REVIEW · MOSHI
7 Days Machame Route Climbing Mt. Kilimanjaro
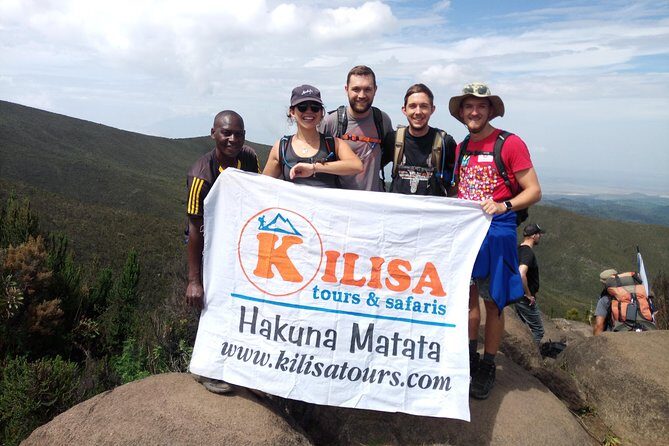
Book on Viator →Operated by Kilisa Tours & Safaris · Bookable on Viator
A mountain with a schedule is better than a mountain with guesswork. This 7-day Machame Route with Kilisa Tours & Safaris is built around smart acclimatization, from rainy-forest starts to a midnight summit push toward Uhuru Peak.
Two things I like right away: the route structure gives your body repeat chances to adjust, and the support system feels serious—guides, porters, rescue fees, plus oxygen tanks and an ox meter in case altitude really bites.
The one drawback to keep in mind: this is still a hard high-altitude climb. Even with good pacing and support, you’re dealing with weather, cold nights, and long days where stamina matters more than optimism.
In This Review
- Key things that make this Kilimanjaro Machame climb worth your attention
- Why the 7-day Machame Route works (and why you should respect it)
- Moshi prep and the drive to Machame Gate (Day 1)
- Rain forest to Shira Camp: the moorland shift that tests lungs (Day 2)
- Shira Plateau to Lava Tower and down to Barranco (Day 3)
- Karanga Camp: your short acclimatization day (Day 4)
- Barafu Camp and the South Circuit views (Day 5)
- Midnight summit day: Stella Point sunrise and the hard part (Day 6)
- Down to Mweka Gate and back to Moshi (Day 7)
- What you’re really paying for: value at $2,750 per person
- Food, water, and that daily rhythm you’ll rely on
- Gear and pacing tips that match this specific Machame route
- What safety support looks like in this package
- FAQ
- FAQ
- What time does the trek start?
- Where does this Kilimanjaro Machame Route trip operate from?
- How long is the climb and what route is it?
- What’s included in the price?
- What’s not included?
- Is there free cancellation?
- Should you book this 7-day Machame climb with Kilisa Tours & Safaris?
Key things that make this Kilimanjaro Machame climb worth your attention
- Machame’s acclimatization built into the itinerary helps you recover and try again for higher ground.
- Early summit timing (midnight to 2am) gives you the best shot at reaching Stella Point and Uhuru Peak in daylight.
- Safety and logistics feel taken care of with guides, porters, rescue team fees, and an emergency first-aid kit.
- Treated drinking water and hot meals on the mountain reduce the “survival math” you’d otherwise do daily.
- Maximum group size of 15 means you’re usually not lost in a crowd of strangers.
Why the 7-day Machame Route works (and why you should respect it)
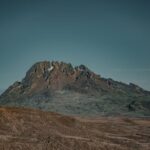
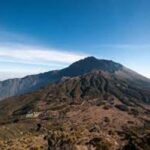
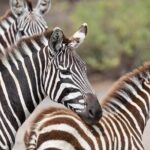
Machame is one of Kilimanjaro’s classic routes for a reason: it varies a lot in scenery and altitude, but it also keeps you moving in a way that supports acclimatization. The climb starts in rain forest, transitions through moorland and semi-desert zones, and then pushes into the alpine and arctic zones near the top. That change is part of the fun—and part of what makes this trek physically demanding.
You’ll notice the itinerary repeatedly brings you up, then down a bit, then up again. That pattern is what you want. High altitude doesn’t care about your plans, but it does respond to pacing and acclimatization. Kilisa’s schedule includes those “in-between” days where you’re not just grinding upward every single time.
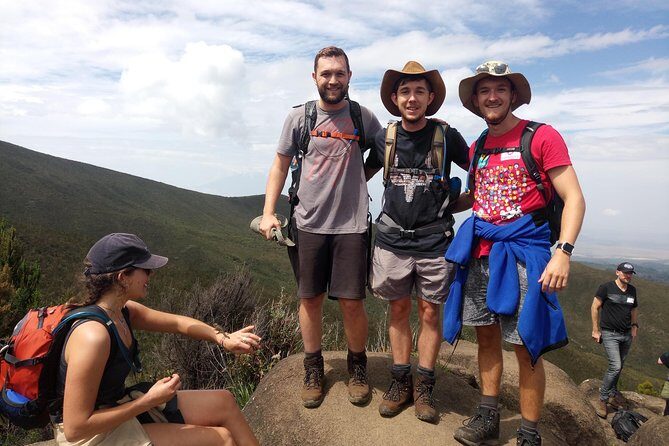
Now, reality check: this is not a walk in the park. You’ll do a steep ridge day, a very challenging crater-rim summit day, and a big descent afterward. If you’re choosing Kilimanjaro because it sounds heroic, good. If you’re choosing it while hoping altitude will be gentle, plan to be surprised.
A few more Moshi tours and experiences worth a look

Moshi prep and the drive to Machame Gate (Day 1)
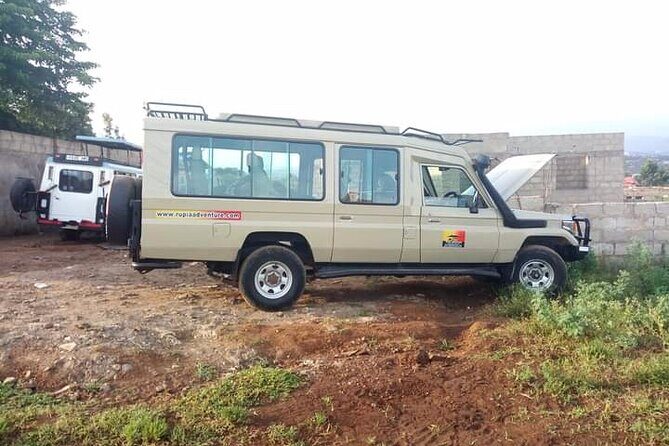
Your day starts in Moshi, with pickup offered and private transport included to the Kilimanjaro National Park area. The drive to the gate takes about 50 minutes, and you’ll pass through the village of Machame on the lower slopes—useful because you get a quick sense of the mountain’s “beginning,” not just the summit photos.
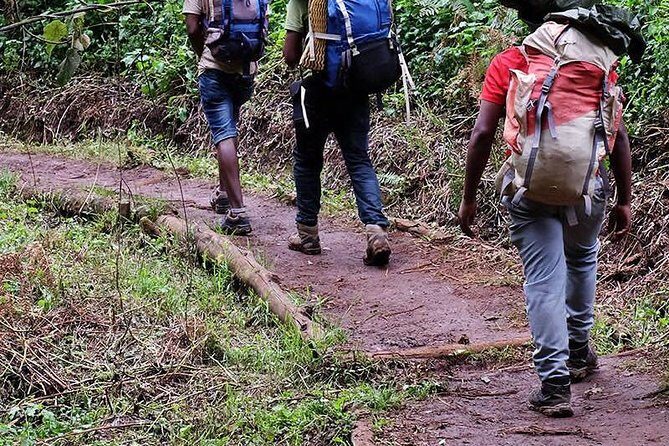
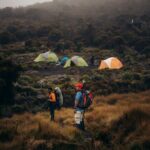
Once you reach Machame Gate, the hike begins at roughly 5,400 to 9,400 ft over about 11 km and 5–7 hours. The habitat is rain forest, which usually means more humidity, slippery sections, and trails that can be muddy.
This first day is about getting your rhythm. It’s also where you learn whether your footwear and socks plan to stay happy. Gaiters and trekking poles are a solid idea here, especially on lower, muddy stretches. You don’t need to sprint. You need to keep your breath steady and save energy for later.
Rain forest to Shira Camp: the moorland shift that tests lungs (Day 2)
Day 2 runs from Machame Camp to Shira Camp—about 5 km with 4–6 hours of hiking. Elevation jumps from 9,400 to 12,500 ft, and the habitat changes into moorland.
After breakfast, you leave the rain-forest glades. Then the trail rises across a steep rocky ridge covered with heather. You’ll also cross a little valley and keep moving along that ridge until it ends, then the route turns toward a river gorge.
Why this matters: at this stage, you’re not just walking—you’re building altitude tolerance. If you go too hard on day two, you’ll feel it later. The itinerary keeps this day shorter than some of the others, which is what you want when your body is still adjusting.
Afterward, you rest at Shira campsite, with dinner and overnight included.
Shira Plateau to Lava Tower and down to Barranco (Day 3)
Day 3 is long: about 10 km and 6–8 hours, rising from around 12,500 to 13,000 ft. It starts in semi-desert, and the day includes the famous Lava Tower area—often nicknamed the Shark’s Tooth.
From Shira Plateau, you go east up a ridge. The route passes a junction toward the peak of Kibo, then shifts south east toward the Lava Tower. After that, there’s another junction that brings you toward the Arrow Glacier at roughly 16,000 ft—not an easy altitude marker, even if you’re not spending the day there.
Then comes the key part: you don’t stay high. You descend to Barranco Hut around 13,000 ft. Even though the numbers end up close to where you started, this is a big acclimatization day. You’re testing higher ground, then returning to sleep lower, which is exactly what helps you later.
This is also one of those days where you learn the difference between tired and “done.” If you stay in your lane, you’ll feel stronger.
Karanga Camp: your short acclimatization day (Day 4)
Day 4 is a shorter bridge day from Barranco Camp to Karanga Camp. It covers about 5 km in 4–5 hours, moving from around 13,000 to 13,100 ft. The habitat is alpine desert.
You leave Barranco and continue along a steep ridge, passing the Barranco Wall, then head into the Karanga Valley campsite. This is a straightforward day, designed to help your body handle the coming push.
If you’re the type who wants to “make up time,” don’t. This day is your insurance policy against summit fatigue. A shorter hike here can save you from paying a bigger price later.
Barafu Camp and the South Circuit views (Day 5)
Day 5 goes from Karanga Camp to Barafu Camp: about 4 km over 4–5 hours with elevation rising from 13,100 to 15,300 ft. Habitat stays alpine desert.
After breakfast, you head toward the junction that connects with the Mweka Trail, then continue up to Barafu Hut. From this position, you’ve completed what’s called the South Circuit, which means you get sweeping views of the summit from a few angles (including sightlines toward Mawenzi and Kibo).
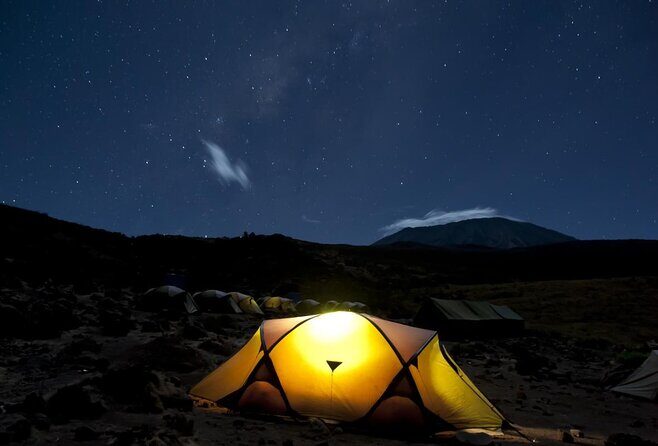
Barafu is where things start to feel real. This is camp-time with a mission: rest, dinner, and prep for the summit night. You’ll want to be ready to sleep even if it’s hard—because midnight starts don’t care if you feel prepared.
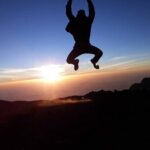
Midnight summit day: Stella Point sunrise and the hard part (Day 6)
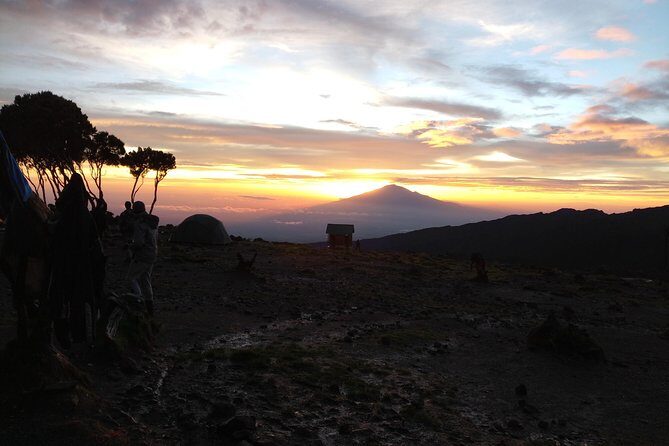
This is the day you came for. It starts very early, usually between midnight and 2am, and it’s the most mentally and physically challenging portion.
Your route goes from Barafu Camp to Summit to Mweka Hut, climbing from about 15,300 ft up to roughly 19,345 ft, then descending to about 10,000 ft by the end of the day. Distance is listed as 5 km ascent / 12 km descent with 7–8 hours ascent and 4–6 hours descent. Habitat is arctic.
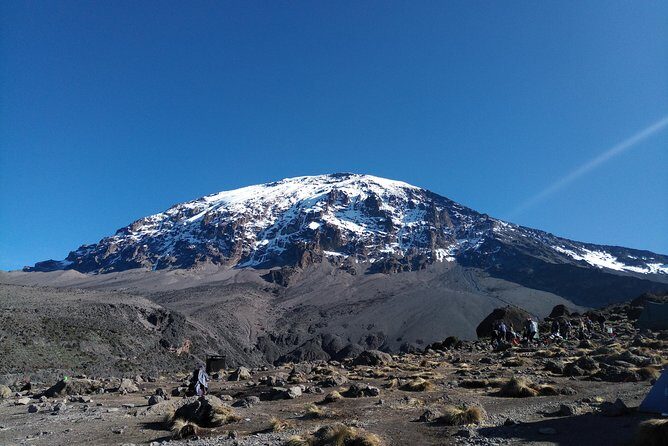
You’ll ascend through heavy scree between the Rebmann and Ratzel glaciers. The climb heads northwesterly toward Stella Point on the crater rim. This is the toughest block: cold, uneven footing, and steady effort that feels slow even when you’re moving.
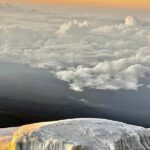
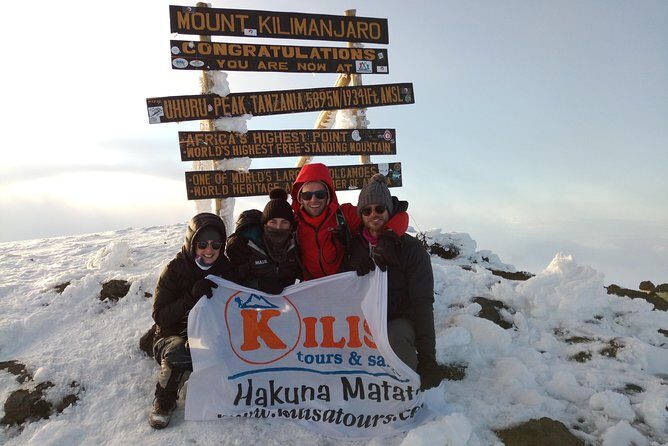
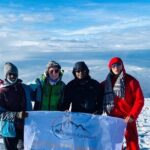
At Stella Point (about 18,600 ft), there’s a short rest—and the big reward is the chance at an unforgettable sunrise. Weather permitting, you may see snow along the way. Then you continue about one hour to the summit.
From Stella Point to Uhuru Peak, the numbers tell one story, but your body tells another. If you stay controlled and keep your pace consistent, you’ll give yourself the best chance to enjoy the moment instead of just surviving it.
Once you reach Uhuru Peak, the day turns into descent work. You drop down toward Mweka Hut around 10,000 ft. That descent is a different kind of hard on tired legs, but it’s also the best sign your summit day is progressing safely.
Down to Mweka Gate and back to Moshi (Day 7)
Day 7 is all about getting lower and staying comfortable while you do it. You hike from Mweka Camp to Moshi, starting around 10,000 ft and descending to about 5,400 ft. It’s listed as around 10 km and 3–4 hours.
You begin with breakfast, then descend to the Mweka Park Gate to receive summit certificates. At lower elevations it can be wet and muddy, so gaiters and trekking poles still help. Shorts and t-shirts will likely be enough in the daytime, but the smart move is keeping rain gear and warmer layers handy in case conditions turn.
After the gate, there’s another hour to Mweka Village. A vehicle meets you there and drives you back to your hotel in Moshi.
This day feels like exhale-and-sort-your-gear. The goal is to finish cleanly, not to break any speed records.
What you’re really paying for: value at $2,750 per person
At $2,750 per person, this isn’t a budget trek—but it also isn’t “paying extra for nothing.” Kilisa’s package includes a lot of the expensive stuff people underestimate on Kilimanjaro.
Key value items included:
- 2 nights of accommodation in Moshi
- Private transport to and from Kilimanjaro International Airport
- Park entry fees and camping fees
- Team Kilimanjaro Rescue fees
- Friendly and professional mountain guides, plus cook and porters
- 3 hot meals daily while on the mountain
- Enough treated and filtered drinking water
- Portable oxygen tanks and an ox meter
- Emergency first-aid kit
Two things to think about when weighing price:
- You’re paying for risk reduction. Rescue fees, emergency supplies, and oxygen equipment are not cheap, and they matter when altitude is unpredictable.
- You’re paying for time and labor. Guides, cooks, and porters mean your hiking day is supported, not “you figure it out.”
What’s not included:
- Travel insurance
- Tips for guides, porters, and cook
- Personal items and toiletries
- The toilet rental: tented portable flush toilet rental listed at US$100 shared in a group
If you compare operators, don’t just compare the headline price. Make sure you’re comparing the same meal plan, rescue coverage, oxygen equipment, and camping setup. Otherwise you may be paying more later in different ways.
Food, water, and that daily rhythm you’ll rely on
On Kilimanjaro, your schedule is a tool. This trek builds a predictable cycle: breakfast before hiking, lunch on the move or at a set point, then dinner and rest at camp.
You’ll also have enough treated and filtered drinking water throughout the trek. That’s one less headache to manage at altitude, where dehydration can creep in while you’re busy staring at glaciers or fighting the next steep stretch.
From the reviews, a recurring theme is the team’s support and consistency. Names like Naick (operator), and guides such as Bakari and Livingston, come up in past experiences. Other guide names mentioned include Abraham, Alfonse, and Bacarri, plus Bryson. The overall thread is that the crew keeps you moving with a calm, steady approach—often described with the idea of pacing like pole pole.
And yes, you’re also eating well. One review notes a “feast every night at camp,” which lines up with the fact that the trek includes hot meals daily rather than just basic fuel.
Gear and pacing tips that match this specific Machame route
This itinerary calls out a few practical things directly, and they’re worth treating as non-negotiable.
- Gaiters and trekking poles: specifically helpful on muddy, slippery sections early and on the wet descent near Mweka Gate.
- Layering for cold nights: the summit day runs in arctic habitat, so expect extreme temperature swings from camp to summit.
- Comfortable day clothes: shorts and t-shirts may be enough at lower elevations, but keep warmer gear and rain gear available.
- Strong physical fitness matters: this trek is listed for travelers with a strong physical fitness level, and the route includes multiple long days and the demanding summit ascent.
For pacing, use the schedule as your guide. The itinerary includes acclimatization stops like Barranco (Day 3) and the short Karanga (Day 4) day. Don’t try to “outwork” altitude. Your job is to hike within your breath, not beyond it.
Also plan for a logistics truth: on summit night, everyone feels slightly different levels of discomfort. Your goal is not to look tough. It’s to finish the day safely.
What safety support looks like in this package
Safety on Kilimanjaro is not a single promise. It’s layers of support that reduce risk.
In this trek, you have:
- Friendly and professional guides
- Team Kilimanjaro Rescue fees included
- Emergency first-aid kit
- Portable oxygen tanks and an ox meter
This doesn’t erase altitude risk. But it gives you more tools than you’d have if you were just hiking with friends and hope.
If you’re anxious about making a summit attempt, this is where it helps that the itinerary includes acclimatization down-cycles before the final push. It’s the difference between “we went up” and “we gave our bodies a chance.”
FAQ
FAQ
What time does the trek start?
The start time listed is 8:30 am.
Where does this Kilimanjaro Machame Route trip operate from?
It operates in Moshi, Tanzania, with pickup offered and transport included in the package.
How long is the climb and what route is it?
It’s a 7-day climb on the Machame Route, with the summit push toward Uhuru Peak.
What’s included in the price?
Included are 2 nights in Moshi, park and camping fees, guides, cook and porters, 3 hot meals daily on the mountain, treated drinking water, portable oxygen tanks and an ox meter, emergency first-aid kit, and Team Kilimanjaro Rescue fees, plus private airport transfers. Taxes (18% VAT on tour fees and services) are included as well.
What’s not included?
Not included are travel insurance, tips, flights, personal items/toiletries, and the portable flush toilet rental (listed as US$100 for the entire trip to be shared in a group).
Is there free cancellation?
Yes. The policy states you can cancel for a full refund up to 24 hours in advance of the experience’s start time, and it requires good weather; if canceled due to poor weather, you’ll be offered a different date or a full refund.
Should you book this 7-day Machame climb with Kilisa Tours & Safaris?
If you want a proper guided Machame trek with structured acclimatization and support that includes rescue fees, first-aid, and oxygen equipment, this package looks like a strong fit for most people who train and take pacing seriously. The reviews scoring at 5/5 from 24 reviews and the repeated emphasis on safety, support, and steady guidance (with guide names like Bakari and Livingston showing up) is exactly what you want when altitude is on the menu.
Book it if:
- You’re physically ready for a summit night climb and long day(s).
- You want hot meals, treated water, and strong operational support.
- You care about having safety layers like the rescue team fees and oxygen equipment in the plan.
Think twice if:
- You’re looking for an easy hike. This isn’t “light trekking,” even with a smart itinerary.
- Weather conditions worry you. The trek depends on good weather, especially around summit timing.
If that sounds like you—trained, realistic, and ready for a serious high-altitude challenge—then this Machame plan is a very sensible way to do Kilimanjaro.