REVIEW · MOSHI
7 Days Machame route – Kilimanjaro
Book on Viator →Operated by Habari Adventure · Bookable on Viator
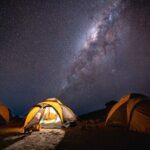
Machame sticks with you long after Kilimanjaro. I like the local guide team trained in safety and first aid, and I like the acclimatization pattern that mixes high hiking with smart descents. The drawback is simple: the altitude grind hits hard, especially the midnight-to-dawn summit push.
From Moshi, your days are timed and structured, with transfers to Machame Gate and park formalities, then steady progress through named camps with real altitude changes. I also appreciate the built-in food plan (breakfasts, lunches, dinners) and the small group limit of 10, which keeps things from feeling like a cattle chute.
One more thing to plan for: this trek depends on strong physical fitness and good weather. If either one is missing, the whole schedule can feel tougher than it already is.
Key highlights worth knowing before you go
- Local guides with safety + first-aid training and English support throughout the climb
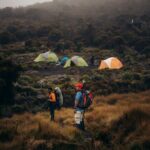
- Small group size (max 10), so pacing and attention tend to feel more personal
- Machame’s acclimatization layout: high hikes plus purposeful downclimbs to help your body adjust
- A midnight summit start designed around reaching Stella and Uhuru around sunrise light
- Park access handled for you, including admission tickets and formal registration/certificates
- Meals built into the trek: breakfast (6), lunch (7), dinner (6), so you’re not constantly budgeting on the mountain
In This Review
- How Habari Adventure Runs the Small-Group Machame Trek
- Local Guides, Real Safety Skills, and the English Support You Need
- Day 1: Machame Gate to Machame Camp Through Chagga Countryside
- Day 2: Forest-to-Moorland Climb and Shira Plateau Glacier Views
- Day 3: Lava Tower Altitude Check and Barranco’s Big Photo Stops
- Day 4: Barranco Wall, Karanga Valley Rest, and a Key Pre-Summit Day
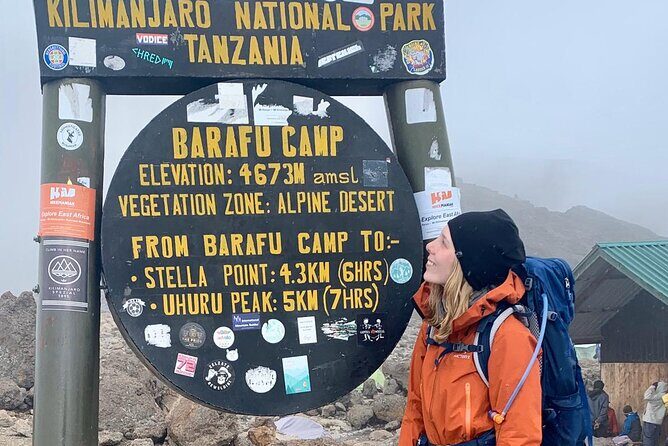
- Day 5: Barafu Camp, the Long Wait, and Getting Ready for Midnight
- Day 6: Stella Point at Sunrise and Uhuru Peak Photos
- Day 7: Mweka Gate Certificates, Private Ride, and That First Warm Shower
- Meals, Park Tickets, and What Your $2,850 Covers (and Doesn’t)
- Value for Money: Is This Machame Package Worth It?
- Who Should Choose This Route and Who Might Rethink It
- Book It or Sit Tight: My Decision Guide
- FAQ
- How long is the Machame route trek?
- How many people are in the group?
- Where does the trek start, and how do transfers work?
- What’s included in the price?
- What time do you start the summit climb?
- Is cancellation refundable?
How Habari Adventure Runs the Small-Group Machame Trek
This is a 7-day Machame route based in Moshi, built around the reality of Kilimanjaro: you don’t just “walk up.” You hike, sleep, recover, and repeat—then you gamble a little with timing for sunrise on summit night.
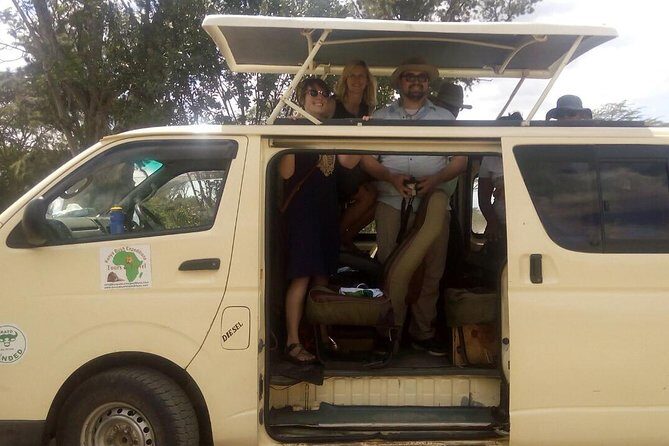
What I like about Habari Adventure’s approach is the structure. You’re picked up from your hotel around 8:00 am on day 1, transferred to Machame Gate, and then moved through park processes with everything sequenced day-by-day. The trek is capped at 10 people, so you’re less likely to feel lost in a crowd when conditions change.
Also, they use mobile ticketing. It’s a small thing, but on trip day it reduces paper shuffling and keeps you focused on the actual goal: getting to the trailhead and moving.
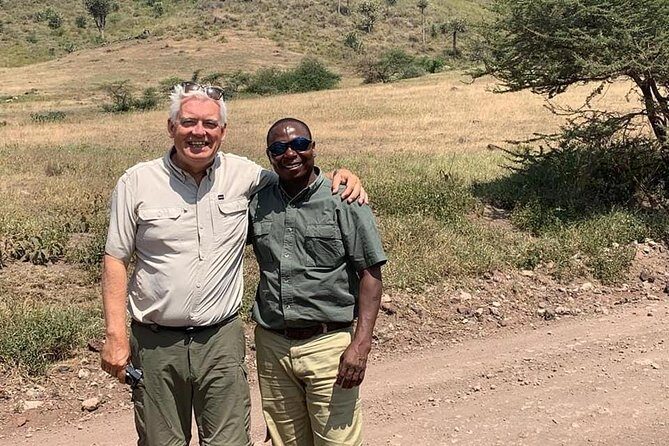
Local Guides, Real Safety Skills, and the English Support You Need

On Kilimanjaro, your guide isn’t just there for directions. You want someone who can manage safety, pace, and morale when your legs start negotiating.
Habari Adventure emphasizes that its guides are locals from Kilimanjaro and other parts of Tanzania, trained in safety and first aid. They also speak English, and many have learned additional foreign languages. That matters on a mountain where you may need clear communication about altitude symptoms, hydration, and when to push versus when to hold back.
You’ll also see familiar names tied to the team in past climbs: Stan (planning support), Leon, Ray, Michael, Omari, Oscar, Innocent, Godi, Justo, Yusuph, and Muddy/Mudy. The pattern across these names is consistent: guides who combine practical trekking guidance with a steady, supportive vibe—plus porters and a sanitation crew working behind the scenes.
If you value a “team” feel more than a strict command-and-control style, this setup is a good match.
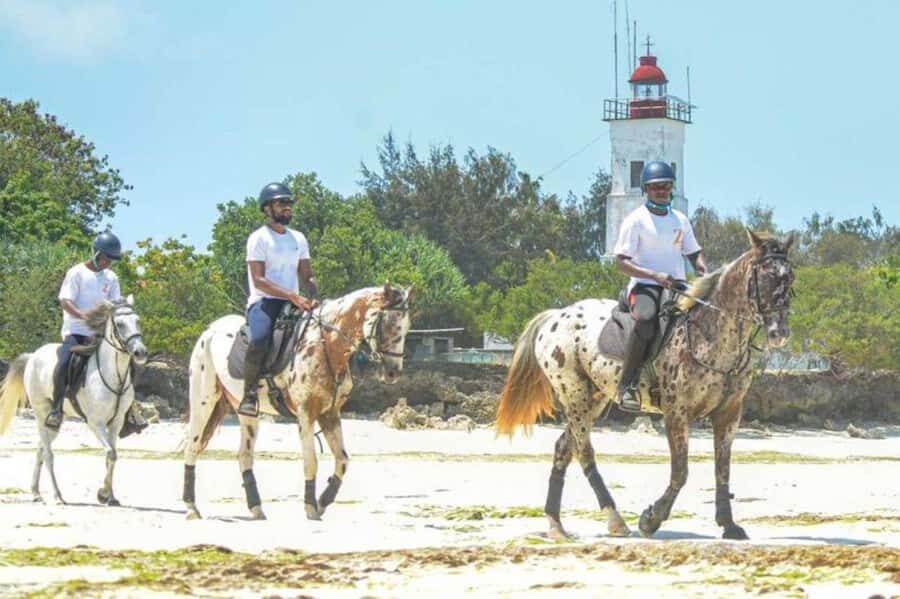
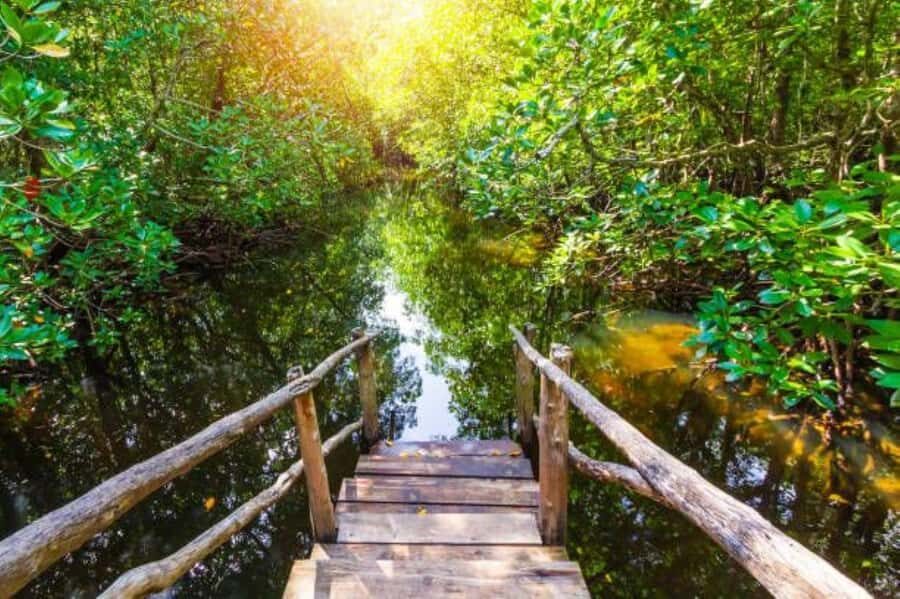
A few more Moshi tours and experiences worth a look

Day 1: Machame Gate to Machame Camp Through Chagga Countryside
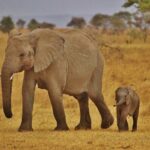
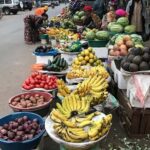
Your trek begins with the transfer to Machame Gate after breakfast, around 8:00 am. On the drive, you pass coffee and banana plantations grown by the Chagga people. It’s a nice early reminder that you’re not only climbing a mountain—you’re entering a living region with farms, traditions, and local land.
At Machame Gate, you handle the park formalities, then start the first real hike: a trek through tropical rain forest up to Machame Camp at 2,835 m. Expect a day that feels like it’s moving you toward altitude slowly rather than slamming you straight into it.
A picnic lunch is planned on the route, which is helpful because it reduces the need for constant stop-and-search for food. Overnight is at Machame Camp, so your first night is about settling in early, not rushing to make up time.
Possible consideration: day 1 can still feel damp and slow if you’re not used to rain-forest walking. Go steady and save your energy.
Day 2: Forest-to-Moorland Climb and Shira Plateau Glacier Views
Day 2 starts around 8:00 am. You climb about an hour into the top of the forest, then transition to moorland with a gentler gradient for about an hour. After lunch/snacks and a break, you continue up over rocky ground toward the Shira plateau.
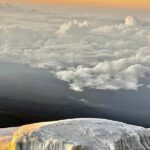
The big payoff here is the widening view. At this point you can see toward the east and also catch sight of the western breach with glacier presence. This is one of those days where the climb is hard enough to feel meaningful, but not yet the peak-night suffering.
Overnight is at Shira Campsite at 3,750 m. That’s a significant rise from day 1, and it sets up why day 3 matters: altitude doesn’t just go up in a straight line on Kilimanjaro. Your body needs time to adjust.
What you should know: a strong pace on day 2 usually helps you keep control on day 3. If you go too fast early, it can come back later.
Day 3: Lava Tower Altitude Check and Barranco’s Big Photo Stops
Day 3 exists for acclimatization. The plan hikes to higher altitude, then descends again—training your body to handle altitude stress.
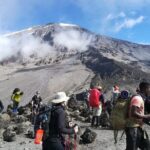
You climb to the alpine desert area up to Lava Tower at 4,600 m, then descend down to Barranco Camp at 3,900 m. That downshift is key. Even though you’re dropping in altitude, you’re still improving how your body handles the day’s oxygen stress.
This descent also sets up some of the best photo moments: you get opportunities to photograph the Western Breach and the Barranco wall while moving into Barranco’s valley setting. Overnight is at Barranco Camp (3,900 m). The campsite is placed below the Barranco wall, which helps create memorable sunset waiting time while dinner is served.
Possible drawback: day 3 can feel emotionally weird—because you’re going down while still feeling the altitude. That’s normal on this route. The goal is to acclimatize, not to “win” with elevation.
Day 4: Barranco Wall, Karanga Valley Rest, and a Key Pre-Summit Day
Day 4 is shorter and strategic. After breakfast, you climb up a steep ridge toward the Barranco wall, then tackle the wall itself. The climb is described as imposing but turns out easier than it looks once you’re committed.
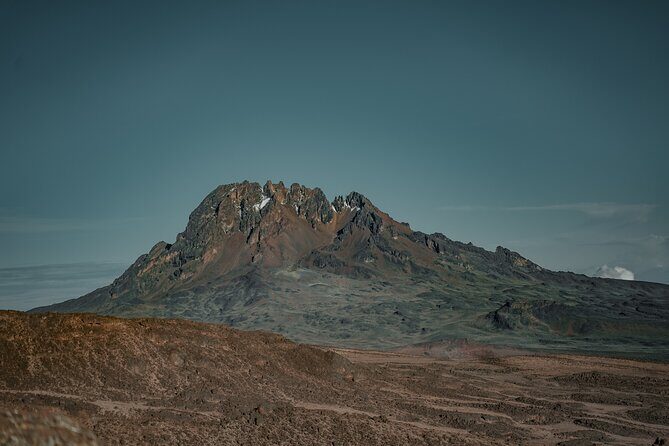
When you top out just below the steeper section, you can appreciate how beautiful Kilimanjaro looks from this angle—Kibo glaciers overhead are part of the visual reward. Then you descend into Karanga Valley camp at the end of the day.
From the camp, you can look east to see the jagged peaks of Mawenzi. It’s a nice shift from “straight climb” to “big picture mountain viewing,” which matters because summit night is still ahead.
You also get afternoon leisure for resting, plus a hot lunch in camp. This day is important because your next step, Barafu, leads directly into the summit plan.
Practical note: treat this as your recovery block. Even if you feel okay, don’t turn it into an extra “go explore” day.
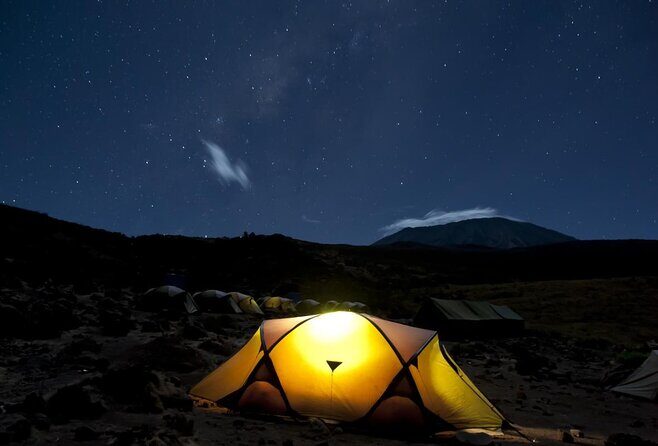
Day 5: Barafu Camp, the Long Wait, and Getting Ready for Midnight
On day 5, you hike to Barafu Camp at 4,640 m. Along the way, you’ll have views of Kibo and Mawenzi peaks, which helps make the steady ascent feel more than just effort.
Once you arrive, you get lunch and a long rest. The itinerary explicitly builds in time for the long night and the day ahead. Dinner is early, and you’re encouraged to try to get sleep because the big push starts around midnight.
This is one of the most important days psychologically. Summit day isn’t only physical; it’s also about managing your nervous system. If you can rest properly here, you often feel better when the time comes to wake up and start moving again.
Possible consideration: Barafu is a high, cold-feeling place at altitude. Even if you’re mentally ready, sleep can be light. Build patience into your plan.
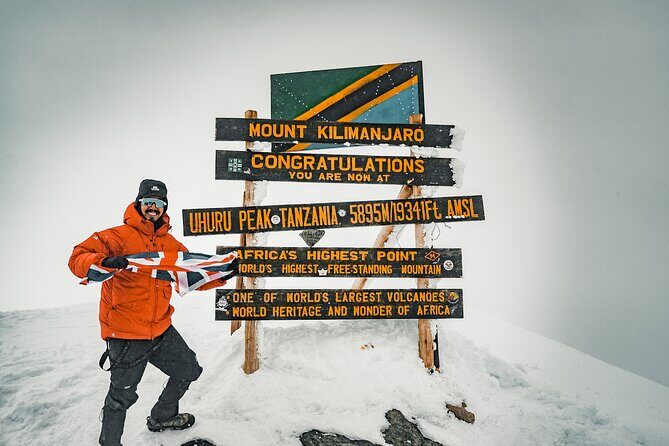
Day 6: Stella Point at Sunrise and Uhuru Peak Photos

This is the summit day, and it starts very early. You wake around 00:00 with light tea and cookies.
Then the route climbs scree for about 4 to 5 hours, gaining a lot of height over a short distance. The view is described as spectacular. The goal is to be on the crater rim at Stella Point (5,756 m) as the first rays hit.
After Stella Point, it’s about 1 hour to Uhuru Peak (5,895 m). You get a chance for photos for a few minutes, then you start descending.
The plan then has you return to Barafu Camp for lunch and rest, followed by walking down to Millennium Camp at 3,950 m for dinner and overnight. That last leg matters because you still need to recover, not just “celebrate and collapse.”
Balanced advice: summit success often comes from the small choices—keeping your breathing steady, taking cues from your guide, and not sprinting out of excitement at the start.
Day 7: Mweka Gate Certificates, Private Ride, and That First Warm Shower
Day 7 is the finishing and recovery day. After breakfast, you make the final descent from Millennium Camp to Mweka Gate. The plan notes it takes a couple of hours.
At Mweka Gate, you collect your certificates after completing park formalities. Then you’re taken back to your hotel by private car so you can get a warm shower—one of the best rewards on any Kilimanjaro itinerary because it signals that the hard part is fully over.
It’s also a chance to reset your sense of time. You’ve been living in a schedule shaped by altitude and dawn light. Day 7 is slower, and the focus becomes closure.
Practical takeaway: even when you feel relieved, don’t ignore fatigue. Your body will need a few hours to fully come down to normal life.
Meals, Park Tickets, and What Your $2,850 Covers (and Doesn’t)
Let’s talk value in plain terms. The price is listed at $2,850 per person, and meals plus core trek access are included.
Included in the package:
- Breakfast (6)
- Lunch (7)
- Dinner (6)
- Admission tickets covered across the trek (you’re paying for park entry/formalities as you move through gates and camps)
- Pickup is offered, and you’re also taken back by private car after the trek
- Mobile ticketing
Not included:
- Use of snorkeling equipment (which is basically irrelevant to Kilimanjaro, but it’s listed as not part of the package)
What’s not spelled out here: details about personal gear (sleeping bag, daypack, trekking poles). Since that isn’t stated in the provided information, I’d treat it as “you’ll need to handle your own basics” and confirm before you pay for extras.
Why meals matter: when you’re at altitude, you want simple consistency. A pre-planned food flow reduces decision fatigue, and it helps you keep moving without constantly hunting for snacks.
Value for Money: Is This Machame Package Worth It?
At $2,850, you’re paying for more than trail time. You’re paying for logistics, trained staff, and the daily rhythm that keeps a 7-day trek running.
This package includes:
- A structured 7-day itinerary with camp-to-camp movement
- Park admission/ticket coverage
- A full meal schedule across the trek
- Small group cap (max 10), which often improves attention and pacing control
- Transfers that cover getting you to Machame Gate and getting you back to your hotel after certificates
The other big “value” factor is lead time. This climb is booked about 80 days in advance on average, which tells you two things: it’s in demand, and dates can fill. If you wait too long, the availability you want might not exist.
If you care most about cutting down planning stress, this style of package is strong. If you care most about total cost minimization, you’ll still want to compare what other operators include in their base price, because that’s where the real differences usually hide.
Who Should Choose This Route and Who Might Rethink It
This experience requires strong physical fitness. That’s not a warning label for fun. Kilimanjaro is a sustained uphill effort for days, then one very long night-to-dawn summit attempt.
You’ll likely enjoy this trek if:
- You want a well-paced route with intentional acclimatization days (Lava Tower up, then down to Barranco; shorter Barranco-to-Karanga recovery day)
- You like the idea of a clear plan for reaching Stella and Uhuru around sunrise
- You prefer a small group (max 10) and a local guide team with safety and first-aid training
- You want a trip where meals and core park access are handled for you
Possible rethinking points:
- If you’re not comfortable with cold, early starts, and long walking hours, summit day can feel brutally demanding.
- If weather isn’t stable in your travel window, you might have schedule changes or date swaps. Good weather is part of the deal.
Book It or Sit Tight: My Decision Guide
I’d book this Machame 7-day trek with Habari Adventure if you’re aiming for a serious Kilimanjaro climb but don’t want to babysit logistics. The included park tickets, full meal plan, pickup/return transport, and the small-group cap all help keep the trip focused on the mountain.
I’d hesitate if:
- You need a trip with lots of flexibility on the fly, because the itinerary is tight and summit timing is weather-dependent.
- You’re not yet at a level where you can handle sustained altitude hiking and a midnight start with a long ascent.
If you choose to go, do one thing that helps everything else: plan carefully for your fitness and altitude readiness. This route gives you a smart structure. Your job is to show up ready to use it.
FAQ
How long is the Machame route trek?
It runs for 7 days (approx.) with day-by-day hiking from Machame Gate up to Uhuru Peak and down to Mweka Gate for certificates.
How many people are in the group?
The trek has a maximum of 10 travelers.
Where does the trek start, and how do transfers work?
It starts around Kilimanjaro Airport/Kilimanjaro National Park area, with pickup offered. On day 1, you’ll be picked up from your hotel around 8:00 am and transferred to Machame Gate. After day 7, a private car takes you back to your hotel.
What’s included in the price?
Meals are included: breakfast (6), lunch (7), dinner (6). Admission tickets are included as part of the trek. Pickup is offered, and mobile ticketing is included as well.
What time do you start the summit climb?
You wake around 00:00 for the summit push. The plan targets Stella Point on the crater rim as the first rays of sun hit, then continues to Uhuru Peak for photos.
Is cancellation refundable?
Yes. You can cancel up to 24 hours in advance for a full refund. The experience requires good weather, and if it’s canceled due to poor weather you’ll be offered a different date or a full refund.