REVIEW · MOSHI
Kilimanjaro Climb by Rongai Route 6 days
Book on Viator →Operated by Hilbas Tours · Bookable on Viator
Rongai makes Kilimanjaro feel quieter and wilder. This 6-day climb (with travel days around it) uses the north approach from the Nalemuru area near the Kenyan border, which is often a smart move in the rainy season. You start with real wilderness walking early on and swap some of the usual crowds for a more remote feel.
I especially liked two things: trained English-speaking guides and first-aid-ready crews who run a safety-focused climb, and proper on-mountain support with meals (including halal and vegan options) plus attentive cooks and porters. One thing to plan around is that this route still includes a demanding summit night and big altitude work—plus your sleeping bag and personal hiking gear aren’t included (rentals may be available), so pack with care.
In This Review
- Key things I’d watch for on this Rongai climb
- Rongai route: the north-side advantage you’ll actually feel
- Moshi and your first day: JRO to hotel, with gear sorted
- Day 2: rainforest walking from Nalemuru village to the moorland transition
- Day 3: slow moorland hiking, lunch at the second cave
- Day 4: Mawenzi Tarn Hut and the alpine desert view angle
- Day 5: Saddle and Linner Desert to Kibo Hut
- Day 6: the summit night, midnight start, and the named resting points
- Day 7: descending through Mandara Hut to Marangu Gate, with certificate sign-out
- Day 8: airport transfer and a smooth landing day
- Price and value: what $2,282 buys you (and what it doesn’t)
- Crew quality: the best part is the calm teamwork
- Food, drinks, and dietary needs: fewer worry points in camp
- What you need to bring (and what you can rent)
- Who should pick the Rongai 6-day climb, and who might not
- Should you book Hilbas Tours for the Rongai route?
- FAQ
- Where does the tour start and how do I get to the hotel?
- What time does the tour begin?
- How long is the climb on the mountain?
- What’s included in the price for $2,282 per person?
- Do I need to bring a sleeping bag and other personal gear?
- Can you handle dietary restrictions like vegan or halal?
- Is oxygen available during the climb?
- How many people are on the trek at once?
- What cancellation window counts as a full refund?
Key things I’d watch for on this Rongai climb
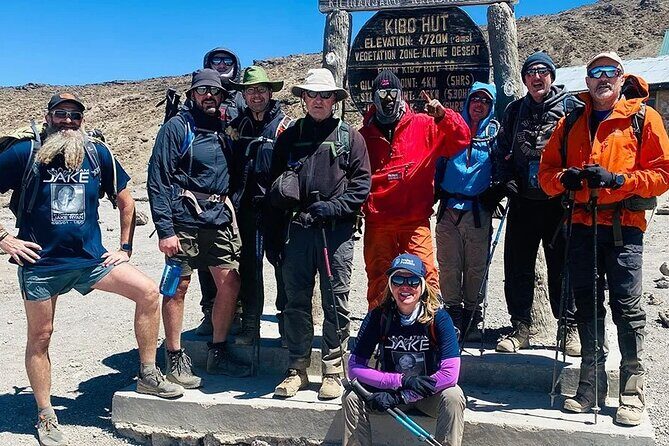
- North-side Rongai/Nalemuru approach with a reputation for less rain than southern routes
- Small group size with a maximum of 15 travelers
- Oxygen cylinders and oximeters included, plus medical kits and rescue-fee coverage
- Real meals and drinks on the mountain, with multiple dietary plans available
- Guide-led trekking with licensed mountain guides and experienced supporting staff
- Pre- and post-climb hotel + JRO airport transfers to make the logistics easier
Rongai route: the north-side advantage you’ll actually feel
Kilimanjaro has multiple routes, but Rongai has a specific personality. It comes up from the north, near the Kenyan border, on the Nalemuru approach. Early on, the walking feels more like you’re in a real wilderness corridor than a well-worn path with constant foot traffic.
That matters in the rainy season. The route is considered one of the more favorable options because it typically sees substantially less rain than the southern routes. Less rain can mean fewer delays, less slushy footing, and a more comfortable rhythm while you’re trying to acclimatize.
The tradeoff: you’re still going high. Rongai’s gentler start doesn’t make the mountain easy. The real work hits in the higher zones and especially on summit night, when weather and altitude can turn the day into a mental grind. If you go in with that mindset, you’ll be happier.
A few more Moshi tours and experiences worth a look
Moshi and your first day: JRO to hotel, with gear sorted
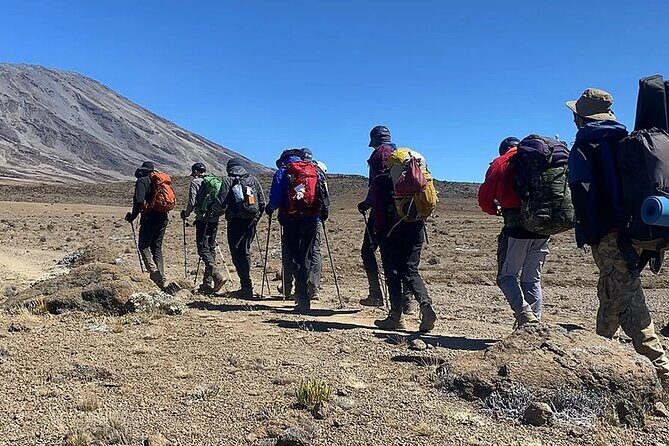
The trip begins around Kilimanjaro International Airport (JRO). When you land, you meet Hilbas representatives and get picked up for a hotel transfer. The first day is designed to get you comfortable fast: hot showers, comfortable beds, a briefing, and gear checks.
This is more than a formality. A calm first day helps you arrive without turning the climb into a gear-chaos story. If you need to rent personal equipment (like the kinds of items travelers usually bring for cold nights and long trekking), this is when that gets handled.
Also note the start time: 9:00 am. That gives you a clear anchor for the rest of your trip schedule and helps if you’re planning safari add-ons in Moshi before or after your climb.
Day 2: rainforest walking from Nalemuru village to the moorland transition
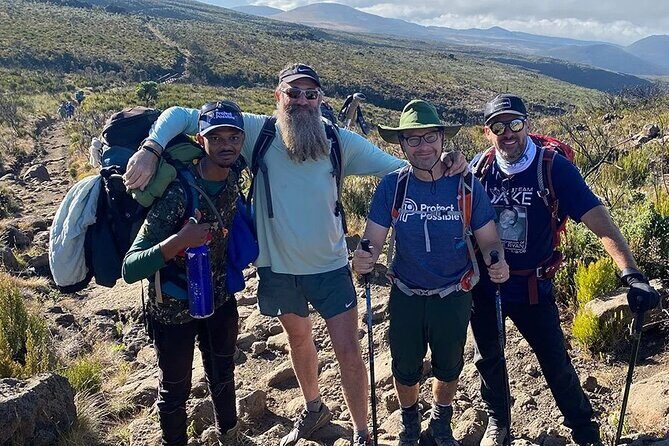
Day 2 is where the Rongai experience starts to make sense. You’ll register at the park area around Marangu Gate, then transfer about 3 hours to Rongai Gate / Nalemuru. Lunch happens either on the way or at the gate before you start hiking.
The hike begins from Nalemuru village. You cross agricultural plots—maize, beans, and potatoes—before you move into a pine forest. This is one of the reasons I like this route for the “I want something different” crowd: the scenery changes often, and the walking feels grounded in rural life before it becomes pure mountain terrain.
Altitude-wise, it climbs from about 1,900 m / 6,270 ft up to around 2,626 m / 8,665 ft over roughly 6 hours for about 8 km. That’s a manageable first day profile. You’re working, but it’s not yet the brutal high-zone reality.
Possible downside: the transfer and gate process take time. Your day is longer than just “hike time,” so don’t plan tight schedules for the same day in Moshi.
Day 3: slow moorland hiking, lunch at the second cave
On Day 3 you continue from about 2,626 m toward higher moorland, eventually reaching around the mid-3,000 m zone. You’ll walk roughly 12 km over about 7 hours.
What makes this day important is not distance—it’s pacing. The description is clear that you hike slowly through the moorland to a point called the second cave for lunch. After lunch, you keep moving slowly and travel across up-and-down terrain in the moorland toward Mawenzi’s peak.
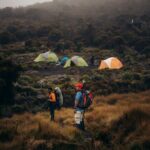
You’ll camp in a sheltered valley, which matters more than it sounds. At altitude, the difference between exposed wind and a protected spot can be the difference between sleeping well and spending half the night awake.
Vegetation shifts from rainforest into moorland, and you start feeling that the mountain is changing shape around you. This is also one of the days where good guiding really shows: controlled speed and steady breathing make acclimatization more likely to work.
Day 4: Mawenzi Tarn Hut and the alpine desert view angle
Day 4 is a shorter-but-steeper day. You climb from about 3,600 m up to around 4,300 m over roughly 5 km, with about 6 hours of hiking time.
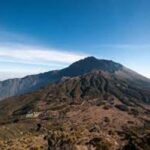
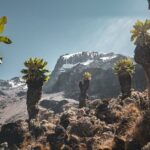
You enter the alpine desert zone here. That zone is drier, colder, and more exposed. The reward is a different angle on the National Park and Mawenzi Peak. You’re not just climbing higher; you’re seeing the mountain in a new composition.
You arrive at Mawenzi Tarn Hut for lunch, then get the rest of the afternoon to explore the area and acclimatize. I like this structure because it gives your body time to adjust. It also gives you a chance to check how you’re handling the cold at these altitudes before the summit push.
Day 5: Saddle and Linner Desert to Kibo Hut
Day 5 takes you through high alpine terrain between the main volcanic masses. You climb from about 4,300 m to roughly 4,720 m over 10 km with about 6 hours of hiking. It’s a long walk, but the route is described as dry and visually spectacular.
The key feature here is the Saddle and Linner desert between Kibo and Mawenzi. This part can feel like a big, open world of scree and cold air. You’ll spend time moving through that crater-rim “in-between” terrain to reach Kibo Hut.
Lunch timing can vary depending on your pace, either packed along the way or taken at scheduled points. When you get to Kibo Hut, you’ll have an early dinner and then go to bed. That early dinner matters on this itinerary because the next day’s summit plan requires you to be ready for a late-night wake-up.
Day 6: the summit night, midnight start, and the named resting points
This is the day you came for. Day 6 is the summit attempt, with a big night climb.
You’ll be woken around 11:00 pm for tea and biscuits. Summit time starts at midnight. From there, the route follows a switchback path up to a volcanic scree slope, passing William Point (~5,000 m) and continuing toward Hans Meyer Cave (~5,200 m). Hans Meyer Cave is listed as a best resting spot for drinking.
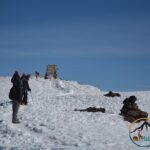
Next you head to Gillman’s Point (~5,681 m) on the crater rim. This section is described as very steep with stone scree, and that’s the part that usually tests people most—your legs and your brain both.
You’re also asked to accept that this day is long. The itinerary lists about 15 hours of hiking time on Day 6. Even if you move well, the altitude and steepness keep taking from you.
This is also where I’m glad this company includes oxygen cylinders and oximeters and has medical kits. Oxygen isn’t magic, but having equipment ready reduces the guesswork when someone’s breathing gets off.
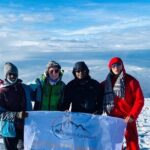
In the end, your summit success is what matters. One of the guide/team experiences shared by past climbers includes reaching Uhuru Peak, and that’s the goal this climb is built around.
Day 7: descending through Mandara Hut to Marangu Gate, with certificate sign-out
After summit day, Day 7 becomes a recovery day in disguise. You start descending from about 3,720 m down to around 2,720 m in roughly 8 hours, with a total distance around 19 km.
The route passes Mandara Hut, then continues through moorland and into rainforest. The fact that you transition back into rainforest on the descent is comforting. It means warmer air and more life around you, which can make the final hours feel easier than you expect.
The day ends at Marangu Gate, where all hikers must sign out to receive completion certificates. Then a driver brings you back to your hotel.
There’s one more practical detail on this day: you’ll pass through coffee and banana farms around Marangu villages on the drive back. It’s a nice reminder that you’re done with the high-altitude stage and moving back into everyday Tanzania.
Day 8: airport transfer and a smooth landing day
Day 8 is straightforward: early breakfast, then transfer to Kilimanjaro airport for your departure flight.
What I like here is that you’re not left scrambling for transport right after your climb. Pre-booked airport transfer is the kind of detail that saves time, stress, and money.
Price and value: what $2,282 buys you (and what it doesn’t)
The listed price is $2,282 per person. For Kilimanjaro, pricing is always a mix of route logistics, permits, staff, food, and safety equipment. This one includes a lot of the heavy-lift items that usually add up fast:
- Two nights in the hotel before and after climbing (with two guests per room; solo accommodation costs extra)
- Airport transfer from JRO and park transfer logistics
- Park fees including camping fees, vehicle fees, and rescue fees
- Guides and porters with English-speaking expertise, plus dedicated support crew
- Three meals a day on the mountain and drinks (coffee/tea and water are included)
- Oxygen cylinders and oximeters, plus medical kits
- Group equipment like dining tent and basic camp setup items
What’s not included is also clear: flights, Tanzania visa, travel insurance, tips, and most of your personal gear (though rentals are available for equipment you need).
So the value question comes down to this: do you trust the staff coverage and safety setup more than you’d trust a cheaper package? With items like oxygen and rescue-fee coverage included, you’re not just buying a guided hike—you’re buying infrastructure around the risks of altitude.
Crew quality: the best part is the calm teamwork
Hilbas Tours gets consistently praised for the feel of the crew—especially the guides and the people running camp logistics. In the experiences shared, names like Hillary (Hils), Emmanuel, and Felix show up as key parts of the climb.
That matters because Kilimanjaro is not only about walking. It’s about decision-making in the high zone, keeping pace consistent, handling discomfort, and making sure camp runs on schedule.
You also get a strong division of labor: guides lead, cooks handle mountain meals, porters carry mountain equipment, and there’s a camp-mastery style support structure. That kind of teamwork is what keeps summit night from turning into chaos when temperatures drop and time gets tight.
Food, drinks, and dietary needs: fewer worry points in camp
Meals on the mountain are included: breakfast, lunch, and dinner each day, plus drinks during the hike. The trip also states multiple dietary options are available, including vegetarian, vegan, lactose-free, gluten-free, and halal, and other meal plans.
This is genuinely valuable. On long high-altitude days, appetite can change fast. If you’re stuck with meals that don’t work for you, the trip becomes harder than it needs to be.
Also, the inclusion of hot drinks like coffee/tea is a small comfort that can help keep your body functioning on cold nights and early mornings.
What you need to bring (and what you can rent)
The big thing to remember: your personal gear is not included. That typically means the colder-night items that keep you safe and warm, plus your personal hiking footwear and clothing.
The good news is that the trip notes equipment rental may be available. Still, don’t assume everything is included just because camp is set up well. Plan for your own readiness:
- You should bring trekking layers for cold alpine temperatures
- You should plan for a proper sleeping setup (since personal sleeping bag is listed as personal gear)
- You’ll want trekking shoes and socks you can rely on for wet or rocky ground
If you’re not sure what category your gear falls into, ask your operator early. Getting that sorted before arriving in Moshi keeps you from making rushed rental decisions at JRO.
Who should pick the Rongai 6-day climb, and who might not
This is a great fit if you want:
- A Kilimanjaro route with a remote north-side feel
- A climb designed with rainy-season timing in mind
- A company that supports safety with oxygen and oximetry
- A structured itinerary with time to acclimatize (especially the afternoon on Day 4)
You might think twice if:
- You know you’re not ready for long summit-day effort and steep crater-rim sections
- You’re not willing to put in the training and preparation that altitude demands
- You’d rather have more gear included than the standard personal-item approach
The trip states a moderate physical fitness level is required. That’s the baseline. Beyond that, your real success will come from how well you can keep pace steady at altitude.
Should you book Hilbas Tours for the Rongai route?
I’d book this trip if you want Rongai’s quieter northern approach and you value safety support that’s built into the package—especially the oxygen cylinders, oximeters, and trained licensed guides. The inclusion of hotel nights, airport transfer, park fees, and mountain meals also makes it feel less like you’re assembling the trip piece by piece.
I wouldn’t book it if you’re hoping for a casual hike with no hard days. Summit night is serious, and your comfort on it will depend on your prep and your personal gear.
If you’re committed to training, packing smart, and accepting the mountain’s rhythm, this Rongai climb with Hilbas Tours looks like a solid, well-supported way to reach Uhuru Peak without the crowds that many people come to Kilimanjaro to avoid.
FAQ
Where does the tour start and how do I get to the hotel?
You meet the Hilbas representatives at Kilimanjaro International Airport (JRO). They pick you up and transfer you to the hotel for hot showers, comfortable beds, a briefing, and gear checks.
What time does the tour begin?
The meeting point lists 9:00 am as the start time.
How long is the climb on the mountain?
The itinerary runs through six hiking days on Kilimanjaro (Day 2 through Day 7), with additional days for hotel and airport transfer.
What’s included in the price for $2,282 per person?
Included items cover airport transfer and transport to and from Kilimanjaro National Park, two nights hotel before and after, guides and porters, park and camping-related fees, meals and drinks on the mountain, and safety items like oxygen cylinders and oximeters, plus medical kits.
Do I need to bring a sleeping bag and other personal gear?
Personal gear is not included, and that can include hiking clothes, footwear, and a sleeping bag. The trip notes that equipment you may need is available for rent.
Can you handle dietary restrictions like vegan or halal?
Yes. The tour states that vegetarian, vegan, lactose-free, gluten-free, halal, and other meal plans are available.
Is oxygen available during the climb?
Yes. Oxygen cylinders and oximeters are included, along with medical kits.
How many people are on the trek at once?
The tour/activity has a maximum of 15 travelers.
What cancellation window counts as a full refund?
A full refund is available if you cancel at least 6 full days before the experience’s start time. For 50% refund, you must cancel 2–6 days before; within 2 days there is no refund.