REVIEW · ARUSHA
7 Days Machame Route Kilimanjaro Trekking
Book on Viator →Operated by Mafie Adventures · Bookable on Viator
Kilimanjaro in 7 days is a serious story. The Machame Route mixes rainforest, moorland, and desert zones while you work toward Uhuru Peak. What I like most is the way the plan keeps you moving with a clear rhythm, and the trekking crew support you get along the way.
You’ll also notice the human side of the climb. In the feedback I saw, guides such as Ombeni and Safaeli (and others like Oliver and Godlove) show up as the reason people feel safe, informed, and cared for—especially around the summit night. The one real drawback to weigh is the cold: exposed camps can drop below freezing, and summit day starts with an almost-too-early wake-up.
In This Review
- Key highlights you’ll feel quickly
- Why the Machame Route is the crowd favorite
- Price and logistics: what you’re actually paying for
- Arusha start: pickup, altitude mindset, and early mornings
- Day 1: Machame Village to the rainforest climb (Montane forest, ~18 km)
- Day 2: Shira plateau and the cold, exposed camp night (Moorland, ~9 km)
- Day 3: Lava Tower drama, then down to Barranco (Semi-desert, ~15 km)
- Day 4: Great Barranco Wall for acclimatization (Alpine desert, ~5 km)
- Day 5: Barafu ridge, last water stop, and the wind problem (Alpine desert, ~4 km)
- Day 6: Summit night from Stella Point to Uhuru Peak (long day, ~7 km up + 23 km down)
- Day 7: Celebration, certificates, and the Mweka forest descent (~3 hours)
- The crew makes the trek: guides, food, and camp rhythm
- Altitude and weather: your realistic game plan
- Who this Machame trek suits best
- Should you book the 7 Days Machame Route trek?
- FAQ
- What time does the trek start?
- Where does the tour begin and end?
- How long is the Machame Route trek?
- Is camping equipment included?
- What about sleeping bag and climbing gear?
- Do you get a certificate, and what colors mean what?
Key highlights you’ll feel quickly
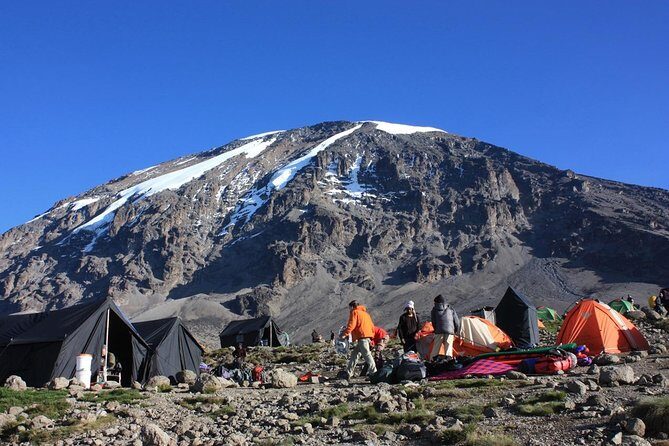
- Machame’s habitat variety: rainforest → moorland → semi-desert → alpine desert → forest again
- A real acclimatization sequence: Shira, Barranco Wall, Karanga, then Barafu ridge
- Camp setup and logistics handled: tents go up fast, porters prepare water for washing and drinking
- Summit night timing: a 23:30 wake-up for the push toward Stella Point and Uhuru Peak
- Certificates that match your height: green for Stella Point, gold for Uhuru Peak
Why the Machame Route is the crowd favorite
The Machame Route is one of the most popular ways up Kilimanjaro, and for good reasons. You get big scenery changes without the trek feeling like one long grind through the same view. It’s also often chosen because it’s a strong mix of challenge and practicality: you can reach high altitude in a way that feels like a real climbing journey, yet the itinerary stays relatively “short” compared with longer routes.
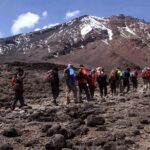
The key value for you is variety. Machame moves you through multiple ecological zones—starting in montane forest, then climbing into moorland, then stepping into semi-desert and alpine desert before returning down through forest on the final day. That means you’re not only chasing elevation. You’re also hiking through different trail textures, lighting, and weather patterns. Fog and rain can be part of the early story, while later days can feel dry, rocky, and brutally windy.
It also tends to be priced as one of the more accessible options. In plain terms: it’s easier to reach, and the route’s timeframe can help you avoid spending extra days and money “waiting out” your trip.
You can also read our reviews of more hiking tours in Arusha
Price and logistics: what you’re actually paying for
At $2,200.11 per person for this 7-day Machame trek, you’re buying more than a walking itinerary. You’re paying for a full field operation: camping gear, staff, park fees and rescue fees, meals, and the driver who gets you in place from Arusha.
Here’s what’s included:
- Camping equipment: mess tent, mattress, and all cooking equipment
- Porterage: staff carry your trek and camp loads
- Meals: 7 lunches, 6 dinners, and 6 breakfasts
- All accommodation during the trek (camping setup nights)
- Rescue and parking fees, plus taxes/VAT
- A professional driver/guide
What’s not included (and this matters for budgeting):
- Sleeping bag rental (available, but not included)
- Climbing gear rental (available, but not included)
- International flights and personal expenses
- Tips, plus any bath towels
- Any future government-imposed increases in taxes/fees
If you’re comparing value, look at this: you’re not just paying for a guide’s hours. You’re paying for infrastructure—tents, cooking, camp support, meals, and the rescue coverage fees. That’s the difference between a “tour” and a DIY plan where you’d need to rent gear, manage meals, and figure out park logistics under time pressure.
Arusha start: pickup, altitude mindset, and early mornings
This trek starts from Arusha (around 1,400m). The scheduled start time is 4:00am, and pickup is offered. You’ll be driven to Machame Village, where registration and porter logistics kick off.
That early start isn’t a gimmick. It sets you up to start hiking while weather is still reasonable and you’re fresh enough to handle the first steep climb into the park. You also get time to settle into the routine: packed lunch, register with TANAPA at the gate, and then follow the day’s ascent.
You’ll want the first day to feel a little steady, not heroic. Rain and fog can appear in the rainforest zone. That means visibility can drop and footing can get slippery—so the smartest strategy is easy effort early and good pacing rather than sprinting.
Also, the tour uses a mobile ticket, which is a small but helpful detail if you’re trying to keep documents organized.
Day 1: Machame Village to the rainforest climb (Montane forest, ~18 km)
On Day 1, you’ll hike about 7 hours over roughly 18 kilometers in montane forest. After an early breakfast, pickup takes you to Machame Village. You can buy mineral water there and you’ll receive a packed lunch.
From the village, the plan depends on road conditions: you might continue with a short drive (around 3 kilometers) or you may walk that portion to reach Machame Gate (about 1,490m). At the gate, your porters organize and pack your belongings for the hike while you and your guide handle registration with TANAPA.
Then comes the rainforest ascent. Expect rain, mud, and fog. This is a good day to mentally prepare for slow movement. Mud isn’t just annoying; it affects how your legs work over time. Taking time on the early sections helps you avoid draining yourself before the altitude starts making your body more sensitive.
Even though the distance looks reasonable on paper, the rainforest is wet and heavy on footing. Go steady. You’re building endurance for later days that feel much more extreme.
Day 2: Shira plateau and the cold, exposed camp night (Moorland, ~9 km)
Day 2 is a shorter hiking day: about 6 hours and around 9 kilometers, moving from rainforest into moorland. You’ll leave the wet green world and start crossing streams, then walking over a rocky ridge to reach the Shira plateau.
Your destination is Shira Camp at 3,840m. One of the standout aspects here is the view potential. When visibility is good, you can see the Western Breach and glaciers to the east. That’s the kind of view that makes you forget how cold it can be later.
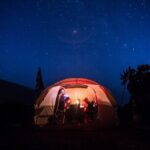
A realistic note: Shira Camp is exposed. The night can get so cold that temperatures may drop below freezing. Your tent and mattress help, but your success still depends on being prepared for cold conditions with whatever gear you have (or rent) like a proper sleeping bag.
If you’re someone who gets cold easily, this day is where you should pay attention to layering and staying dry. Wet clothing in the cold is a fast way to feel miserable.
A few more Arusha tours and experiences worth a look
Day 3: Lava Tower drama, then down to Barranco (Semi-desert, ~15 km)
Day 3 runs about 7 hours over roughly 15 kilometers, transitioning into semi-desert and rocky terrain. After breakfast, you hike east through moorland that slowly turns drier and stonier.
Around the 5-hour mark, you’ll reach Lava Tower at 4,630m. Packed lunches are served there. You also get an option if weather permits: you can climb the Lava Tower itself. Even if you choose not to climb it, the tower works like a natural landmark where your mind starts catching up with the altitude.
This is also where altitude effects often begin to show more clearly. It’s common to notice headaches or shortness of breath. You’re not failing if this happens; it’s your body adjusting. The key is to stay calm, keep moving, and follow your guide’s pacing.
After lunch, you descend to Barranco Campsite at about 3,950m. Think of this day as a balance: altitude exposure up top, then a descent that helps you recover before the next acclimatization-focused day.
Day 4: Great Barranco Wall for acclimatization (Alpine desert, ~5 km)
Day 4 is shorter on paper—4 to 5 hours for about 5 kilometers—but it has a punch. You’re climbing the Great Barranco Wall in alpine desert.
It looks intimidating from below, but this section is described as a Class 2 climb, which usually means it’s more about careful footing than technical rock climbing. Still, you’ll want sure steps. At the top, the reward is big: you can get views of Heim Glacier, and you’re often high enough to feel like you’re walking above the clouds.
After the wall, the trail winds through the Karanga Valley with up-and-down terrain. This is an acclimatization day in the best sense: you work, you gain elevation in the right moment, and then you keep the plan moving toward higher camps.
The biggest lesson on Day 4 is mental. If you feel tired, focus on the next step, not the summit goal. Small decisions keep you steady when your body is working harder than your legs.
Day 5: Barafu ridge, last water stop, and the wind problem (Alpine desert, ~4 km)
Day 5 is a “positioning day” for the summit push. Expect 2 to 3 hours of hiking over about 4 kilometers.
You leave Karanga Camp at around 3,959m. The trail intersects with the Mweka Route, then after about an hour you reach Barafu Hut. It’s the last water stop for porters—there’s no accessible water at Barafu Camp around 4,550m.
Barafu Camp sits on a rocky, exposed ridge. That means wind is a real factor. Your tents will be set, but you need to take a practical approach: get comfortable with where you are before dark. It’s not the day for wandering around or losing track of where the camp edges are.
You’ll get an early dinner, then rest. This is the night that turns the whole trip into a real summit attempt, so sleep matters more than you think. If your body is uneasy or you’re too alert, try slow breathing and keep your head calm. The start on summit night comes fast.
Day 6: Summit night from Stella Point to Uhuru Peak (long day, ~7 km up + 23 km down)
This is the day that makes Kilimanjaro either a dream or a story you won’t forget.
You’ll be woken around 23:30 with tea and biscuits. Then you start the ascent. The route heads northwest and climbs over stone scree toward the crater rim. Many hikers find this the hardest part—mentally and physically—because you’re pushing in cold darkness and your body feels like it’s doing extra work for every step.
After about 6 hours, you reach Stella Point at 5,685m. Sunrise is often the payoff moment here. It’s a classic Kilimanjaro feeling: you’ve worked in the dark, and suddenly the world opens up.
After Stella, you continue for about 2 more hours on a snow-covered trail to Uhuru Peak (around 5,895m). From there, you have the long descent. The total day includes roughly 7 kilometers of ascent and about 23 kilometers of descent, which is why people say the mountain really tests you on the way down.
Practical reality: even after the peak, your knees and legs need respect. Take the descent slowly. It’s not the time to prove anything.
Day 7: Celebration, certificates, and the Mweka forest descent (~3 hours)
Day 7 starts with a well-deserved breakfast. Then you get a celebration with dancing and singing—and it’s more than a feel-good moment. This is when you present your tips to the guide, assistant guides, chef(s), and porters.
After that, you descend about 3 hours back to Mweka Gate. There’s also a certificate process required by the National Park: you’ll sign your name, and the color depends on how high you got.
- Green certificate: reached Stella Point (5,685m)
- Gold certificate: reached Uhuru Peak (5,895m)
Then you’ll continue down into the Mweka village for about an additional hour. The final forest segment often feels like a reset button after the rocky summit days. You might feel emotional here, even if you didn’t think you would.
The crew makes the trek: guides, food, and camp rhythm
In Kilimanjaro trekking, the “product” isn’t only altitude. It’s how smoothly your days run—especially around cold nights, weather changes, and the summit schedule.
In the feedback associated with this kind of expedition, guides named Ombeni and Safaeli earned praise for being friendly, kind, and professional at the same time. Other guide combinations also came up, like Oliver and Mathew, and Oliver and Godlove. You can treat that as a sign of how much staff quality matters. On Kilimanjaro, good leadership helps you keep pace, manage nerves, and handle discomfort without panic.
Food is also part of the value. You get dinners prepared by the chef, plus snacks in camp and prepared water for washing and drinking. One practical advantage of this included camp setup is that you’re not trying to manage cooking, tent logistics, or meal timing while your body is adjusting to altitude.
Porters play a huge role in how you experience the trek. Because porterage is included, your pack load is generally smaller than it would be on a self-planned trek, and that matters for energy management on summit day.
Altitude and weather: your realistic game plan
You don’t need to be a mountain athlete to do Machame, but you do need a sensible strategy for altitude and weather.
What I’d plan around:
- Cold nights are not optional. Shira and Barafu are exposed and can be below freezing. Rent a sleeping bag if you need it. Layer up and keep clothes dry.
- Start slow, especially on rainy forest days. Rain, mud, and fog can make the first climb feel harder than expected.
- Accept headaches or breathlessness as a signal. On Day 3, altitude symptoms can begin around Lava Tower. Let your guide steer pacing and don’t push through panic.
- Treat the summit as a process. The 23:30 wake-up and ascent to Stella Point is about steady progress, not speed.
- Descend carefully. The Day 6 descent is long. Knee care beats bravado.
Also, because water access can be limited (like the note that there’s no accessible water at Barafu Camp), staying organized helps. Bring what you need for hydration and follow staff instructions.
Who this Machame trek suits best
This trek works well if you want a classic Kilimanjaro route with real habitat changes and an acclimatization path that doesn’t feel random. It’s also a good match if you like the idea of a camp-supported experience where you’re hiking while staff handle cooking and camp setup.
You’ll likely enjoy it most if:
- You want a strong balance of challenge and structure
- You’re okay with early starts and a summit-night schedule
- You want a full-service operation rather than managing gear and meals yourself
It may not be the right fit if you:
- Struggle with very cold conditions without proper sleeping gear
- Can’t handle long driving days and early wake-ups
- Have a medical situation where altitude is a concern (in that case, you’ll want to consult your clinician before booking)
Should you book the 7 Days Machame Route trek?
If your goal is a route that delivers changing scenery and a real shot at the summit, I’d say this Machame plan is worth strong consideration. The itinerary uses altitude in a way that makes sense: you climb, you acclimatize, you push at the right time, and you finish with a forest descent and certificates that mark your achievement.
The deciding factors for you should be practical:
- Can you handle freezing nights and a 23:30 summit wake-up?
- Are you ready to budget for sleeping bag and climbing gear rental if you don’t already have them?
- Do you like the idea of traveling with a trained crew and letting them run the camp rhythm?
If those check out, you’re set up for the kind of Kilimanjaro experience that feels both structured and human—where the last big climb happens because you trusted the process all week.
FAQ
What time does the trek start?
The trek starts at 4:00am, and pickup is offered from Arusha.
Where does the tour begin and end?
It starts in Arusha, Tanzania, and ends back at the meeting point.
How long is the Machame Route trek?
The duration is listed as 7 days (approx.).
Is camping equipment included?
Yes. Camping equipment is included, including a mess tent, mattress, and cooking equipment.
What about sleeping bag and climbing gear?
Climbing gear and a sleeping bag are not included, but both are available for rent.
Do you get a certificate, and what colors mean what?
Yes. The park requires a sign-in for certificates. Reaching Stella Point earns a green certificate, while reaching Uhuru Peak earns a gold certificate.