REVIEW · ARUSHA
8-Day Small-group Lemosho Kilimanjaro Summit Trekking
Book on Viator →Operated by Climb Kili · Bookable on Viator
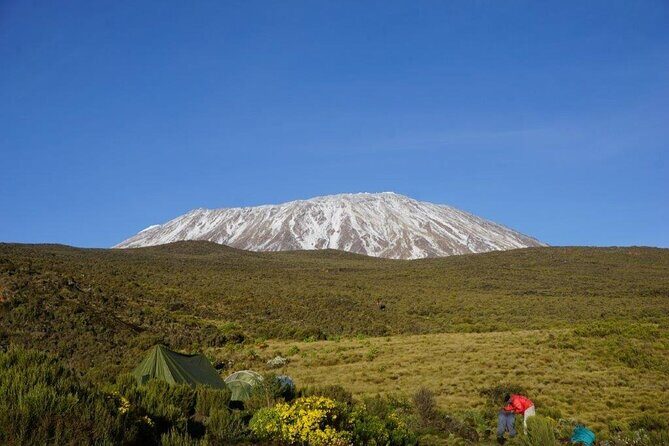
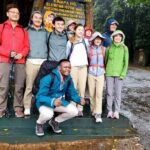
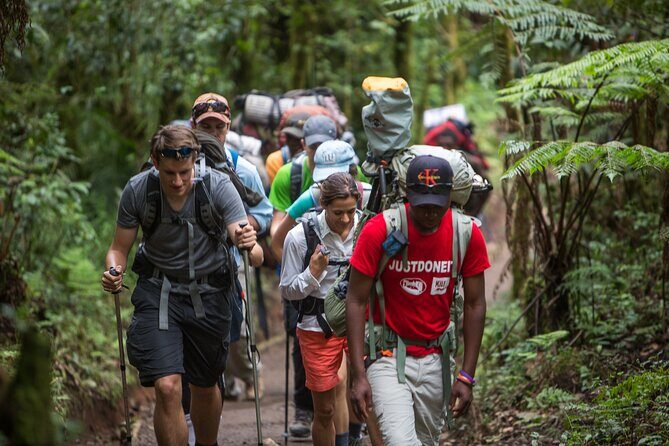
Kilimanjaro is the big one, and the Lemosho route is the smart-feeling way up. This 8-day small-group trek takes you through different climate zones, helping you acclimate as you gain altitude. I like that the plan is built for real hiking days, not just a straight sprint to the top.
What I really like is the small group setup (max 15), which usually means you get more personal attention when you need it. I also appreciate the all-in feel: camping equipment, fees, and meals are included, so you’re not managing logistics on top of altitude.
The main thing to consider is that this is still a serious hike. Summit night is long and steep, and the route includes an exposed ridge camp plus a heavy-scree push toward Stella Point.
In This Review
- Key things to know before you go
- The Lemosho plan: why this route feels built for acclimatization
- Day 1 from Londorossi Gate to Mti Mkubwa rain forest camp
- Day 2: Shira ridge hiking and first big horizon views
- Day 3 on the Shira plateau: Moir Camp and the option to explore the old cone
- Day 4: Lava Tower and Arrow Glacier acclimatization, then Barranco Camp
- Day 5: Barranco Valley up the wall, into the Karanga Valley toward the arctic zone
- Day 6: Kosovo Camp and Barafu views, with an exposed-ridge caution
- Day 7: Midnight summit push to Stella Point sunrise and Uhuru Peak
- Day 8: Mweka Gate exit and the hotel shower you’ll be counting down to
- Price and value: what $2,895 includes (and why that matters on Kilimanjaro)
- Who should choose this Lemosho summit trek
- Should you book this 8-day Lemosho summit trek with Climb Kili?
- FAQ
- What time does the trek start?
- How big is the group for this trek?
- Are hotel transfers included from Arusha?
- What’s included in the cost?
- How does summit night work on this route?
- Can I cancel for a full refund?
Key things to know before you go
- Small-group attention with a max group size of 15
- Included gear and food: camping equipment, fees, and meals throughout
- Real altitude progression through rain forest, Shira plateau, Barranco, and high ridges
- Acclimatization built in with the Lava Tower / Arrow Glacier day and a slow approach to Kosovo Camp
- Summit day details: midnight start, sunrise at Stella Point, then the push to Uhuru Peak and a long descent to Mweka Camp
The Lemosho plan: why this route feels built for acclimatization
The Lemosho route is popular for a reason: it gives your body time to adjust as you climb. In an 8-day format, you’re not just ticking boxes at big altitudes—you’re hiking through the zone changes that happen on Kilimanjaro, from lower forest up toward the drier, colder heights.
You’ll feel this most in the way the trek is paced. You get a gentle first day, a full exploration day on the Shira plateau, then an acclimatization day with a high detour toward Lava Tower and the Arrow Glacier area. Later, you get that slower day toward Kosovo Camp so you can rest, prep, and reduce the stress heading into the summit attempt. For many hikers, that rhythm is the difference between feeling steady and feeling punished.
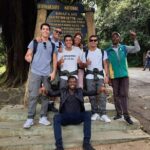
This trek also comes with a guide structure that matters in the thin-air reality. It’s designed for health, safety, and summit success, with a lead guide supported by assistant guides and a crew that handles the camp rhythm. In past climbs with Climb Kili staff, I’ve seen the team run the pacing and decision-making in a practical way—regular checks on how you’re feeling, help with timing meals and starts, and lots of patience when someone needs to slow down.
You can also read our reviews of more hiking tours in Arusha
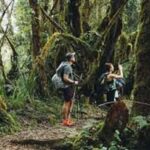
Day 1 from Londorossi Gate to Mti Mkubwa rain forest camp
Your trek starts with a western-side check-in at the Londorossi gate, after pickup from your Arusha hotel. Then you ease into the hike through montane forest with a gentle climb that’s long enough to wake up your legs, but not so aggressive that you’re gasping right away.
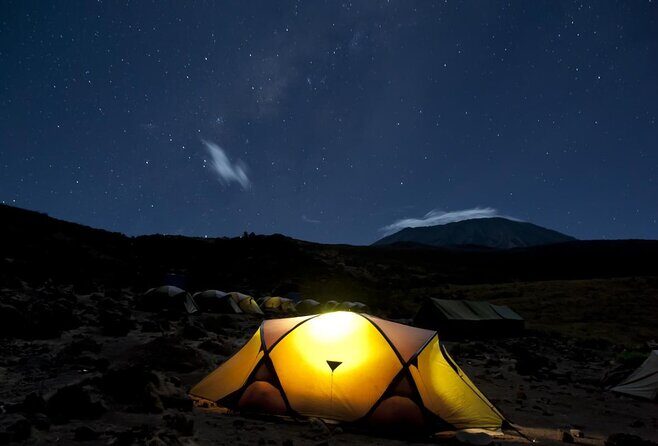
By late afternoon, you camp under the Climb Kili banner with tents set up and your personal belongings already moved into camp. The setting is Mti Mkubwa, which in Swahili means Big Tree. That name fits the vibe: you’re still in the forest, moving under a canopy feel that’s very different from what comes later.
Two practical things I’d keep in mind for Day 1:
- Take the forest pace seriously. It sets your breathing and your hiking habits for the days ahead.
- Keep an eye on how you feel at the higher altitude you’re already reaching today (around 2,360 m / 7,742 ft). It’s not extreme yet, but it’s the start of your adjustment.
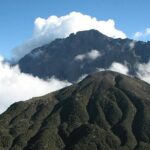
Day 2: Shira ridge hiking and first big horizon views
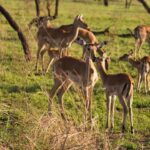
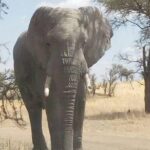
Day 2 is where the trek starts feeling like Kilimanjaro in a big way. You leave the forest and move into a savannah of tall grasses, heather, and volcanic rock—even with the lichen “beards” that hang off the scene like natural decoration.
After that shift, you follow the Shira ridge toward the high-altitude desert plateau. This is when the mountain starts to look real on the horizon. You’re still hiking for several hours (roughly 5–6 hours total, and about 3,505 m / 11,500 ft by the end of the day), so it’s not just a scenic walk—but it’s a day that usually brings excitement because you can finally see what you’re working toward.
The drawback of Day 2 is simple: the altitude steps up. You might feel it as breathlessness or a slightly slower pace. The smart move is to walk like you’re saving something for later. If you push hard on a day like this, you can pay for it on the next plateau day.
Day 3 on the Shira plateau: Moir Camp and the option to explore the old cone
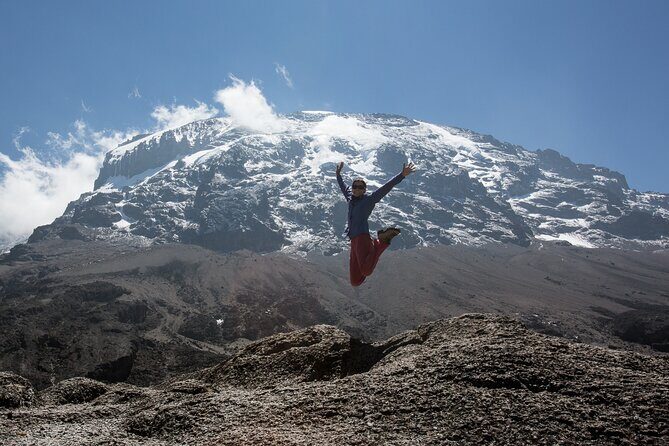
Day 3 gives you a full Shira plateau day. Instead of racing upward, you explore. You’ll trek east toward Kibo’s glaciated peak, with an option to visit the ancient collapsed Shira cone—described as the oldest of Kilimanjaro’s three volcanoes.
Then you finish at Moir Camp, tucked in a huge gorge at the end of a dormant lava flow. This camp situation is one of those details that changes how the day feels: you’re not just “at a place,” you’re in a specific geological setting that makes the hike feel like it’s passing through layers of the mountain’s story.
You’ll likely cover around 14 km / 8.7 miles over 5–7 hours, reaching about 4,206 m / 13,800 ft. That’s a big day on paper. The good news is that this is also the sort of day where you can manage your effort. Walk steadily. Stop when you need to. Treat it like body-training, not a personal speed challenge.
Day 4: Lava Tower and Arrow Glacier acclimatization, then Barranco Camp
Day 4 is one of the most important days for your success chances, because it’s built around acclimatization. You take an upward hike toward Lava Tower (about 4,500 m / 15,000 ft), and shortly after the tower you reach a junction that brings you up toward the Arrow Glacier area.
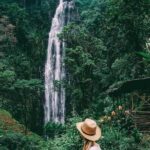
Then you descend through the Senecio forest, with a waterfall part of the way (a nice break from pure climbing). Finally, you land at Barranco Camp, set in the shadow of the massive Barranco wall.
The Barranco wall detail matters. Camps like this can feel windy and exposed, and the trek notes that clouds can drift through the Barranco Valley breeze. So plan on it being a “get ready for the cold air” kind of evening even if the exact weather changes day to day.
If you’re the kind of hiker who hates feeling “stopped and started,” know that Day 4 is still that mixed rhythm day. Take advantage of the rest at Lava Tower and use it to reset. This is one day you don’t want to treat as a fast transition.

Day 5: Barranco Valley up the wall, into the Karanga Valley toward the arctic zone
Day 5 is where the trek asks for confidence on steeper ground. You conquer the Barranco Valley and head up the Barranco wall, described as an adventurous stretch that pushes you into the arctic zone of Kilimanjaro.
Then the route continues on the South Circuit path through the Karanga Valley, and you camp at Karanga Camp. The day is shorter on distance than some previous days (around 3.2 km / 2.2 miles), but that’s not automatically easier. Shorter can still mean steeper, and the arctic-zone mention signals a shift in what your body has to deal with.
Here’s the practical takeaway: Day 5 is about staying focused. Your legs might feel better because it’s shorter, but your pace needs to stay controlled because it’s colder and thinner. Walk with purpose, but don’t try to “make up time.”
Day 6: Kosovo Camp and Barafu views, with an exposed-ridge caution
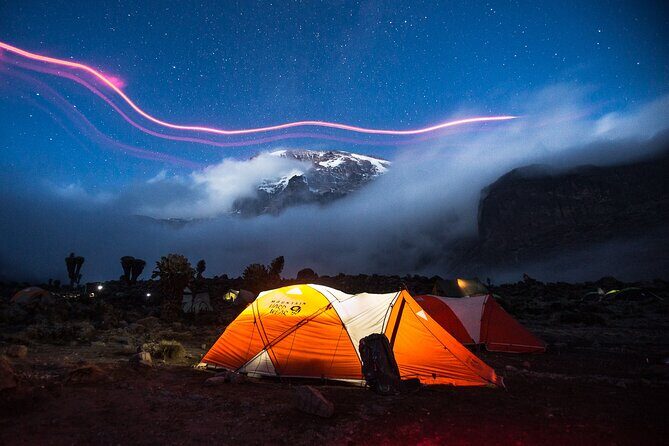
Today’s goal is slow and deliberate. You hike to Kosovo Camp (about 4,876 m / 16,000 ft) in roughly 5–6 hours, passing Barafu Camp along the way with excellent views of Kibo and Mawenzi peaks.
Kosovo Camp sits on an exposed ridge, and the trek explicitly flags that you should get familiar with the terrain before dark. That’s a very real consideration. Even if visibility is fine, you’re working near edges and uneven ground, and summit-night fatigue can show up earlier than you expect.
This day also includes the most valuable work you can do before the big push: rest, relaxation, and summit preparation. You’re also acclimatizing, which means you’re not just trying to survive the night—you’re trying to arrive at summit night as functional as possible.
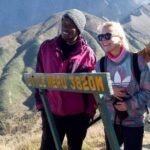
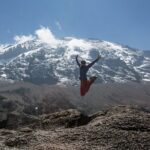
Day 7: Midnight summit push to Stella Point sunrise and Uhuru Peak
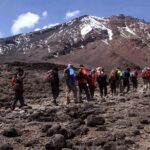
Summit day is the “everyone remembers this” part of the trip. You’ll start around midnight, take on a steep, non-technical section of the route, and hike toward Stella Point for sunrise.
The trek describes it as one of the steepest on Kilimanjaro’s non-technical paths. You’re looking at about 6–7 hours ascending to Stella Point, then about 4–6 hours descent from there to Mweka Camp.
You’ll walk through heavy scree toward Stella Point on the crater rim, passing between the Rebmann and Ratzel glaciers. Then comes the emotional payoff: from Stella Point, you can see the summit, and the trek notes it’s roughly 1 hour to Uhuru Peak.
The tough part here is mental as much as physical. You’ll likely feel like you’re stuck in the same slope for ages—until you suddenly aren’t. If you’ve done the earlier acclimatization days correctly, you’re more likely to have the breath and judgment to keep moving without overexerting.
At the end, you descend to Mweka Camp for dinner and celebration. That matters. Summit day is rarely “fun hiking.” It’s effort and focus. Ending with food, warmth, and a sense of closure helps your body shift out of survival mode.
Day 8: Mweka Gate exit and the hotel shower you’ll be counting down to
The final day is a walk to Mweka gate. The tone here is reflective: you’re done with the climbing portion, and you’re walking through the last stretch toward the vehicle pickup.
Once you reach Mweka gate, your Climb Kili vehicle is waiting for the transfer back to your hotel. The trek specifically calls out a very welcomed shower at the hotel, which is the kind of small detail that turns into a big deal when you’ve been living in cold air and camp routines for nearly a week.
It’s also the day where you’ll notice how much your body needs time after altitude. Don’t turn this into another long adventure day. Let the shower and the rest do their job.
Price and value: what $2,895 includes (and why that matters on Kilimanjaro)
At $2,895 per person, this isn’t a cheap weekend activity. But when you’re climbing Kilimanjaro, the real question is what you’re buying beyond the words summit trek.
From what’s included, you’re getting:
- Round-trip transfers from your Arusha hotel
- All camping equipment, fees, and meals
- Admission ticket included for the trek segments listed through the days
That “all-in” support is what you want at high altitude. If you had to plan extra gear rentals, manage campsite fees, or organize meal logistics on your own, that adds stress at the exact time you should be focusing on your pace and acclimatization.
Also, the small-group cap (max 15) can be a value multiplier. It often means fewer people competing for attention and decision-making space with the guide team. On summit night especially, that attention matters—because it helps keep you moving steadily rather than forcing a one-size-fits-all strategy.
A fair consideration: you still need strong physical fitness. The trek says it directly, and the schedule supports that claim—especially on summit day and the exposed ridge camp.
Who should choose this Lemosho summit trek
This trek is described as suitable for both beginner and advanced climbers, which makes sense when you look at the pacing and acclimatization days. If you’re new to altitude hiking, you’ll likely appreciate the structured progression: rain forest start, Shira plateau exploration, acclimatization via Lava Tower, then a slower lead-in to Kosovo Camp.
It also suits experienced hikers who want a known route and a team approach focused on safety and summit success. If you’re strong and comfortable in long climbs, you’ll probably enjoy the varied route textures—from lichen-draped rocks on Shira ridge to the barranco wall section to the crater-rim scree on summit night.
The biggest “not for everyone” factor is how you handle uncertainty and effort at altitude. If you’re not ready for a midnight start, a steep ascent, and days that step you upward in altitude, you might be better off choosing a different plan with less pressure.
Should you book this 8-day Lemosho summit trek with Climb Kili?
If your goal is a structured Kilimanjaro attempt that takes acclimatization seriously, I’d book it. The route choice (Lemosho), the camp plan, and the steady build-up toward summit night all support a “stay functional” strategy. I also like that you’re not carrying the heavy logistics: gear, meals, and fees are handled, and you get Arusha transfers.
If you’re considering it, be honest with yourself about fitness and mental stamina. Summit night is steep and mentally demanding even for people who train hard. If you can handle long hiking days and you’re ready to move at a controlled pace, this is a strong fit.
FAQ
What time does the trek start?
The meeting/start time is listed as 8:00 am.
How big is the group for this trek?
The maximum group size is 15 travelers.
Are hotel transfers included from Arusha?
Yes. The trek includes round-trip transfers from your Arusha hotel, and a vehicle is also mentioned at Mweka gate for the ride back.
What’s included in the cost?
Meals, camping equipment, fees, and admission tickets are included. Pickup is also offered.
How does summit night work on this route?
You start around midnight to reach Stella Point for sunrise. From Stella Point, you can see the summit and then continue to Uhuru Peak, followed by descent to Mweka Camp for dinner and celebration.
Can I cancel for a full refund?
Yes. Free cancellation is available up to 24 hours in advance of the experience start time for a full refund.