REVIEW · MOSHI
7 Days Kilimanjaro Trekking Machame Route
Book on Viator →Operated by Kiwoito Africa Safaris · Bookable on Viator
Stepping onto Kilimanjaro is life-size effort. This 7-day Machame Route trek is interesting because you climb through multiple habitats and take on longer, steeper hiking days than the more gradual routes, with Stella Point sunrise as the payoff. Two things I really like are the variety of environments and the real expedition feel of sleeping in tents at the camps. One drawback to consider: you need solid fitness and comfort with steep sections, including a rock-face scramble on Barranco Wall.
From Moshi, the logistics are straightforward: pickup is offered, you head out to Machame Gate to sign up, and the experience runs as a private tour so it’s only your group. The on-the-ground support is a big reason people succeed here, with guides such as Sébastian Shirima and Henry repeatedly praised for being professional and motivating. If you want a route that’s scenic and demanding (in a good way), this one fits.
In This Review
- Key Highlights Worth Planning For
- Why the Machame Route Works So Well for a 7-Day Kilimanjaro Climb
- Moshi Pickup and Your First Steps at Machame Gate
- Day 1 and 2: Rainforest to Shira Moorlands (and why it matters)
- Day 3: Lava Tower Shark’s Tooth to Barranco for Acclimatization
- Day 4 and 5: Barranco Wall Scramble to Barafu Prep
- Day 6 Summit Night: Stella Point Sunrise and Uhuru Peak
- Day 7 Descent to Mweka Gate and Drive Back to Arusha
- The Human Side: Guides Like Sébastian Shirima and Henry
- Price, Park Tickets, and Value for Money on Machame
- What to Pack and How to Pace Yourself on This Route
- Should You Book This 7-Day Machame Trek?
- FAQ
- Where does the trek start?
- How long is the Machame trek?
- How long is the Machame route from gate to gate?
- What’s the hardest part of the itinerary?
- Do you sleep in tents or huts?
- Is pickup included, and where do you return to?
- Are admission tickets included?
- Is this tour private?
- What if I need to cancel?
Key Highlights Worth Planning For
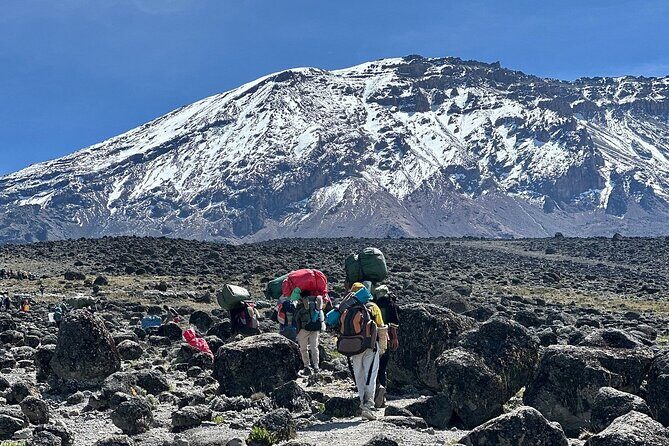
- Machame’s steep rhythm: longer hiking days and tent camping make this feel like the real deal on Kilimanjaro
- Shira Plateau to Lava Tower: you’ll pass the Shark’s Tooth Lava Tower and reach the Arrow Glacier area
- Acclimatization done right: Day 3’s high point then down to Barranco helps your body prep for summit night
- Barranco Wall scrambling: a 257-meter rock face means you should practice basic scrambling comfort
- Summit timing between midnight and 2:00am: expect the famous sunrise stop at Stella Point (weather permitting)
- Wet, muddy finishing stretch: gaiters and trekking poles are your best friends on the last descent
Why the Machame Route Works So Well for a 7-Day Kilimanjaro Climb
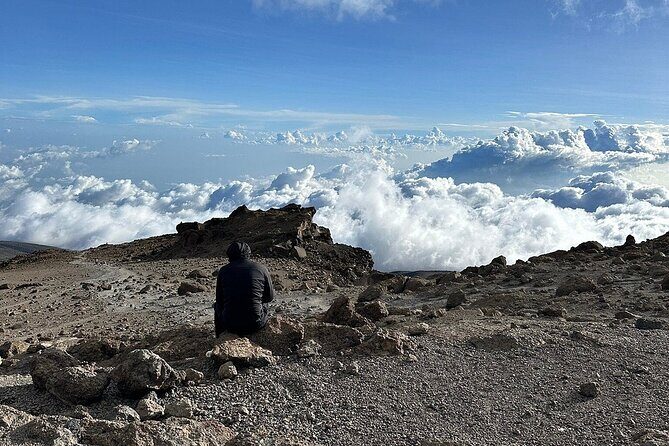
The Machame Route is one of the most popular ways up Kilimanjaro because it mixes drama with variety. You start in rainforest, then transition into heath and moorlands, and later you move through semi-desert and alpine desert zones before the final summit push. The route is also long enough to feel like a true climb rather than a quick walk-up: gate to gate it’s about 62 km (37 miles).
What that means for you is simple: you’ll earn your views. You’ll also spend more time moving uphill compared with routes that rely on a gentler profile. In other words, Machame is for people who like steady effort, good pacing, and you’re okay with sleeping at altitude in tents.
The schedule also gives you the kind of acclimatization that matters. It’s not just a nonstop grind upward. You’ll go high and then adjust on Day 3, and that planning helps your chances on summit day. If you’re the type who gets nervous about altitude, Machame’s built-in logic is a relief—assuming you follow the pace your guide sets.
You can also read our reviews of more hiking tours in Moshi
Moshi Pickup and Your First Steps at Machame Gate
Your trip is based out of Moshi, and pickup is offered. The day begins with a transfer to Machame Gate where you’ll sign up before the trek really starts. The meeting start time listed is 7:00am, which helps if you want your day structured from the beginning.
The first hours are about turning travel energy into trail energy. You’re not just going uphill—you’re entering Kilimanjaro’s world in stages. Day 1 begins at about 3,000m, and you’ll hike through rainforest to Machame Campsite. It’s a good mental reset because you’re moving at a pace that lets you settle into altitude before the steeper work begins.
Practical note: the first day is long enough to set your rhythm. Expect 5 to 7 hours for about 11 km. That’s not “easy mode,” but it’s also a smart first step so your body doesn’t get shocked.
Day 1 and 2: Rainforest to Shira Moorlands (and why it matters)
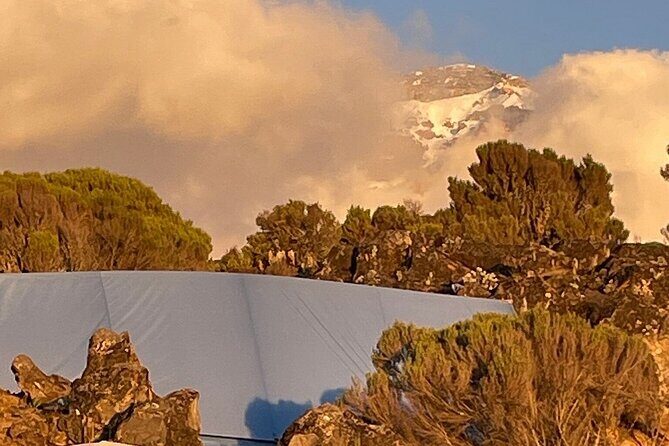
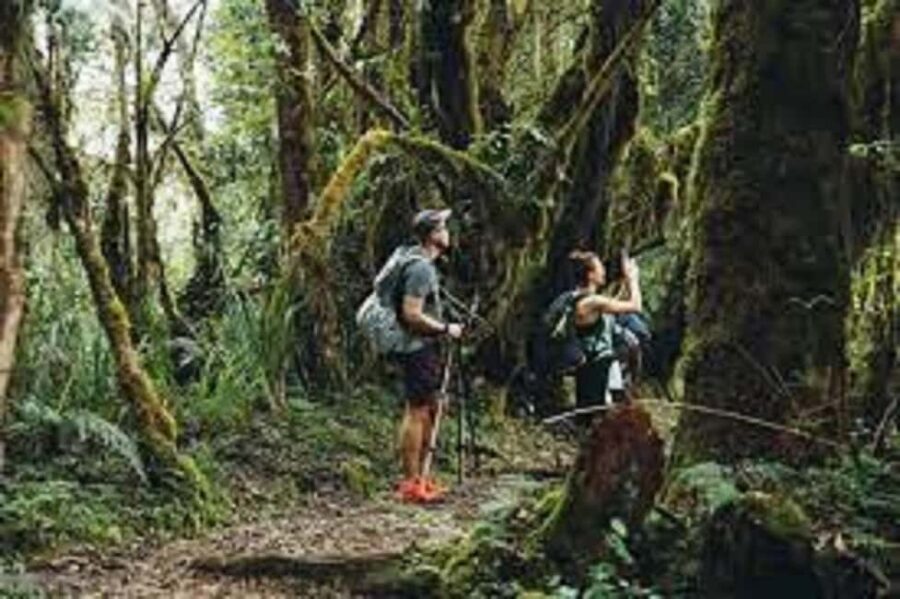
Day 1 takes you into montane forest. You hike about 11 km over roughly 5 to 7 hours, reaching around 3,000m at the start and ending at Machame Campsite. The win here is atmosphere. Rainforest on Kilimanjaro is cooler and greener than what most people picture when they think about summit snow, so it helps you understand the mountain is more than one single view.
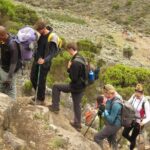
Day 2 is where the climb gets more serious. After breakfast, you leave the rainforest and start ascending through a valley and up a rocky ridge that’s steep and covered in heath. Then the trail transitions onto the Shira Plateau. You’ll pass through heather and open moorlands, cross a large river gorge, and reach Shira 2 Camp (then set up at Shira Campsite). The altitude change listed is about 3,000m to 3,850m (+850m).
This day is also key for acclimatization because you’re gaining altitude quickly enough to feel it, without yet launching into the extreme summit-country elevations. You’ll hike around 9 km in 4 to 6 hours.
One practical drawback on Day 2: the trail can feel steep for long stretches once the rainforest ends. If you push too hard early, you’ll feel it later. Your best strategy is boring but effective—slow, steady steps and consistent breathing.
Day 3: Lava Tower Shark’s Tooth to Barranco for Acclimatization
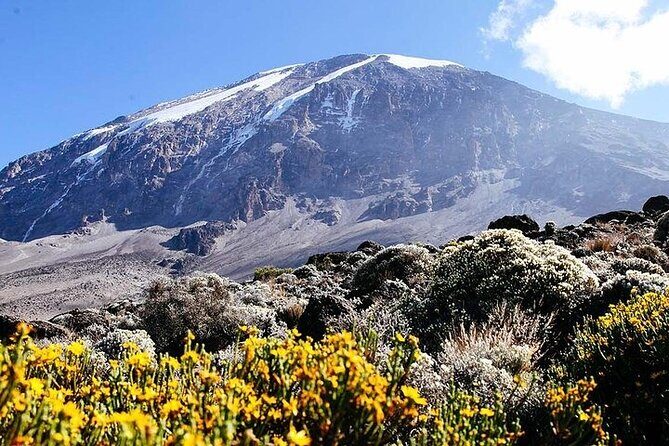
Day 3 is a big “wow” day, even before summit night. Starting on the Shira Plateau, you continue along a ridge, passing junction points toward the Kibo area, then shift direction southeast toward the Lava Tower called the Shark’s Tooth. Shortly after, you reach a second junction up to the Arrow Glacier area at about 16,000 ft.
Then comes the smart part: you don’t finish the day at the same altitude. You continue down to Barranco Hut at about 13,000 ft. That high-to-lower movement is classic acclimatization logic. It helps your body digest the climb and reduces the risk of feeling wrecked as you approach the higher camps ahead.
Distance is about 10 km, with 6 to 8 hours of hiking listed, mostly in semi-desert terrain. The day covers “peak scenery” while still keeping your long-term goal in mind.
If you’re the kind of climber who likes to feel progress, this day delivers. You get iconic landmarks (Lava Tower), and you also get a physiological break (descent to Barranco).
Day 4 and 5: Barranco Wall Scramble to Barafu Prep
Day 4 is where Machame earns its reputation. You start with a steep traverse up the Barranco Wall, a 257-meter rock face that requires basic scrambling skills. This is not the day to pretend you’re fine with exposure and uneven footing if you aren’t. If scrambling makes you tense, talk to your guide early and commit to using secure handholds and slower foot placements.
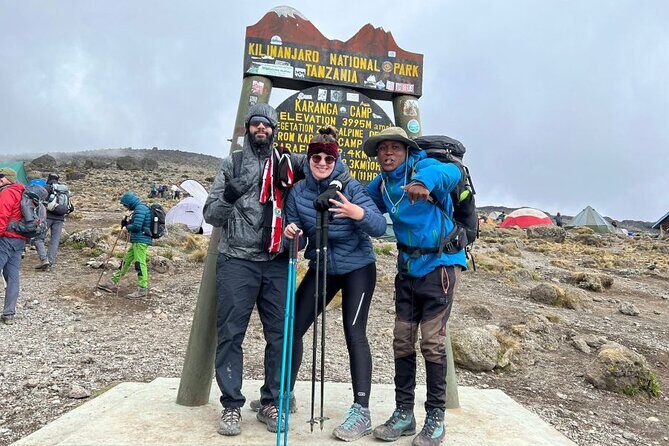
After the wall, the trail follows inclines and declines to Karanga Camp at 3,960 meters. You’ll hike about 7 km over roughly 7 hours. The habitat is described as the High Alpine Zone, so conditions can feel more severe than earlier days.
Day 4 also sets you up for Day 5: you spend the night at Karanga, then the next day pushes you toward Barafu camp.
Day 5 is designed as a short reset day. The trail starts at Karanga Camp and joins the Mweka trail toward the base of Barafu at 4,680m. Distance is about 6 km and the hike takes around 3 hours. Habitat is listed as Alpine Desert.
This is a psychological day as much as a physical one. You should use it to recover, eat, and be ready for midnight to early-morning effort later. If you keep grinding on Day 5, you’ll pay for it on summit night.
A few more Moshi tours and experiences worth a look
Day 6 Summit Night: Stella Point Sunrise and Uhuru Peak
This is the heart of the Machame story. You start very early—between midnight and 2:00am—to reach the summit area between the Rebmann and Ratzel Glaciers.
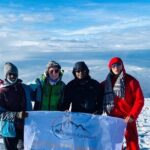
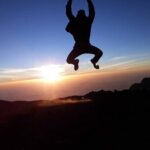
At Stella Point (about 18,600 ft), you take a short rest. This is where many people experience the most memorable sunrise of their lives, weather permitting. From there, there’s about a 1-hour ascent to Uhuru Peak, and you may encounter snow all the way up (depending on conditions).
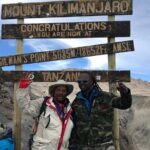
Uhuru Peak is the highest point on Mount Kilimanjaro and the continent of Africa.
Then you descend straight down to Mweka Hut Campsite, with a lunch stop at Barafu along the way. The descent is often rougher than people expect because loose gravel can turn your legs into jelly fast. This is where foot discipline matters, and where gaiters are genuinely helpful.
If you’re wondering how “hard” this day is: it’s hard because you’ll be awake for the long haul, and it’s hard because you’ll be moving on steep, thin-air terrain. The good news is that this tour’s structure is built around supporting summit timing, including the sunrise checkpoint at Stella Point.
Day 7 Descent to Mweka Gate and Drive Back to Arusha
Day 7 begins with a descent. After breakfast, you continue down to Mweka Park Gate to receive your summit certificates. Lower elevations can be wet and muddy, and that’s when trekking poles and gaiters really help with stability and keeping debris out of your boots.
From the gate, it’s another hour to Mweka Village. Then a vehicle meets you there and drives you back to your hotel in Arusha.
You’ll descend from about 10,000 ft to 5,400 ft and hike about 10 km in 3 to 4 hours. The listed habitat shifts back to rain forest, which is a nice emotional contrast after the stark summit-country air.
Clothing-wise, the tour guidance is practical: shorts and T-shirts are likely enough at lower elevations. Still, keep rain gear and warmer clothing handy because Kilimanjaro weather can change fast—even when you’re hoping the mountain is done with surprises.
The Human Side: Guides Like Sébastian Shirima and Henry
I love climbs where the team treats the mountain like a shared job. In the feedback for this trek, guides and their support staff come up again and again for being professional, encouraging, and genuinely invested in whether you make it.
Sébastian Shirima is repeatedly mentioned as a master guide—motivating, supportive, and skilled at managing the day-to-day reality of altitude. Henry is also named with a similar theme: patient coaching and encouragement, especially during the hardest stretches. Other names show up as well, including Charles (coordination support), Evaline (communication before the trip), William, Gift, and Amani. People also describe porters and guides working as a tight team, with a sense of celebration at the top once summit success happens.
Why that matters for you: on Kilimanjaro, the difference between “good luck” and “good outcome” often comes down to pacing, decision-making, and how well your team reads conditions. When the human part is strong, it keeps you calmer, steadier, and more likely to make smart choices under stress.
Price, Park Tickets, and Value for Money on Machame
At $2,500 per person for about 7 days, this trek isn’t a budget impulse buy. The value shows up in the structure.
First, the route is a full Machame climb with real altitude days, not a shortened itinerary. Second, the tour includes park admission tickets (the day descriptions indicate admission ticket included). Third, you get a private setup where only your group participates, which matters for comfort and communication.
Finally, you’re paying for more than movement up a trail. You’re paying for camp management at multiple campsites and guided summit timing, including the early departure window that makes Stella Point sunrise possible.
That said, the price should be weighed against your expectations. If you want an easy, fluffy trip, Machame will feel intense. If you want a guided expedition with tent nights, long hiking days, and a clear summit plan, the cost starts to make sense.
What to Pack and How to Pace Yourself on This Route
This itinerary is physically demanding, and the provided guidance points to the gear that actually matters.
- Plan for gaiters and trekking poles, especially for the wet, muddy finish and tricky descents.
- Expect you may need rain gear and warmer layers, even if shorts and T-shirts are usually fine at lower elevations toward the end.
- Be comfortable with basic scrambling for Barranco Wall. That means confidence on uneven rocks and using your hands when needed.
Now for pacing. The Machame route has multiple “big” days. If you go out fast on Day 1 or Day 2, you’ll likely feel it when the terrain steepens and altitude thickens. Your best pacing is steady and controlled, even if your ego wants to prove something.
If summit night feels intimidating, remember this: the schedule gives you a summit target window and a built-in checkpoint at Stella Point. That structure helps you keep focus instead of spiraling into fear.
Should You Book This 7-Day Machame Trek?
Book it if you want a Kilimanjaro route that’s active, scenic across multiple habitats, and built around thoughtful acclimatization. You’ll enjoy the Machame style if you like steep climbs, you can handle tent camping, and you’re okay with scrambling on Barranco Wall. I’d also recommend it if you value strong guide support, since people specifically praise Sébastian Shirima and the team for motivation and professionalism.
Skip it (or rethink your plan) if you’re looking for a gentle walk, because Machame is steep by design and summit night starts in the dark. Also think twice if scrambling makes you panic—this climb asks you to use basic hands-on movement.
If you’re physically prepared and you trust your team’s pacing, this is exactly the kind of mountain trip that turns into a real story you’ll still talk about years later.
FAQ
Where does the trek start?
You’re transferred to Machame Gate to sign up before you start hiking. The meeting start time listed is 7:00am, and the trip is based in Moshi.
How long is the Machame trek?
The trek runs for about 7 days. The tour summary lists the duration as 7 days (approx.), with day-by-day hiking and camping at campsites.
How long is the Machame route from gate to gate?
The Machame route is approximately 62 km (37 miles) from gate to gate.
What’s the hardest part of the itinerary?
The summit push happens early (between midnight and 2:00am), and you also tackle the Barranco Wall, which is a 257-meter rock face that requires basic scrambling skills.
Do you sleep in tents or huts?
This route uses tent camping. You set up camp at Machame Campsite, Shira Campsite, Barranco Hut area, Karanga Camp, Barafu, and the Mweka campsite.
Is pickup included, and where do you return to?
Pickup is offered. After the last day descent, a vehicle meets you at Mweka Village and drives you back to your hotel in Arusha.
Are admission tickets included?
Admission tickets are listed as included in the day descriptions throughout the trek.
Is this tour private?
Yes. It’s described as a private tour/activity, and only your group participates.
What if I need to cancel?
You can cancel up to 24 hours in advance for a full refund. If you cancel less than 24 hours before the start time, no refund is provided.