REVIEW · MOSHI
Mountain Kilimanjaro Climbing 7 Days Lemosho Route
Book on Viator →Operated by Exceed Expectations Tours & Safari · Bookable on Viator
Kilimanjaro feels personal on the Lemosho route. You start in lush rainforest, then step up through moorland, lava ridges, and desert-like uplands before you earn the summit views at Stella Point and Uhuru Peak. Two things I really like about this 7-day plan are the route quality—beautiful, remote, and built for chances to acclimatize—and the way the Exceed Expectations Tours crew runs the trip with supportive, friendly guidance (Oscar Swai is often named in their responses).
You should still think about the downside before you commit: this is a serious trek with very long, cold days, including a steep summit push at night. If cold and altitude have ever gotten to you before, you’ll want to prepare smart and take the acclimatization days seriously.
In This Review
- Key Highlights I’d Circle on Your Planner
- Why Lemosho Works So Well for Your Chances (and Your Photos)
- Getting From Moshi Into the Mountain: Lemosho Gate Day 1
- Day 2 Across Shira Plateau: Long Hours, Good Acclimatization Gains
- Day 3 Lava Tower to Great Barranco: The Day You’ll Remember
- Day 4 Great Barranco Wall to Karanga: Work Done, Not Work “Glorified”
- Day 5 To Barafu (4,640m): Scree Slopes and Summit Preparation
- Day 6 Summit Night: Stella Point as Sunrise Marker, Uhuru Peak as Reality Check
- Day 7 Down Through Rainforest to Mweka Gate
- Exceed Expectations Tours & Safari: Local Crew and Group Flow
- Price and Value: What $2,626.67 Buys You
- Weather Reality: Rain, Cold, and the Night Sky You Came For
- Who This Tour Fits Best (and Who Should Think Twice)
- Should You Book the 7 Days Lemosho Route with Exceed Expectations Tours?
- FAQ
- How long is the Kilimanjaro 7 Days Lemosho Route trek?
- Where does the tour start, and what time is the start?
- Is pickup included?
- Do I get a mobile ticket?
- What’s the maximum group size?
- What fitness level do I need?
- Are park admission tickets included?
- If weather is bad, can the trip be refunded or rescheduled?
- What is the cancellation policy for a full refund?
Key Highlights I’d Circle on Your Planner
- Rainforest to moorland to desert zones across one of Kilimanjaro’s most scenic route profiles
- Acclimatization built into the rhythm, with a mid-day altitude check around 4,200m on Day 4
- Lava Tower lunch stop (4,640m) with crater-peak scenery and a huge day’s payoff
- Great Barranco Wall work: non-technical, but long and tiring in real altitude fatigue
- Summit strategy: reach Stella Point as the first light hits, then continue to Uhuru Peak
- Small group size (max 15) for a calmer experience and easier logistics with your team
Why Lemosho Works So Well for Your Chances (and Your Photos)
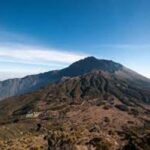
The Lemosho route is popular for a reason: it gives you a strong mix of scenery and altitude timing. You’re not just grinding straight up a single corridor. You’re moving through zones that feel genuinely different—starting forested and green, then shifting into grassy moorland and rocky volcanic landscapes, and finally becoming more stark as you get closer to the summit regions.
I also like that the route is described as remote and beautiful, not crowded. That matters in small ways: you tend to feel less rushed, and the “Kilimanjaro is huge” feeling lands harder when you aren’t constantly surrounded. The wider circuit also gives you chances to see the mountain from different angles, not just one long line of views.
Second, the itinerary is set up to help your body acclimatize. You’ll gain altitude steadily, then you’ll get the chance to “stress and recover” in a structured way—camp changes plus a targeted acclimatization climb on Day 4.
A few more Moshi tours and experiences worth a look
Getting From Moshi Into the Mountain: Lemosho Gate Day 1
Your day starts with a pick-up and transfer to the Lemosho gate on the western side of Kilimanjaro. The details are slightly spread out: the meeting point is listed at Kilimanjaro Airport with a 7:30am start time, while the trip plan also notes hotel pick-up around 8:00am for the transfer. Either way, expect a morning move from Moshi into the park area, then registration before you start hiking.
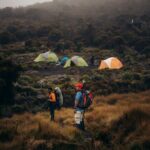
Day 1 is a steady introduction through the Lemosho glades into Big Tree camp. What I like about this warm-up day is that it’s not a brutal “day one hero” test. The forest setting keeps things more comfortable as you climb—humid air, shade, and a gentler mental start before the moorland and scree begin.
Practical tip: on Day 1, treat it like a gear check day. Put on layers you’ll actually keep using later, test your pace, and get your rhythm. Kilimanjaro is long—your Day 1 behavior affects how smooth Day 2 feels.
Day 2 Across Shira Plateau: Long Hours, Good Acclimatization Gains
This is a big move day: about 11 hours. You trek across grassy moorland and heather dotted with volcanic rock formations. The route takes you through Shira 1 camp and then onward to Shira 2, with the kind of wide-open scenery that makes you notice how the mountain’s zones change fast.
The high-value moment here is the view potential: Kibo Peak sometimes sits in the clouds as you head across the plateau. You also gain a reasonable amount of altitude, and parts of the route are fairly steep. That means you’ll feel the “work” early enough to respect altitude, but the plateau walking still gives your body time to adjust.
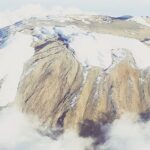
I also like that there’s mention of Northern Ice fields visible from the western side, with unusual Kibo views. Those sightings are not guaranteed every minute, but when the light and clouds cooperate, it’s one of the reasons Lemosho is worth choosing.
Possible drawback: this is long. If you’re prone to getting behind early, Day 2 can be where you feel it most. Plan for a steady pace over speed.
Day 3 Lava Tower to Great Barranco: The Day You’ll Remember
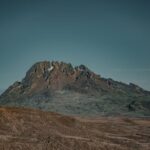
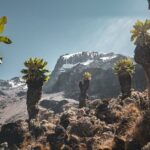
Day 3 includes a rewarding high point: you’ll reach Lava Tower (4,640m), described as a distinct pinnacle and your high point for the day. You’ll walk into the upland desert zone and across lava ridges beneath the glacier area of the Western Breach.
For me, the value of this day is the shape of the climbing. You get panorama payoff through ascent, then you get a steep descent that leads you into the Great Barranco Valley area, finishing at a camp set around 3,960m. That descent-to-camp structure is useful—your body gets altitude experiences but you still end the day sheltered by cliffs with extensive views.
You also get lunch at the Lava Tower area. That’s not just a meal stop; it’s a mental marker: you’ve climbed a meaningful altitude target, so the rest of the day feels earned.
Day 4 Great Barranco Wall to Karanga: Work Done, Not Work “Glorified”
Day 4 starts with a descent into the start of the Great Barranco, then an exit over the Great Barranco Wall. This is where the route earns its “long and tiring” reputation. It’s described as rock climbing without technical moves, but it can still burn you out—because altitude fatigue doesn’t care that the scrambling is not technical.
Then you pass underneath the Heim and Kersten glaciers (another strong scenery and context moment), and you head toward Karanga valley. You climb up to Karanga camp (3,963m).
Two things you should expect on this day:
- A real effort day, even without technical steps
- A training-with-wisdom option: if you’re feeling strong, there’s a mid-afternoon acclimatization trek up to around 4,200m, then back down to camp
That “go up, come down” pattern is the kind of acclimatization that can help your body handle the later big altitude jump. Don’t treat the extra walk as a badge; treat it as optional altitude practice.

Day 5 To Barafu (4,640m): Scree Slopes and Summit Preparation
After rest and breakfast, you hike to Barafu camp (4,640m), taking roughly 3 hours. The description is clear: desolate scree slopes, little to no vegetation, and a tough steep walk made harder by altitude.
I like how this day is framed. It’s not pretending that Barafu is a casual overnight. This is the staging area where you rest, manage warmth, and start thinking like a summit night climber: hydrate, eat, and get warm early.
Then comes the schedule pressure: you’ll have an early dinner and try to sleep. You’re expected to be up and start the climb between 11pm and 12pm.
Key consideration: the emotional challenge on summit days is often colder than people expect. Even if you feel fine during the day, your body can stiffen at night. Dress for cold, not for comfort.
Day 6 Summit Night: Stella Point as Sunrise Marker, Uhuru Peak as Reality Check
This is the big one: about 15 hours, starting around midnight and climbing steeply toward the summit glaciers. The route includes 4 to 5 hours of scree climbing gaining incredible height over short distance.
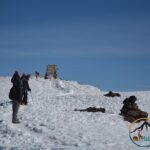
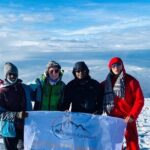
The plan calls out an important target: you should reach the crater rim at Stella Point (5,739m) as the first rays of sun hit. From there, you get ice cliffs within the crater and dramatic surrounding views, including Mawenzi Peak.
Then you continue for roughly an hour to Uhuru Peak (5,895m). That final move is where you find out what “altitude fatigue” really feels like. The goal is simple: keep moving, keep breathing, and don’t spend energy on theatrics.
After that, you begin the descent back to Stella Point, then down on scree slope and track back to Barafu for breakfast. After breakfast you continue down to Millennium Camp for a long rest.
One practical note: your descent is still strenuous. Even when you feel “done,” your legs are still carrying you down for hours.
Day 7 Down Through Rainforest to Mweka Gate
Day 7 is your release valve. You’ll trek down through rainforest to Mweka Gate, complete park formalities, and receive certificates you can hang with pride. Then vehicles meet you and you return to Moshi for a hot welcome shower.
What I like about the final day is the contrast. After days of altitude zones and night climbing, rainforest feels like relief. It also gives you something important: time to slowly reset your body instead of immediately jumping into a long travel day without recovery.
Exceed Expectations Tours & Safari: Local Crew and Group Flow
This is where a lot of Kilimanjaro trips rise or fall. You want a team that handles details smoothly because weather and altitude are already hard enough.
From the way Oscar Swai and the Exceed Expectations Tours team are described in their communications, there’s a pattern of hands-on support: flexible planning when dates were uncertain, and a group experience built around active movement rather than turning every moment into a slow stop-and-wait routine. People also describe guides as pleasant, courteous, friendly, and helpful—exactly what you need when you’re cold, tired, and sometimes grumpy.
Group size matters too. With a max of 15 travelers, your trek likely stays organized without feeling chaotic. That’s a real advantage for pacing, meal flow, and how your group handles changing conditions.
Price and Value: What $2,626.67 Buys You
At $2,626.67 per person, this trek isn’t cheap, so the question isn’t just whether you can afford it. It’s whether the plan gives you value that matters on Kilimanjaro.
Here’s what you can feel good about from the provided details:
- Multiple days of admission ticket coverage are included across the itinerary
- Pickup is offered, reducing day one friction
- You get a well-structured 7-day acclimatization pattern rather than a compressed sprint
- The route is set up for summit success by improving your altitude schedule, not just by adding miles
Where you should be thoughtful: any Kilimanjaro price can swing based on what’s bundled and how operators price staffing and logistics. The data here confirms admission tickets, but it doesn’t list every other cost category in the same way. Before you pay, I’d ask Exceed Expectations Tours directly what’s included beyond the admission ticket callouts, and confirm what you’ll need to budget for personally (personal gear, gratuities, and any optional add-ons if they exist).
Weather Reality: Rain, Cold, and the Night Sky You Came For
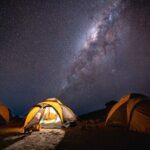
Kilimanjaro weather can switch fast. The route description and the broader trip notes point to the reality of changing conditions—you can go through rain, sun, and clear starry nights. That’s not a guarantee of drama; it’s just the norm.
So pack and plan like this:
- Be ready for cold at night (especially around summit window)
- Expect wet trail segments early if the rainforest zone delivers rain
- Keep your layers system simple and easy to manage while you’re tired
If you’ve only climbed mountains in dry climates, Kilimanjaro will teach you new patience.
Who This Tour Fits Best (and Who Should Think Twice)
This trek is best for people with moderate physical fitness who want a classic, scenic route with an acclimatization-first attitude. You’ll do well if you:
- Can handle long hiking days
- Can wake up for an overnight summit push
- Can tolerate cold, even if you’re not a winter-sports person
You might think twice if you:
- Want a short, casual walk
- Have struggled with altitude before and can’t commit to slow, steady effort
- Hate night hiking so much that the summit schedule feels impossible
Should You Book the 7 Days Lemosho Route with Exceed Expectations Tours?
If you want a Kilimanjaro climb that leans into route quality and thoughtful altitude pacing, I’d say this is a strong choice. The Lemosho itinerary gives you big view days, a meaningful high-point lunch at Lava Tower, and the kind of rhythm that supports acclimatization. You’re also working with a local operator—Exceed Expectations Tours & Safari—where Oscar Swai is repeatedly associated with helpful, flexible communication.
My final check for you: be honest about stamina and cold tolerance. Summit night is not a gentle stroll. If you respect that and train for long hours, you’ll likely love how the days feel—steady progress, changing landscapes, and that sunrise moment on the crater rim.
FAQ
How long is the Kilimanjaro 7 Days Lemosho Route trek?
It’s listed as 7 days (approx.), with a day-by-day itinerary from pick-up through return to Moshi.
Where does the tour start, and what time is the start?
The meeting point is Kilimanjaro Airport, and the start time is listed as 7:30am. The itinerary also notes pickup around 8:00am for the transfer to Lemosho gate.
Is pickup included?
Yes, pickup is offered.
Do I get a mobile ticket?
Yes, the tour notes a mobile ticket.
What’s the maximum group size?
The maximum is 15 travelers.
What fitness level do I need?
The guidance says travelers should have a moderate physical fitness level.
Are park admission tickets included?
Admission tickets are included as part of the itinerary details for the listed days.
If weather is bad, can the trip be refunded or rescheduled?
The experience requires good weather. If canceled due to poor weather, you’ll be offered a different date or a full refund.
What is the cancellation policy for a full refund?
You can cancel up to 3 days in advance for a full refund. For a full refund, you must cancel at least 3 full days before the experience’s start time.