REVIEW · KILIMANJARO
Lemosho Route
Book on Viator →Operated by Maua Adventures · Bookable on Viator
This route earns its reputation the hard way. The Lemosho itinerary moves you from forest to Shira Plateau and then out onto the higher, colder zones—built for steady acclimatization—while the summit push is run on a clear schedule. I also like how the plan starts with an equipment check on arrival, so you’re not guessing what you’re missing before the mountains get serious.
The one drawback to factor in is the timing. You’ll be up very early—pickup starts around 2:00am, and the summit attempt is triggered by a 23:30 wake-up with a target departure around 24:00—so plan for cold, fatigue, and not much sleep.
On the value side, you’re not only buying a trail. You’ll have a base in Moshi at Lindrin Lodge the first night, guided trekking for a limited group (max 15), and meals mapped into the hike days, which matters when you’re trying to stay hydrated and warm.
In This Review
- Key points to know before you choose Lemosho
- Lemosho Route: Why This Approach Helps Your Odds
- Day 1 in Moshi: Pickup, Gear Check, and a Real Rest Start
- Day 2: Lemosho Glades (2,385m) to Big Tree Camp (2,780m)
- Day 3: Big Tree Camp to Shira 1 (3,500m) and the Kibo-Cloud Moment
- Day 4: Shira 1 to Shira 2 (3,900m) and Northern Ice Field Views
- Day 5: Shira 2 to Barranco (3,960m) via Lava Tower (4,640m)
- Day 6: Barranco to Karanga (3,963m) and That Long Rock Climb
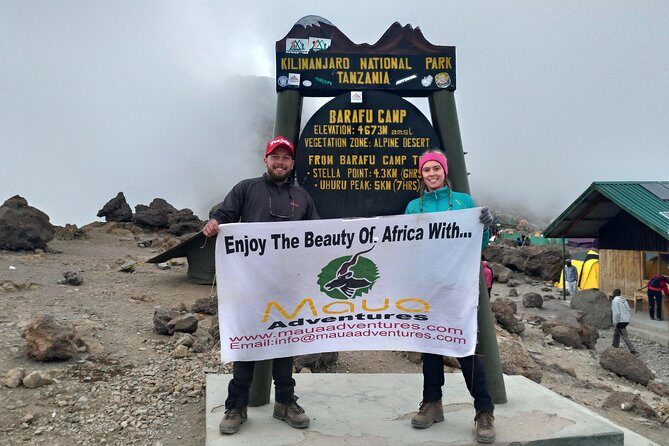
- Day 7: Karanga to Barafu (4,640m) and the Summit Countdown Mood
- Day 8: Barafu to Uhuru Peak (5,895m) and Down to Mweka Camp
- Day 9: Mweka Camp to Mweka Gate (1,640m), Certificates, and the Rainforest Finish
- Price and Value: What $2,310 Covers (and What It Doesn’t)
- Your Crew and Group Size: Small Enough to Matter
- What to Pack and How to Keep the Summit Night From Beating You
- Who This Trip Fits Best (and Who Might Want a Different Option)
- Should You Book This Lemosho Climb with Maua Adventures?
- FAQ
- Where is the meeting point and when does the experience start?
- Do I get to stay in Moshi before the trek starts?
- Are meals included during the trek?
- When do you start the summit climb?
- What altitude do you reach at the top?
- What is the maximum group size?
- What’s included in the price, and what isn’t?
- What happens if the trek can’t run due to weather?
Key points to know before you choose Lemosho
- Forest-to-desert progression: you build altitude gradually, then step into moorland and upland desert terrain before the summit day
- Food is scheduled: breakfast, lunch, and dinner are built into the hiking rhythm on the climb days
- Summit night has a plan: hot tea and biscuits at 23:30, then gear ready for a departure around 24:00
- Lava Tower day (often a mental highlight): lunch at the high point around 4,640m helps break the monotony of altitude
- A real recovery descent: after Uhuru/Stella Point you drop to Mweka Camp, then down to Mweka Gate through lower rain-forested slopes
- Small-team feel: the trek caps at 15 travelers, which tends to make coordination smoother
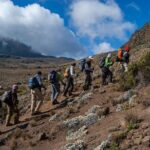
Lemosho Route: Why This Approach Helps Your Odds
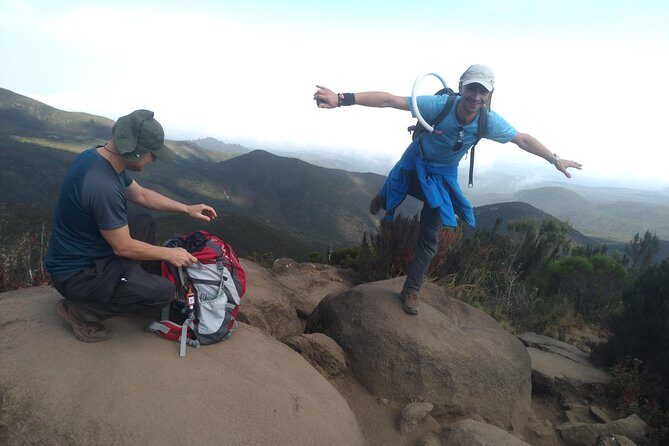
Lemosho is a long, logical on-ramp to Kilimanjaro. Instead of rushing straight to high altitude, you start in the forests and slowly work your way up through moorland and plateau before the final, steep alpine push. For you, that usually means less panic on day two and more time to notice how your body is reacting.
You’ll also appreciate the way the trek breaks altitude into manageable chunks. Some days feel like “a lot of walking,” but they’re built around getting time at the right elevations and keeping your pace slow. When you’re climbing from around 2,300m upward to 5,895m, even small altitude decisions matter.
You can also read our reviews of more tours and experiences in Kilimanjaro.

Day 1 in Moshi: Pickup, Gear Check, and a Real Rest Start
You start with a transfer from Kilimanjaro International Airport to Moshi town, where you’ll meet your guide and do an equipment check. This is one of those not-glamorous details that can save your entire climb. If something’s missing, you can rent gear on the same day, which reduces last-minute scramble.
Your first night is at Lindrin Lodge with bed and breakfast. That matters because Kilimanjaro success isn’t only summit-day grit—it’s also about arriving calm, organized, and rested enough to handle the next morning’s start.
If your gear checklist is already tight, great. If you’re unsure about boots, layers, or cold-weather basics, this day is your safety net.
Day 2: Lemosho Glades (2,385m) to Big Tree Camp (2,780m)
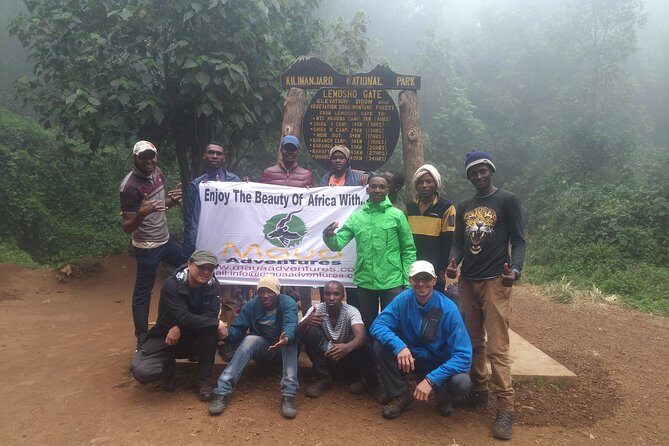
The second day begins with a pickup around 08:00 and a drive to the Lemosho gate on the western side of the mountain. After registration, you climb steadily through the forested section of the route—shorter day by Kilimanjaro standards, and intentionally so.
You’ll cover about 7km (4.3mi) in roughly 4 hours, ending at Big Tree Camp at 2,780m. The practical win here is that it teaches you the rhythm: slow steps, consistent breathing, and checking in with how you feel at higher altitude without yet getting punished by cold.
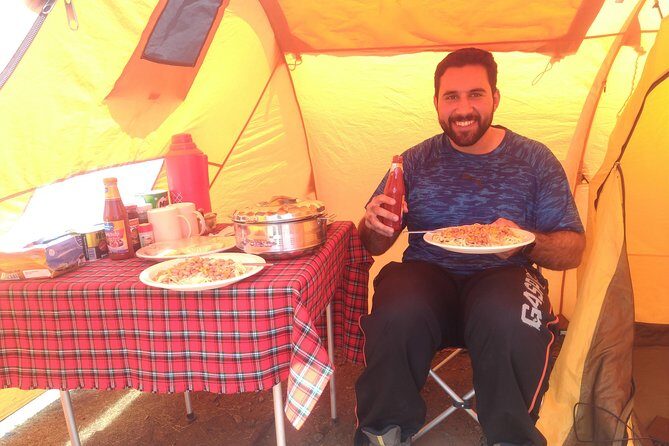
Meals (breakfast, lunch, dinner) are included on the hiking days, so you can focus on pace instead of planning food logistics. That helps with the less obvious part of acclimatization: keeping calories in your system.
Day 3: Big Tree Camp to Shira 1 (3,500m) and the Kibo-Cloud Moment
Today you cross a plateau of grassy moorland and heather with volcanic rock formations. You’re still moving steadily, but parts of the route are steeper, and you’ll feel the altitude more than day two.
The hike is about 8.5km (5.3mi) and takes around 7 hours, ending at Shira 1 Camp (3,500m). One of the itinerary’s key promises is views of Kibo Peak floating on the clouds—and on days like this, clouds can turn the mountain into something almost theatrical. Even when you don’t get a clean view, the timing of the day gives you a chance to adapt to the higher zone.
This is the day where I’d be strict with you about pacing. Keep it slow enough that you can talk in short sentences. If you find yourself pushing for speed, save that energy for later—Kilimanjaro doesn’t reward “toughing it out” early.
Day 4: Shira 1 to Shira 2 (3,900m) and Northern Ice Field Views
You continue across the moorland of the Shira Plateau toward Shira 2 Camp (3,900m). This is a classic acclimatization-support day: moderate distance, altitude gained, and time in the right place so you don’t just climb and hope.
It’s about 8km (5mi) with roughly 5 hours of trekking time. The plan includes a chance to view the Northern Ice fields from the western side and enjoy panoramic scenes with Kibo appearing in unusual angles. In the afternoon you do an acclimatization walk, then settle back at camp for dinner and overnight.
This is where the “value” is real. You’re paying not just for summit access, but for time at altitude that reduces the stress of the final days.


Day 5: Shira 2 to Barranco (3,960m) via Lava Tower (4,640m)
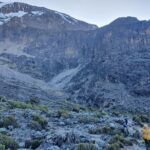
Day five is where the route starts to feel more like Kilimanjaro proper. You ascend again with far-reaching views, walking into an upland desert-like zone and across lava ridges under the western breach area. Then comes one of the day’s anchor points: Lava Tower (4,640m).
You trek about 10km (6.2mi) over roughly 7 hours. You have lunch at Lava Tower, then later make a steep descent to Barranco Camp (3,960m) in the Great Barranco Valley.
Barranco is a special kind of camp: you’re sheltered by cliffs, but you still get wide-open views down toward the plains. The practical side is that Barranco often gives you a clearer sense of “this is the valley system below the high country,” which helps the navigation feel less mysterious.
Drawback to plan for: the descent can feel like it’s stealing your legs. If your knees are sensitive, take your time and use a careful downhill step pattern.
Day 6: Barranco to Karanga (3,963m) and That Long Rock Climb
Today starts by descending into the Great Barranco, then you exit steeply up the Barranco Wall. It’s not technical, but it’s long and tiring—exactly the kind of day that separates “I can hike” from “I can hike at altitude.”
You then pass underneath the Heim and Kersten glaciers, continue toward the Karanga valley, and climb up to Karanga Camp (3,963m). The day is about 5.5km (3.4mi) with roughly 5 hours of trekking time.
For those feeling strong, there’s an optional mid-afternoon acclimatization hike to around 4,200m, then a return to camp for dinner and rest. I like this structure: it gives a boost for people who tolerate altitude well, without forcing it on everyone.
Day 7: Karanga to Barafu (4,640m) and the Summit Countdown Mood
Day seven is shorter on paper—about 3km (1.9mi) and around 3 hours—but it’s tough in a different way. You walk across desolate scree slopes with little to no vegetation around you, and the altitude makes every step feel heavier.
When you arrive at Barafu Camp (4,640m), you eat, rest, and prepare for a long night and day ahead. The key instructions here are simple and crucial: keep hydrated and stay warm. Then you’ll do the early dinner, try to sleep, and accept that sleep may be limited.
This is usually the day where your mental game matters as much as your legs. If you’ve spent previous days pacing well, you’ll arrive at Barafu with energy to recover—then you can focus on the summit night plan.
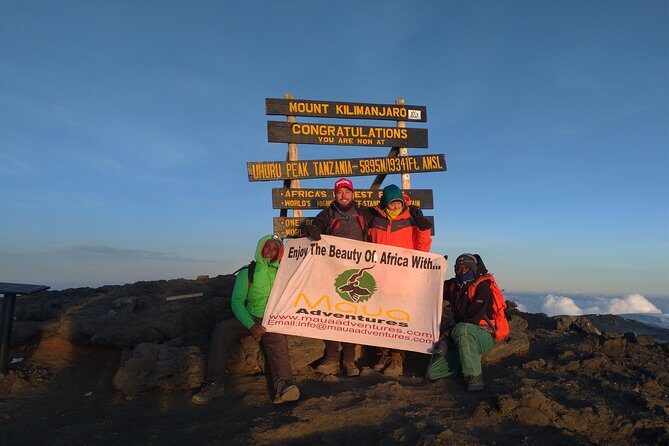
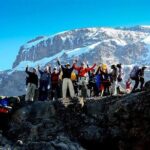
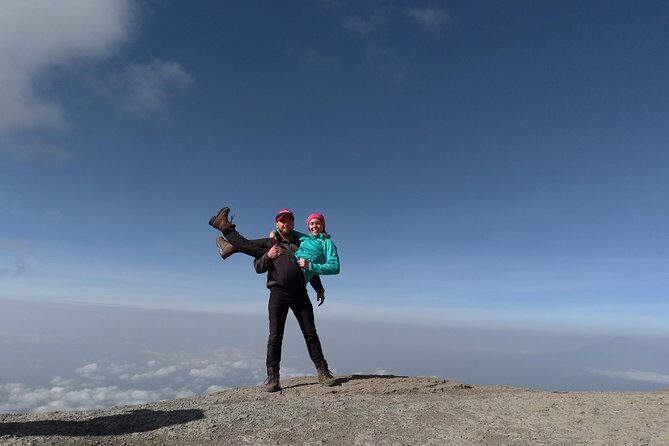
Day 8: Barafu to Uhuru Peak (5,895m) and Down to Mweka Camp
Summit night begins with a wake-up around 23:30, with hot tea and biscuits. You’ll want your warm clothes, headlamp, insulated water, and snacks ready for departure at around 24:00.
The climb to the crater rim is steep and slow, and you should expect about 6–8 hours to reach the top of the crater where you can see the sign for Stella Point (5,739m). From there, the route continues to the summit area at Uhuru Peak (5,895m), depending on conditions and timing.
The trick is momentum. Small steps. One step at a time. No sprinting, no pushing your breathing into panic. If you keep that steady rhythm, the mountain stops feeling like a wall and starts feeling like a long staircase that you can eventually finish.
After the summit experience, you continue to Mweka Camp (3,100m). That’s a huge drop in elevation, but remember: your body still needs time to recover from the effort and cold.
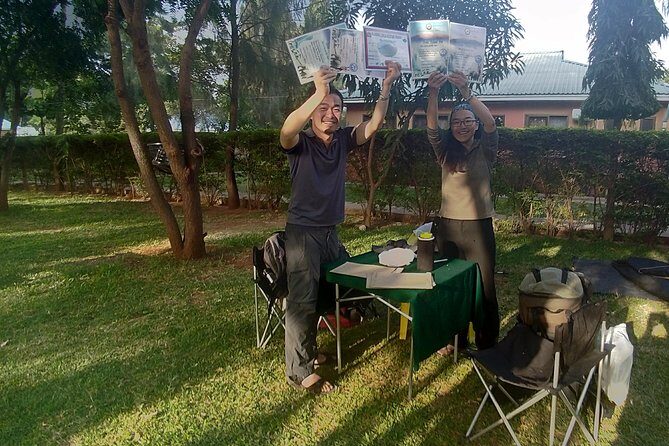
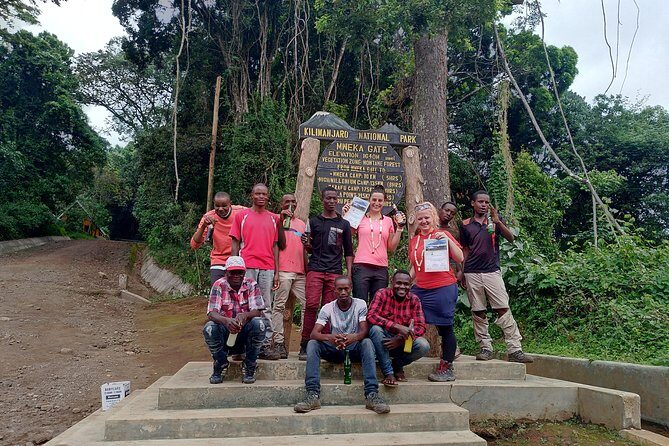
Day 9: Mweka Camp to Mweka Gate (1,640m), Certificates, and the Rainforest Finish
The plan ends with a descent from Mweka Camp down to Mweka Gate at 1,640m. The hike is about 9km (5.5mi) and usually takes 3–4 hours, described as pleasant because it runs through lower rain-forested slopes.
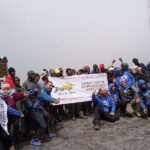
If you reached Stella Point or Uhuru Peak, you receive official certificates: a green certificate for Stella Point and a gold certificate for Uhuru Peak. Then there’s customary crew tipping before you’re transported back to your hotel in Moshi.
This day has a simple emotional payoff. You’re moving again, the air feels less thin, and the last part of the trail turns Kilimanjaro from a high-altitude project into a real journey you finished.
Price and Value: What $2,310 Covers (and What It Doesn’t)
At $2,310 per person, you’re not buying a cheap “walk up a mountain.” You’re buying logistics, guides, camp infrastructure, and the controlled structure of a climb where altitude decisions are part of the service.
Here’s how the value shows up based on what’s included in the plan:
- Transfers from Kilimanjaro Airport to Moshi
- Your first-night stay at Lindrin Lodge (bed and breakfast)
- Meals on trekking days (breakfast, lunch, dinner)
- A summit schedule with specific wake-up and departure timing
- A trek that includes a long acclimatization arc instead of just chasing altitude quickly
- Parking fees listed as included
- A mobile ticket and pickup offered
What’s not included is also worth noting: items of a personal nature. Gear rentals can come up if you’re missing something during the day-one equipment check, but that’s not framed as automatically included. Plan for that possibility so there are no surprises.
Also, budgeting for tips is realistic. The plan notes that it’s customary to tip your trekking crew before returning to Moshi.
Your Crew and Group Size: Small Enough to Matter
This route runs with a capped group size—maximum 15 travelers. That matters on Kilimanjaro, where clumping too many people into camp logistics can turn simple tasks into chaos. Smaller groups tend to move more smoothly, especially on summit night when everyone’s timing and preparation count.
The operator is tied to real, named guides in the way it’s described in practice. Depending on your dates, your team might include guides such as Wency Machiba, Omary/Omery, or Said, along with crew roles like a head chef (sometimes referred to as Kurwa-shef) and other support staff such as Ramadhani, Regan, Subaru, Frank, Prince, and Makariot. If those names keep showing up in how people describe the experience, it usually means the company is built around a consistent team rather than a last-minute lineup.
In practical terms: you want a crew that helps you with the boring stuff (water, layers, timing) because that’s what keeps altitude days safer and calmer.
What to Pack and How to Keep the Summit Night From Beating You
The itinerary gives clear hints about what matters most on summit night, and you should take them seriously. Have:
- Warm clothes ready before you’re half-asleep
- A working headlamp
- Insulated water reserves
- Snacks staged so you can grab them without rummaging
Then add a bit of common sense:
- Wear layers you can adjust quickly as the temperature swings
- Keep your pace controlled from the start of the ascent—do not treat summit day like a fitness test
- Hydrate regularly in the days leading up to Barafu, because the mountain makes dehydration feel like altitude sickness
One more thing: your sleep will likely be broken or short before summit. Don’t bet on perfect rest. Treat it like a night shift. The goal is readiness, not comfort.
Who This Trip Fits Best (and Who Might Want a Different Option)
This plan is described for travelers with moderate physical fitness. That doesn’t mean it’s easy. Kilimanjaro is demanding by nature, and even a “moderate” person can struggle if they rush or don’t listen to their body.
Choose this climb if you want:
- A route with a longer acclimatization timeline
- A structured summit plan with clear wake-up and departure instructions
- Meals and core logistics handled, so you can focus on pacing and warmth
You might want to reconsider if you have strong knee issues on descents, you know you struggle with early mornings, or you’re not prepared for the reality that summit night is cold, slow, and mentally tough.
Should You Book This Lemosho Climb with Maua Adventures?
I think you should seriously consider booking if you like organized trekking and you want a climb that prioritizes time at altitude rather than speed to the top. The itinerary’s structure—Shira Plateau days, Lava Tower lunch at 4,640m, Barafu as the countdown base, then the timed summit departure—helps you manage the mountain instead of fighting it.
I’d hesitate only if you know early mornings and summit-night sleep loss will break your focus, or if you’re hoping for a relaxed hike. This route is built for success through discipline: steady pace, warmth, hydration, and respecting the altitude.
If you’re willing to take it slow and prepared, Lemosho is a powerful way to do Kilimanjaro—one step at a time, all the way to Uhuru Peak.
FAQ
Where is the meeting point and when does the experience start?
The meeting point is Kilimanjaro International Airport on Kilimanjaro Airport Rd, Tanzania, with a start time listed as 2:00am.
Do I get to stay in Moshi before the trek starts?
Yes. After pickup from the airport, you’re transferred to Moshi and spend your first night at Lindrin Lodge with bed and breakfast.
Are meals included during the trek?
Yes. The itinerary states that breakfast, lunch, and dinner are included on the trekking days (and your day 1 stay is bed and breakfast).
When do you start the summit climb?
You’ll be awoken around 23:30 with hot tea and biscuits, and you prepare for a sharp departure around 24:00.
What altitude do you reach at the top?
The summit is Uhuru Peak at 5,895 meters, and Stella Point at 5,739 meters is a key reference point on the route.
What is the maximum group size?
The experience is limited to a maximum of 15 travelers.
What’s included in the price, and what isn’t?
Included items listed are parking fees, and the itinerary also includes pickup and the meals during the climb. Items of a personal nature are not included.
What happens if the trek can’t run due to weather?
If the experience is canceled due to poor weather, you’ll be offered a different date or a full refund.