REVIEW · KILIMANJARO
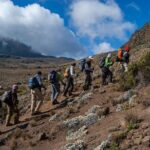
8 Days Kilimanjaro Hike via Lemosho Route
Book on Viator →Operated by Nafika tours · Bookable on Viator
Lemosho starts with real wow-factor scenery. From Londorossi Gate at 2,360m on the west side, you climb through rainforest, moorland, lava ridges, and alpine desert, with Kibo views changing every day from a new angle. It’s one of the most scenic routes on Kilimanjaro, and the way this plan spreads altitude gain is a big part of why it’s so popular.
I also like that Nafika leans hard into safety. Your guides do regular health checks, and you have emergency oxygen plus a first aid kit as part of the package. On a mountain where conditions can turn fast, that peace of mind matters.
One consideration: the summit night is a real sleep-screw-up. You’ll start around midnight for the climb to Stella Point and Uhuru Peak, and you should be ready for cold, long hours. Also, the visa (listed at $50) is not included.
In This Review
- Key Highlights I’d Plan Around
- The Lemosho Route Advantage: Scenic on Purpose, Not by Accident
- Getting To Lemosho Gate: Pickup, Moshi Base, and Your First Camp Rhythm
- Days 2–3 on the Shira Plateau: The Best Kind of Cloud Watching
- Day 4’s Lava Tower Lunch (4,640m): High-Altitude Achievement With a View Break
- Day 5 Barranco Wall and the Optional 4,200m Acclimatization Trek
- Day 6 Barafu Camp: A Short Hike That Sets Up the Long Night
- Summit Day (Day 7) From Midnight to Stella Point and Uhuru Peak
- Descent Day 8: Mweka Gate Certificates, Warm Showers, and the Post-Mountain Glow
- Price and Value: What $2,350 Covers (and Why It’s Not Just the Walk)
- The Safety Reality: Health Checks, Altitude Sickness Response, and Your Part
- Who Should Book This Lemosho Plan (and Who Might Pause)
- Should You Book Nafika’s 8-Day Kilimanjaro via Lemosho?
- FAQ
- How long is the Kilimanjaro hike on this route?
- Where does the climb start and what gate is involved?
- What are the highest points you’ll reach on the hike?
- Is emergency oxygen included?
- Is treated water provided during the trek?
- What camping gear is included?
- Is pickup offered, and how do you get to the trailhead?
- Is the visa included in the tour price?
- What’s the group size limit?
Key Highlights I’d Plan Around

- Western start at Londorossi Gate (2,360m) for early panoramic momentum
- Shira Plateau viewpoints where Kibo Peak shows up from different angles
- Day 4 Lava Tower lunch at 4,640m, with a serious view break built in
- Acclimatization pacing using Shira 2 and an optional 4,200m trek on Day 5
- Safety setup with emergency oxygen, first aid kit, and regular health checks
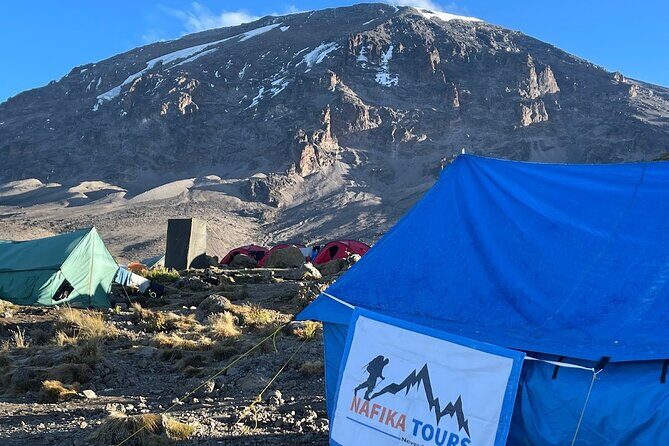
- Comfort details like provided sleeping pads, sleeping bags, and even table/chairs at camp
The Lemosho Route Advantage: Scenic on Purpose, Not by Accident
If you want Kilimanjaro scenery that feels earned—not just photographed—you’ll probably love Lemosho. This climb begins on the west side and then works around the mountain to the south. That means you’re not stuck staring at the same slope all week. You’ll see different faces of Kilimanjaro as you go: moorland plateaus, western-breach lava features, and later the high-desert feel near the summit zone.
What makes this route extra practical is the way it supports acclimatization. The itinerary includes full walking days that build altitude steadily, plus days that slow down the climb to help your body adjust. That matters because altitude sickness is less about “toughness” and more about pacing and response. Nafika’s plan is built around that concept, not around rushing.
Also, this operator markets Lemosho as a balance of low crowds, beautiful scenery, and high summit success. You still should expect other groups on shared mountain areas, but Lemosho is generally known for feeling less packed than the busiest routes. For many hikers, that quieter vibe is the difference between a grind and a meaningful journey.
You can also read our reviews of more hiking tours in Kilimanjaro

Getting To Lemosho Gate: Pickup, Moshi Base, and Your First Camp Rhythm
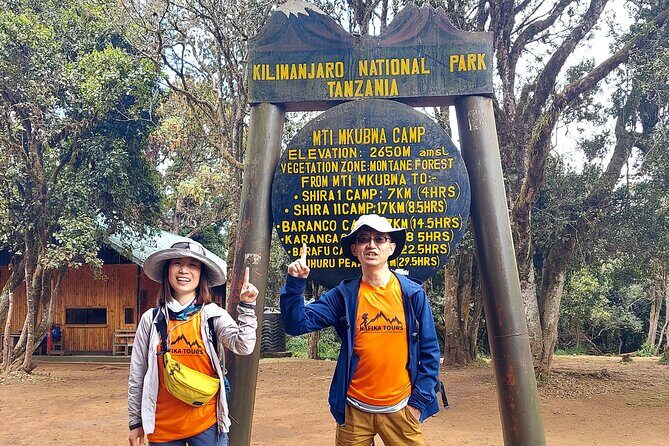
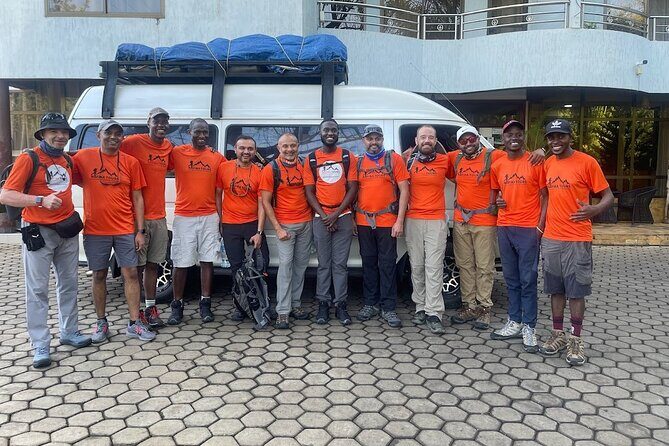
The trip is organized around private transfers. You’ll be picked up around 8:00 am on Day 1 and driven to Lemosho Gate on Kilimanjaro’s western side. Once you arrive, Nafika handles the pre-hike formalities, then you’re sent on your way to the first night at Big Tree Camp.
You also get 2 nights in a Moshi hotel included. That’s not just a perk—it’s smart timing. Moshi is where you can focus on basics: sleep, hydrate, and check gear before you start hauling yourself upward. If you’re arriving from overseas, having that built-in buffer helps your body and your mood.
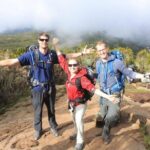
Day 1 is about transition. The hike runs through forested terrain and Lemosho glades, with your first real elevation effort into the camp at Big Tree. Expect it to feel more like a warm start than a workout your legs will dread. Still, you’ll want to treat it like day one of a long story: take it easy, sip water, and don’t act like you’re training for a marathon.
One more practical detail: the experience is described as having a maximum group size of 20 travelers. That’s small enough to keep things coordinated, but large enough that camp logistics should feel organized rather than chaotic.
Days 2–3 on the Shira Plateau: The Best Kind of Cloud Watching
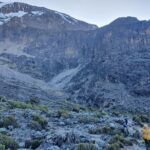
After Big Tree Camp, the climb turns into big-open terrain. Day 2 goes across grassy moorland and heather scattered with volcanic rock formations. You’ll hike about 8.5 km (5.3 mi) and reach Shira 1 Camp. The goal is steady altitude gain without turning the day into a sprint. From camp, the views are famous in this region—especially when Kibo Peak appears as if it’s hovering in the clouds.
Day 3 keeps that rhythm. You’ll observe the Northern Ice fields from the western side and get unusual angles of Kibo. The route continues across the Shira Plateau moorland, and that wide-open walking is both calming and mentally demanding. You’re moving for hours, but you’re not wrestling thick undergrowth. It’s easier to pace yourself, but you still need to watch your breathing and energy.
When you reach Shira 2 Camp, the plan includes a short acclimatization walk before dinner. That little extra push is important. It’s not there to make you exhausted. It’s there to give your body a reason to adapt and to help you feel steadier for the days when the trail gets steeper.
If you’re the type who likes to take photos, this is your stretch. Just remember: on Kilimanjaro, stopping often means slowing your acclimatization routine. I’d take photos, but I’d also respect the pace plan.
Day 4’s Lava Tower Lunch (4,640m): High-Altitude Achievement With a View Break
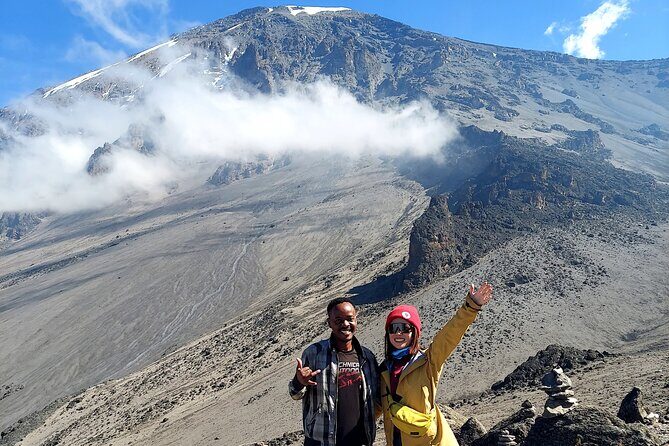
Day 4 is where Lemosho starts to feel serious. You ascend with far-reaching panoramas until you reach the upland desert climatic zone, then you continue on lava ridges beneath the glaciers of the Western Breach. The standout moment is lunch at the Lava Tower (4,640 m), the highest point for the day.
This is a smart design: you get a meaningful climb up, then you get a built-in rest and fuel stop while you’re at your day’s high point. You’re not left searching for a snack two hours after a big effort. The itinerary even notes the views are so intense that photos don’t do them justice.
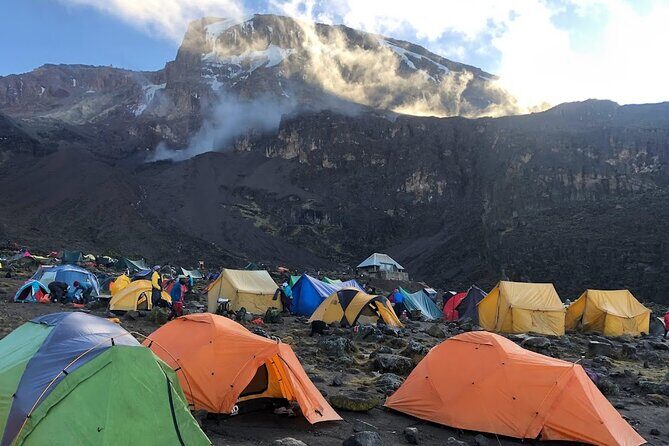
After lunch, you descend to camp at the base of the Great Barranco Valley around 3,960 m. That shift can help your legs, but don’t underestimate the descent. Downhill can still tax your knees, especially if you come down too fast. Bring trekking pole technique you trust.
One possible drawback of Day 4: it’s longer (about 7 hours). If you usually like short days, this is the day you’ll feel that difference. On the flip side, it’s also the day that makes you understand why Lemosho is often called the scenic route.
Day 5 Barranco Wall and the Optional 4,200m Acclimatization Trek
Day 5 includes one of Kilimanjaro’s most talked-about obstacles: the Barranco wall. The plan describes it as imposing, but also notes it can be easier than it looks. That tracks with what most hikers find on Kilimanjaro: your brain worries first, your body catches up next—if you go slow and keep moving.
After the wall, you pass underneath the Heim and Kersten glaciers and head toward Karanga valley. From camp, you can see Mawenzi to the east. The itinerary also mentions the descent beauty here—again, one of those stretches where the mountain rewards you for being patient.
Lunch is at camp, and the afternoon is your own, with a strong recommendation to rest and nap. That’s not just “nice.” It’s preparation for the next phase. Day 5 is shorter than summit build days, but it still matters.
For additional acclimatization, the itinerary includes an optional mid-afternoon walk up to around 4,200 m, then returning to camp. If you’re feeling strong and your body is tolerating the altitude well, that extra step can help you feel more stable for the summit push. If you’re not feeling great, skip it and follow your guide’s pace decisions.


Day 6 Barafu Camp: A Short Hike That Sets Up the Long Night
Day 6 is a bit of a trick day. You hike to Barafu Camp (4,640 m), but the plan describes it as a short-day setup: around 4 km and about 4 hours. The altitude climbs, but the time on your feet is controlled.
This is intentional before summit night. The itinerary puts Alpine desert habitat here, which means fewer trees and more exposure. You’ll likely feel wind and cold more than you did earlier, especially as you approach the summit zone.
After arriving, you get lunch and an afternoon that’s mostly about sleeping and saving energy. Dinner is early, then there’s an important detail: alarms are set around midnight for the summit start. If you’re the type who struggles when sleep gets interrupted, start treating this day like the final rehearsal.
In other words: Day 6 looks easy on paper. It’s not easy in the mind. This is the day you prepare to operate on mountain-time and accept that your body is the boss.
Summit Day (Day 7) From Midnight to Stella Point and Uhuru Peak
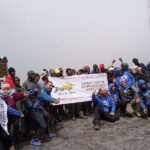
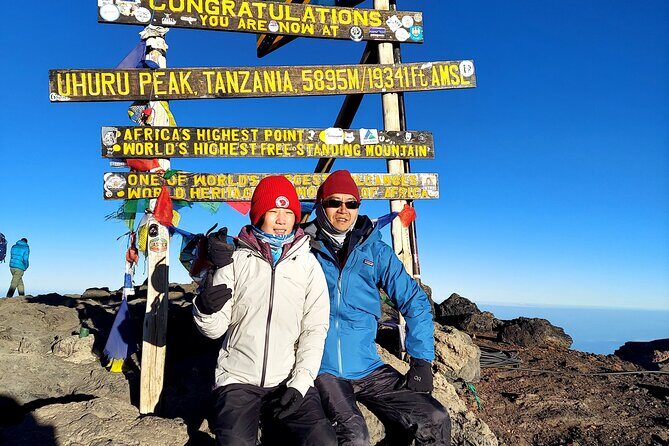
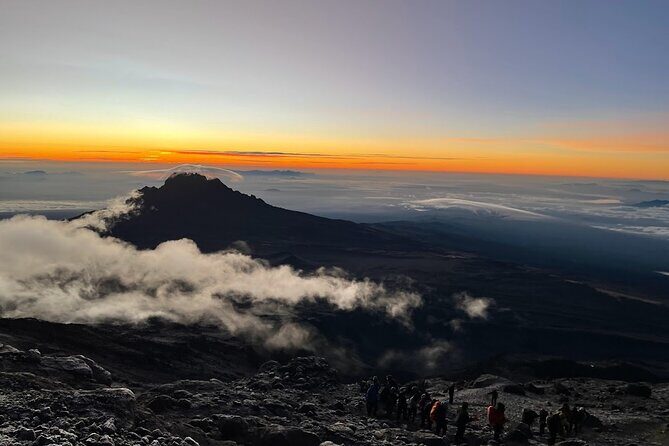
Day 7 is the heart of the whole trip. You’re woken at midnight with light tea and breakfast, then you begin a 4 to 5 hour climb gaining incredible height over a short distance. The itinerary describes the sunrise view as spectacular, and the plan has you at the crater rim at Stella Point (5,756 m) as the first rays hit.
From Stella Point, it’s about 1 hour to Uhuru Peak (5,895 m). That final push is the part most people remember forever: cold air, tight steps, and a feeling that time slows down because you can’t afford to move too fast.
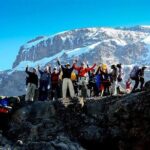
Once you reach Uhuru Peak, the itinerary includes photos and celebration before starting descent. You then return to Barafu Camp for lunch and rest. The day is listed as long—about 13 hours—but the big thing is you’re not doing a constant grind. The plan has stops, pacing, and a structured descent.
Practical tip: your comfort on summit day is mostly layers, not motivation. Cold at high altitude can bite even when you’re working hard. I’d prioritize warmth and wind protection over style.
And yes, this is where fatigue can make you reckless. The safest summit is the one you reach by staying calm, sipping water, and not racing the group.
Descent Day 8: Mweka Gate Certificates, Warm Showers, and the Post-Mountain Glow
Your final day is mostly about getting down safely and steadily. After breakfast, you start the final descent from Millennium Campsite to Mweka Gate—about 14 km and around 5 hours.
The itinerary mentions Montane Forest habitat here, which is a welcome change after alpine desert. Walking in forest terrain usually feels less exposed, and the trail tends to feel more forgiving than the higher, rockier zones.
At Mweka Gate, you’ll collect certificates, then say goodbye to your mountain guides. After that, you have a private car ride back to your hotel area to enjoy a warm shower—something you’ll likely think about all week.
That’s the payoff: you climbed through zones that feel like different planets, then you return to earth with paperwork and a cold drink. It’s not glamorous. It’s satisfying.
Price and Value: What $2,350 Covers (and Why It’s Not Just the Walk)
At $2,350 per person, this isn’t a budget hike. But Kilimanjaro isn’t cheap for a reason: permits, logistics, staff time, and safety gear. The value here comes from what’s included, not from marketing.
Here’s what your package lists as included:
- Camping equipment: sleeping tents, sleep pads, sleeping bags, plus table and chairs
- Professional guides and good salaries for crews, porters, and guides
- Private transportation (including pickup and transfers)
- Emergency oxygen and a first aid kit
- Treated water throughout the trek
- 2 nights hotel in Moshi
- Meals: breakfast (8), lunch (8), dinner (7)
What’s not included is the visa ($50).
For many hikers, the biggest hidden value is gear. If you’ve had to rent sleeping bags and pads before, you’ll understand why providing camp gear matters. Trekkers also benefit from the food rhythm: planned meals keep you fueled without guessing what you’ll get at altitude.
Is it still a chunk of money? Yes. But you’re paying for a support system: staff, safety supplies, and the practical camp setup that makes long days bearable.
The Safety Reality: Health Checks, Altitude Sickness Response, and Your Part
This is one of those mountains where safety isn’t a slogan. Nafika states that their top priority is keeping climbers out of harm’s way. The plan includes regular health checks, and guides are ready to detect and treat altitude sickness.
You also have emergency oxygen and a first aid kit. That matters most if you start feeling off early in the trip. The key is not pushing through symptoms because you’re stubborn or because you don’t want to slow down the group.
Your part is simple:
- Tell your guide when you feel worse.
- Don’t try to win every day’s pace.
- Use the acclimatization parts of the schedule as they’re intended.
Also remember: Kilimanjaro is high-altitude travel. You’re not just hiking—you’re managing your body’s oxygen use. A good guide plan reduces risk. You still have to respond.
If you want an operator that treats health like a daily job, Nafika’s setup is aligned with that idea.
Who Should Book This Lemosho Plan (and Who Might Pause)
This trip is described for travelers with moderate physical fitness. That doesn’t mean it’s easy. It means the schedule is built for people who can hike multiple hours per day and handle a long summit push.
If you:
- want the most scenic version of Kilimanjaro (with changing views),
- prefer a route that offers acclimatization pacing,
- and value a company that stresses health checks and safety supplies,
then this is a strong fit.
If you’re the kind of person who hates losing sleep, the summit schedule may feel rough. Day 7 starts at midnight. You’ll be tired before you reach the highest point. If that sounds like your worst nightmare, at least go in with your eyes open and plan your mindset.
Should You Book Nafika’s 8-Day Kilimanjaro via Lemosho?
If your goal is a scenic route with a structured acclimatization rhythm and a safety-first approach, I think you should seriously consider booking this. The included gear, treated water, oxygen/first aid, and the included Moshi hotel nights make it feel like a real package rather than a bare-bones hike where you figure things out alone.
I’d book when you can say yes to the realities: cold summit night, long hours on Day 7, and the need to follow guide pacing. If you’re unsure, use the free cancellation window to buy yourself confidence—just make sure you’re ready to commit once you’ve chosen your climb.
FAQ
How long is the Kilimanjaro hike on this route?
The trek runs about 8 days.
Where does the climb start and what gate is involved?
The climb starts at Londorossi Gate on the western side of Kilimanjaro at an altitude of 2,360 metres.
What are the highest points you’ll reach on the hike?
The itinerary includes Stella Point (5,756 m) and Uhuru Peak (5,895 m) on the summit day. It also lists Lava Tower (4,640 m) as the highest point for Day 4.
Is emergency oxygen included?
Yes. The package includes emergence (emergency) oxygen and a first aid kit.
Is treated water provided during the trek?
Yes. Treated water is provided through the trek.
What camping gear is included?
Camping equipment is provided, including sleeping tents, sleep pads, sleeping bags, and table and chairs.
Is pickup offered, and how do you get to the trailhead?
Pickup is offered. On Day 1, you’ll be picked up at your hotel around 8:00 am and transferred to Lemosho Gate.
Is the visa included in the tour price?
No. The visa is listed as not included, with a cost of $50 USD.
What’s the group size limit?
The tour has a maximum of 20 travelers.