REVIEW · ARUSHA
Lemosho Route 7 Days Trekking at Mount Kilimanjaro
Book on Viator →Operated by Suricata Safaris · Bookable on Viator
Kilimanjaro feels personal on the Lemosho route. This 7-day trek with Suricata Safaris is interesting because it runs on a less-crowded path and you climb through rainforest, moorland, and alpine desert instead of just grinding the same few trails. I also like the practical support built into the plan: you’ll have a certified guide and a team that’s experienced enough to guide you calmly through the steep bits, including guides such as Mike and Freddie.
The one catch is that even with good pacing, summit day altitude is tough. Multiple recent groups reported rain and wet trail conditions, and you still have to wake up for the midnight start, climb to Uhuru Peak (5895m), then descend the same day.
In This Review
- Quick highlights: what matters most on this 7-day Lemosho climb
- Why the Lemosho Route is a smart fit for 7 days
- Arusha to the Londorossi Gate: first steps at 2100–2750m
- Shira One Camp at 3500m: a steep day you should treat with respect
- Lava Tower and Barranco Camp: acclimatization that feels like a mini adventure
- Barranco Wall to Karanga Camp: the day your legs feel the terrain
- Barafu Camp at 4600m: waiting in the cold for the big push
- Midnight summit to Uhuru Peak, then down to Mweka: the day you’ll remember forever
- Day 7 to Mweka Gate and Jevas Hotel: finishing with relief and a certificate
- Suricata Safaris: what the guide team support looks like in real life
- Price and value: is $2,800 fair for 7 days up Kilimanjaro?
- Who should choose this trek, and who might rethink it
- Should you book Suricata Safaris for the 7-day Lemosho route?
- FAQ
- Where is the trek based?
- How long is the Kilimanjaro Lemosho trek?
- What route is this tour using?
- How much does it cost?
- What’s included in the cost?
- What is not included?
- How many people are in the group?
- What is the summit point?
- Is this trek suitable for beginners?
- What happens after you reach Mweka Gate?
- What’s the cancellation window for a full refund?
Quick highlights: what matters most on this 7-day Lemosho climb
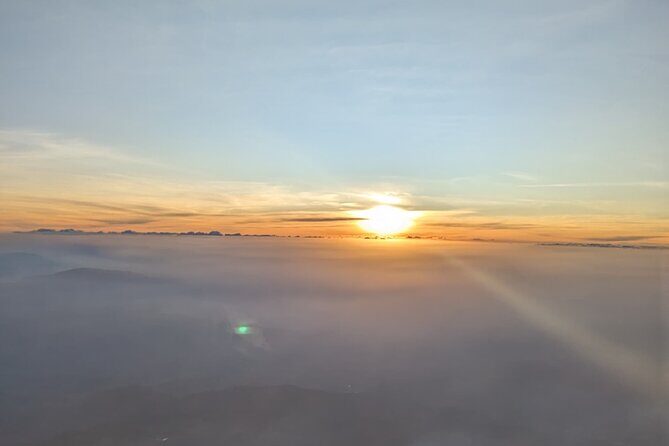
- Lemosho Route, fewer crowds by design: you’re on a quieter approach that still gives you strong acclimatization time.
- Clear altitude progression: camps at 2750m, 3500m, 3940m, 4000m, 4600m, then the big push to 5895m.
- Acclimatization stops that aren’t just a checkbox: Lava Tower (4600m) on Day 3 helps your body prep for the higher camps.
- Experienced guide teams: guides like Freddie, Mike, and Modest are named in recent feedback for professionalism and steady leadership.
- Meals are handled for you: breakfast, lunch, and dinner are included across most days, so your focus stays on hiking.
- You finish with a certificate and a proper landing in Arusha: Mweka Gate wrap-up plus transfer to Jevas Hotel in Arusha.
Why the Lemosho Route is a smart fit for 7 days
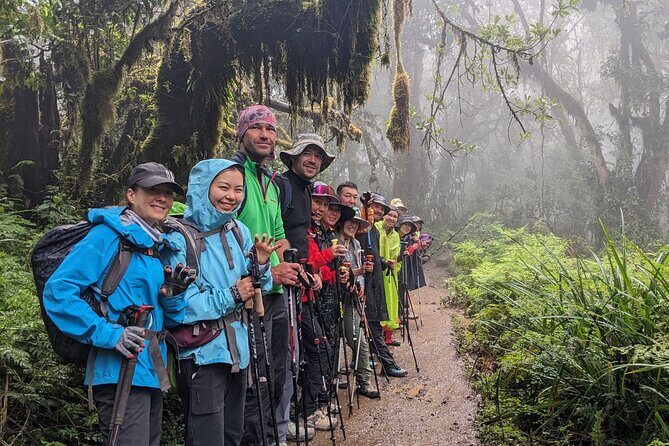
The Lemosho Route works for many hikers because it’s not only about “getting higher.” It’s about timing your body to handle altitude changes. Over 7 days, you get multiple nights at meaningful elevations, which gives you repeat chances to recover between climbing efforts.
You also avoid the common trap of feeling like the mountain is one long, continuous punishment. This itinerary breaks the climb into blocks: rainforest start, Shira ascent, Lava Tower acclimatization, Barranco Wall, then Barafu and summit push. That structure matters because Kilimanjaro doesn’t care how confident you feel on Day 1—altitude is the real boss.
Finally, Suricata’s group size maxes at 8 travelers, which is usually a good sign for getting attention when you need it (especially on the steep and cold parts). You may still meet more porters and cooks around you, but the hiking party stays small.
You can also read our reviews of more hiking tours in Arusha
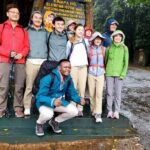
Arusha to the Londorossi Gate: first steps at 2100–2750m
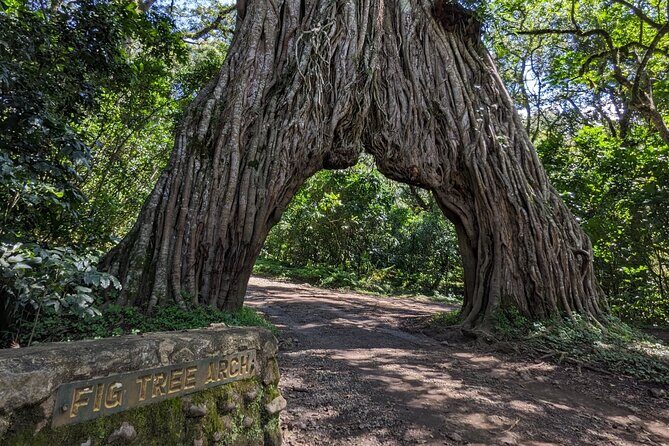
Day 1 starts in Arusha with travel in a 4×4 Land Cruiser/Land Rover to the Londorossi Gate (2250m). You’ll register and pay for the permit there, then continue to the Lemosho starting point at 2100m. This is a good moment to understand the rhythm of the trip: paperwork happens early so the hike can start clean.
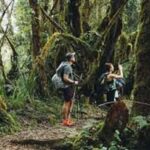
From the trailhead, you do a 6 km rainforest climb to Mti Mkubwa Camp (Big Tree Camp) at 2750m. The schedule says about 3 hours and roughly 650m of ascent. That first day is long enough to feel like you’ve started, but it’s not the kind of day that destroys your legs before altitude even has a chance to work on you.
What I like about this start: the rainforest section is a reality check. Your hiking pace matters more than speed here. If you go out too fast on Day 1, you’ll feel it later—usually on summit day, when you’re standing in the cold trying to make your legs do math.
Possible drawback: Day 1 is warm and humid compared to higher zones, so you may sweat early even when it feels comfortable. Plan to keep your pace steady and resist the urge to “catch up” to people who are moving faster.
Shira One Camp at 3500m: a steep day you should treat with respect
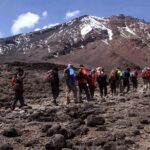
Day 2 takes you from the rainforest into heath and moorland, then up to Shira One Camp at 3500m. You cover about 13 km and gain around 1100m, with roughly 6 hours on the move.
That’s the kind of day where your mind tries to bargain. You’ll feel like you’re taking forever, then you’ll look up and realize the numbers are real. This is where I’d focus on controlled effort: short steps, steady breathing, and constant checking of your comfort level.
I also like that the plan doesn’t pretend this day is easy. It’s steep enough that managing pace becomes part of altitude safety. If you’re someone who gets impatient, you’ll need to practice being calm. Kilimanjaro rewards consistency.
Tip that helps here: if you’re using trekking poles, this is a day to use them confidently on uneven ground. Poles reduce the stress on knees during long climbs, especially when you’ll be descending later.
Lava Tower and Barranco Camp: acclimatization that feels like a mini adventure
Day 3 is one of the itinerary highlights because you’re not just hiking “up.” You go to Lava Tower (4600m) for acclimatization, then continue on to Barranco Camp (3940m). The hike is listed around 6–7 hours and about 10.75 km, with picnic lunch included.
You’re likely to feel altitude most on the approach to Lava Tower. That’s normal. What matters is how your body reacts when you stop. Many hikers do better on this route if they treat Lava Tower as a goal but not a sprint.
Then comes the Barranco Camp piece: even though you’re moving down in elevation to 3940m after Lava Tower, the day still counts as a major altitude experience because you’ve been high and forced your body to adapt.
From a “what to expect” angle: mornings can be cold, afternoons can be changeable, and the air can feel thin even when the climb isn’t brutally steep. Keep water and snacks frequent, because hunger plus altitude is a combo that can sneak up on you.
Barranco Wall to Karanga Camp: the day your legs feel the terrain
Day 4 starts with the Barranco Wall climb up to Karanga Camp (4000m). This segment is listed as a 3–4 hour day and only about 4.25 km, which is short on paper—but short hikes on Kilimanjaro can still be hard.
The plan also includes hot lunch upon arrival, plus rest and an acclimatization walk. I like that this day builds in recovery time. It’s a reminder that you’re not just moving forward; you’re preparing for Barafu and summit night.
Why Barranco Wall is such a memorable moment: it’s where many hikers realize that Kilimanjaro is as much about foot placement and balance as it is about breathing. If you’ve only trained for “distance,” you might still do fine—but you’ll likely feel it here.
If you tend to panic when a trail looks steep: keep your gaze a few steps ahead and use your poles (if you’ve trained with them). Small, controlled movement wins.
A few more Arusha tours and experiences worth a look
Barafu Camp at 4600m: waiting in the cold for the big push
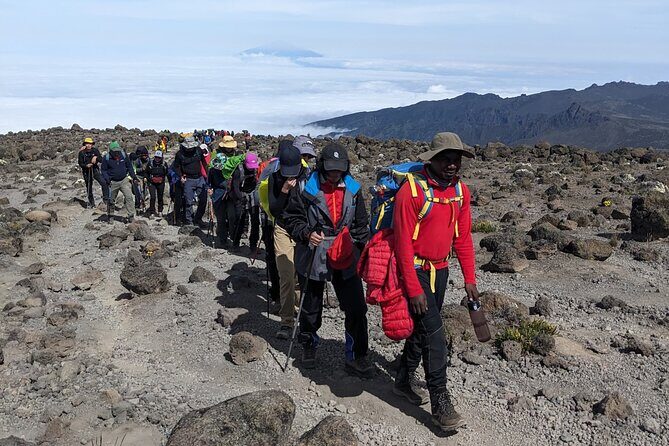
On Day 5, you climb from heath and moorland up to Barafu Camp (4600m). The trek is around 3–4 hours, 4.25 km, and about 600m of ascent, then you get hot lunch, rest, and an early dinner before sleeping for a few hours.
Barafu is often where people start noticing the emotional side of altitude. You’re high, you’re tired, and you can feel the summit day looming in the background. That’s normal. The goal is not to be brave. The goal is to show up to the midnight climb with enough energy left for steady movement.
Practical advice: on this evening, I’d focus on warmth management. Layering matters. Even if you feel fine when the sun is out, summit conditions can be brutally cold.
Midnight summit to Uhuru Peak, then down to Mweka: the day you’ll remember forever
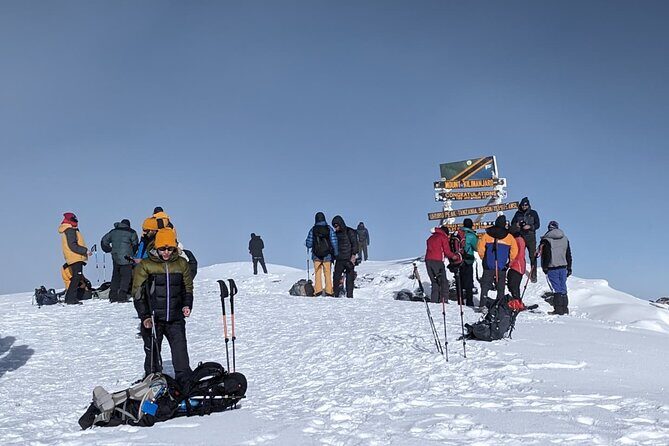
Day 6 is the summit day, starting around 12:00 am. You’ll pack essential items, take hot drinks and snacks, then begin the ascent to Uhuru Peak (5895m).
The climb is listed as 6–7 hours, about 4.86 km, and roughly 1295m of elevation gain. After summiting, you descend back to Barafu Camp for breakfast in about 3 hours, then you rest and have hot lunch. After that, you continue the descent through alpine desert, heath, and moorland to Mweka Camp at 3100m.
The full descent route from Uhuru Peak to Barafu and then to Mweka is listed as 11.5 km with a total altitude decrease of 2795m.
This is where your body needs a plan more than motivation. You’ll likely move slowly on the way up, and that’s exactly right. The “summit” isn’t achieved by speed. It’s achieved by refusing to stop too early and keeping your rhythm.
What I find comforting: the itinerary doesn’t end at the summit. It sends you down to Mweka the same day, which can help reduce the stress of facing multiple days of descent at altitude. Still, it’s a long day. Even if you feel strong, you’ll feel it.
Also, watch for the emotional swing. Summit success can be euphoric, then the next few hours turn physical fast. Keep hydrating and follow your guide’s pacing. If your guide tells you to slow down, it’s not a vibe check—it’s altitude math.
Day 7 to Mweka Gate and Jevas Hotel: finishing with relief and a certificate
After breakfast, Day 7 is the trek to Mweka Gate (1800m) through rainforest for about 3–4 hours. You cover 9.1 km with a descent of about 1400m.
If you successfully summited, you’ll receive a certificate at the gate. Then you’ll meet your vehicle and be transferred to Jevas Hotel in Arusha.
This day can feel almost too easy compared to the summit day—until you remember what “easy” really means at altitude. Your legs will likely be tired. The rainforest trail may feel cooler and damp, and that can be slippery depending on conditions.
I like that there’s a clear finish line. You’re not stuck hiking “just one more thing.” Once you reach Mweka Gate, your job is done.
Suricata Safaris: what the guide team support looks like in real life
From recent feedback, the Suricata team gets praised for professionalism and a steady, caring presence. Guides named include Mike and Freddie, and other groups mention Freddy and Modest as key people on the mountain. That kind of repetition matters: it suggests continuity of leadership, not a random rotation every time.
You also tend to get more crew behind the scenes than you’d expect if you only picture “one guide and you.” In one described group, there was a guide team (Freddie and Mike), plus a cook and 9 porters for a group of 3. Another group described a larger total presence (around 25 people overall), while still keeping the trekking group itself small.
What you care about as a hiker: a good crew keeps the logistics smooth so you don’t burn energy worrying about the basics. Your job stays simple—eat, hydrate, move safely, rest when told, and follow the pacing.
Price and value: is $2,800 fair for 7 days up Kilimanjaro?
At $2,800 per person, this isn’t a budget trip. But it also isn’t just a “guide walks with you” deal. The itinerary includes a certified guide, breakfast (6), lunch (7), and dinner (6), and park entry via admission ticket included across the days listed. The permit payment is handled at Londorossi Gate on Day 1.
When you compare costs, you should ask what’s doing the heavy lifting:
- You’re paying for multiple days of high-altitude logistics (camps, route planning, and time built for acclimatization).
- You’re paying for trained leadership during the most dangerous phase: the summit night and summit push.
- You’re paying for the included meals that keep your energy consistent.
What’s not included matters too: international flights and departure taxes are not included, and neither is medical, travel, or luggage insurance. That’s normal for trekking companies, but it’s on you to budget for it.
For value seekers: if you want the quieter Lemosho approach, a structured acclimatization plan, and a small max group size, this pricing is in line with what you’d expect for a guided 7-day climb with real support.
Who should choose this trek, and who might rethink it
This 7-day Lemosho trek is best for you if:
- You have moderate physical fitness and you’re comfortable with multi-hour hikes on uneven terrain.
- You want a route that gives your body time to adapt (not just a fast smash to the summit).
- You prefer a smaller trekking group experience (max 8 travelers).
You might rethink if:
- You’re expecting a relaxed hike where the summit day feels optional. It isn’t.
- You hate cold and you’re not willing to layer and manage your warmth.
- You’re not planning around altitude risk seriously. Even with good guides, summit day is still a demanding climb.
Also, if rain is a big concern for you, go in with the mindset that wet conditions can happen. Recent experiences included heavy rain during parts of the trek, and wet trails change the hike from “hard” to “hard and slower.”
Should you book Suricata Safaris for the 7-day Lemosho route?
I’d book this trek if you want the Lemosho approach with a team that’s been doing the job for real—not just once in a while. The biggest reasons are the built-in acclimatization rhythm, the small max group size, and the fact that guides like Freddie, Mike, and Modest show up repeatedly in positive feedback for professionalism and steady support.
I’d hesitate if you’re fragile about weather, or if you’re the type who underestimates summit day. This is still Kilimanjaro: long hours, cold air, and altitude effects you can’t “out-train.”
If you want one clear checklist before booking: train for steady hiking, practice using trekking poles if you’ll bring them, and plan your packing for cold. On Kilimanjaro, gear and pacing are often the difference between suffering quietly and suffering with surprises.
FAQ
Where is the trek based?
The experience starts and ends in Arusha, Tanzania, with transport arranged to and from Kilimanjaro National Park.
How long is the Kilimanjaro Lemosho trek?
It runs for 7 days (approx.).
What route is this tour using?
This trip uses the Lemosho Route to climb Mount Kilimanjaro.
How much does it cost?
The price is $2,800.00 per person.
What’s included in the cost?
You get a certified guide and meals (breakfast 6, lunch 7, dinner 6). The admission ticket is included, and you also have pickup offered and a mobile ticket.
What is not included?
International flights & departure taxes are not included, and medical, travel & luggage insurance are not included.
How many people are in the group?
The trek has a maximum of 8 travelers.
What is the summit point?
The summit is Uhuru Peak (5895m).
Is this trek suitable for beginners?
It says travelers should have a moderate physical fitness level, so it’s not positioned as a beginner stroll.
What happens after you reach Mweka Gate?
After the final trek to Mweka Gate (1800m), you’ll receive a certificate if you summited, meet the vehicle, and get transferred to Jevas Hotel in Arusha.
What’s the cancellation window for a full refund?
You can cancel up to 24 hours in advance for a full refund. If you cancel less than 24 hours before the start time, the amount paid is not refunded.