REVIEW · MOSHI
Kilimanjaro climb, Rongai Route (7-day)
Book on Viator →Operated by Altezza Travel · Bookable on Viator
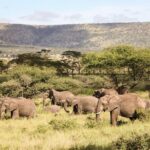
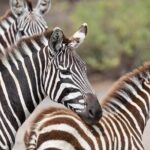
Rongai climbs feel quieter. This 7-day Kilimanjaro climb from the northern side pairs a least-crowded Rongai Route vibe with steady acclimatization, big changes in altitude and weather, and a real support team that keeps you moving with less guesswork. You’ll cross forest, moorland, rocky semidesert, and then the icy summit zone.
What I like most is how much attention you get day to day. The operator includes certified medical-style support (including Wilderness First Responder guides), plus practical gear like oxygen tanks and oximeters, so you’re not left to wing it if someone starts feeling off. Another big plus is the camp setup: walk-in tents, branded group equipment, and three meals a day with drinks included on the mountain.
One consideration: the last push is long and cold. Summit night is physically demanding even with a moderate gradient, and the descent is where you need to be extra careful because most accidents happen while going down. Also, you’ll need to bring or rent key personal gear, since it isn’t included.
In This Review
- Key things that make this Rongai climb stand out
- Rongai Route: why the northern side feels different
- Moshi arrival and Aishi Machame Hotel: use the comfort before the climb
- Nalemuru Gate to Simba Camp: your first altitude jump, done at a manageable pace
- Second Cave Camp to Kikilewa: the acclimatization hike that earns its keep
- Kikilewa Camp as a relief day: Kibo views when the clouds cooperate
- Mawenzi Tarn Camp and acclimatization around Mawenzi
- Kibo Summit Camp (4,700 m): the shift to rocky semidesert
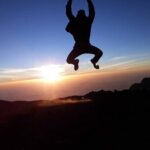
- Summit night to Uhuru Peak (5,895 m): slow steps, hard hours
- Descent to Horombo and down to Marangu Gate: protect your step
- Camps, food, and medical support: the practical comfort layer
- Price and value: is $3,507 worth it for Rongai?
- Who should book this Rongai 7-day climb
- Should you book Altezza Travel for Kilimanjaro via Rongai?
- FAQ
- What’s included for the airport transfers?
- Where do you start the climb in the national park?
- What are the overnight accommodations like on the mountain?
- Do you provide medical support and oxygen?
- What about meals and drinks during the hike?
- Is personal hiking gear included?
- How many nights do you stay in the hotel?
Key things that make this Rongai climb stand out
- Northern approach via Nalemuru Gate (2,020 m) for a quieter start than many popular routes
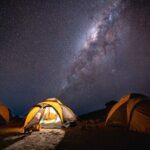
- Walk-in camp tents (North Face VE-25) and camp crews that set up your home each night
- Daily acclimatization that’s built in, including short hikes with small altitude gains
- Summit support with a tight guide-to-climber ratio during the steepest hours
- Oxygen tanks, oximeters, and medical kits included for safety management
- Comfort before and after: two nights in Aishi Machame Hotel plus airport transfers
Rongai Route: why the northern side feels different
The Rongai Route has a reputation for being less crowded and more scenic, and the way this itinerary is paced matches that. You start on Kilimanjaro’s northern entrance at Nalemuru Gate, then you climb into progressively higher zones where conditions can flip fast.
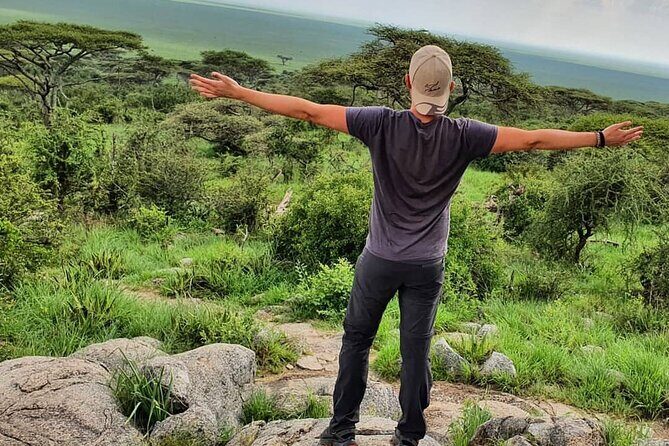
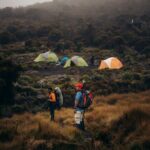
Early on, you move through conifer forest and then into higher camps where the air gets thinner. Later, the terrain shifts toward rocky semidesert, and by the time you’re in summit country, it’s about cold, thin air, and disciplined pacing. That “climate changes as you climb” part is a big deal because it means you’re planning for multiple weather realities, not just one kind of hiking.
This also matters for beginners. The overall structure includes days that are meant to help your body adjust, not just add mileage. The rhythm is: treks to higher camps, short acclimatization hikes, then time to rest. That’s the difference between pushing altitude every day and actually giving yourself a chance.
A few more Moshi tours and experiences worth a look

Moshi arrival and Aishi Machame Hotel: use the comfort before the climb
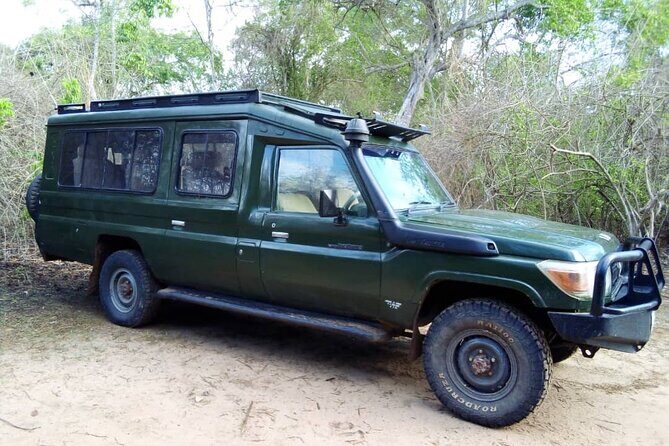
Your trip includes pick-up at Kilimanjaro International Airport (JRO) and transfers by ground, plus two nights at Aishi Machame Hotel. You check in on arrival day (check-in starts at 2:00 PM), and there’s time for a briefing in the evening so you start the mountain knowing what to expect.
This is more than “nice-to-have.” Good pre-climb sleep and a calm check-in reduce stress when you’re about to hike for hours at higher elevations. The hotel also helps with practical stuff: you can double-check gear, organize layers, and make sure you understand how the first park day works.
After you finish, you get a recovery window back at the hotel, then transfer to the airport. In other words, you’re not forced into straight-to-travel mode while your legs are still cooked.
Nalemuru Gate to Simba Camp: your first altitude jump, done at a manageable pace
On day one of the climb, you meet your mountain guides and crew before setting out for Kilimanjaro National Park’s northern entrance at Nalemuru Gate (2,020 m). The head guide handles permits and search-and-rescue registration, which is one less admin headache for you.
Then comes the first trek: through coniferous forest of the northern slope to Simba Camp (up to 2,625 m). This part is described as moderate and takes around 5 hours. For most people, that’s a good “warm start,” because you’re testing your breathing and energy while still walking in a more forgiving environment than summit night.
Practical tip: don’t treat this as the day you prove fitness. The itinerary repeatedly stresses pace control from the start, and you’ll feel why soon. Even if the trail isn’t steep, the altitude is still doing work.
Second Cave Camp to Kikilewa: the acclimatization hike that earns its keep
After breakfast at Simba Camp, you head toward Second Cave Camp (3,480 m). The route is listed as fairly easy and takes about 3 hours, which gives you a useful pattern: you can arrive, settle, and still have time that doesn’t revolve around scrambling for camp logistics.
Then you build acclimatization into the climb rather than waiting for the summit day to pay the bill. After lunch at Second Cave, you do an easy acclimatization hike toward Kikilewa Camp (3,630 m) with about a 100-meter gain, then you hike back down to Second Cave. That short “up a bit, then back down” format is a smart way to help your body adjust without exhausting you.
You’ll also get a rest-and-view day later, but this phase is the first time the itinerary starts acting like a plan for biology, not just a checklist.
Kikilewa Camp as a relief day: Kibo views when the clouds cooperate
From Second Cave, the next trekking day leads you to Kikilewa Camp (3,630 m). This is framed as a relief day, and it includes time to rest after lunch.
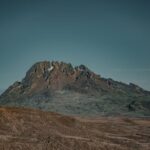
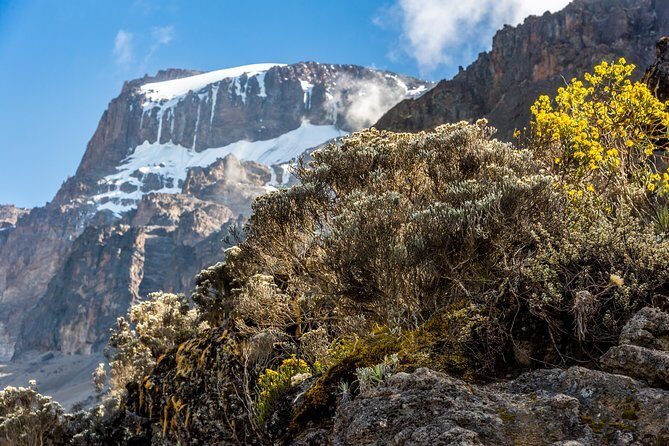
One nice perk here is the chance to see Kibo Volcano at its finest, assuming weather cooperates. On Kilimanjaro, that’s never guaranteed, but the fact that the itinerary places viewpoints where the air and angle make spotting more likely is still a good sign.
In the evening, your guide checks health conditions across the group and gives instructions for the next trekking day. That matters because altitude issues aren’t always obvious until you’re already deep into the climb. A quick check-in can help keep mild symptoms from turning into bigger problems.
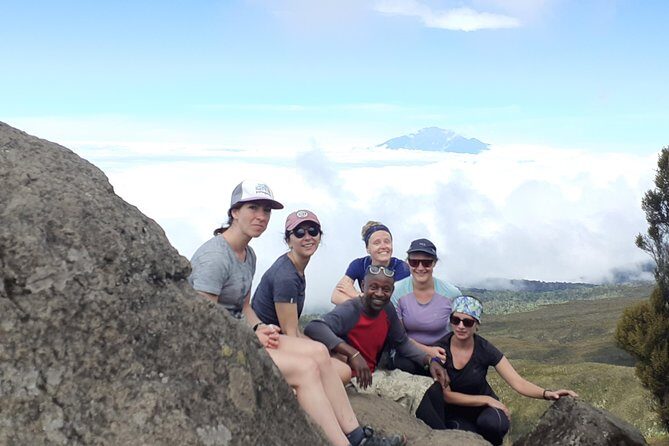
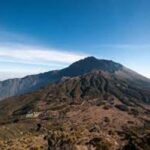
Mawenzi Tarn Camp and acclimatization around Mawenzi
Next you move toward Mawenzi Tarn Camp at the foot of Mawenzi Volcano. This day includes a trek, lunch at camp, then a two-hour rest period, followed by a short acclimatization hike with a 200-meter gain toward Mawenzi Volcano, then back down to camp.
This keeps the pattern consistent: climb, rest, small altitude bump, return. It’s the kind of structure that helps both beginners and experienced hikers who want a smoother approach.
Expect the day to feel “active but not reckless.” The climb to the next camp still takes effort, but the included rest and the controlled acclimatization hike take some of the pressure off. If you’re the type who wants a schedule that feels logical rather than random, you’ll probably appreciate this.
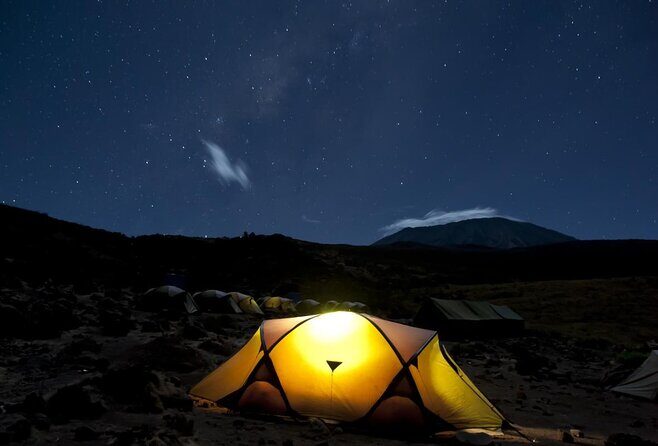
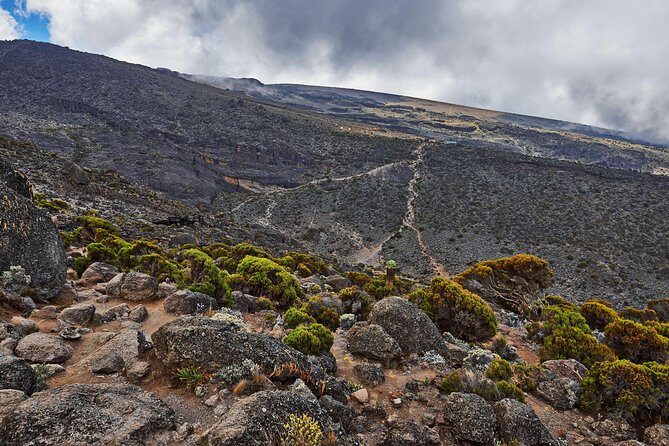
Kibo Summit Camp (4,700 m): the shift to rocky semidesert
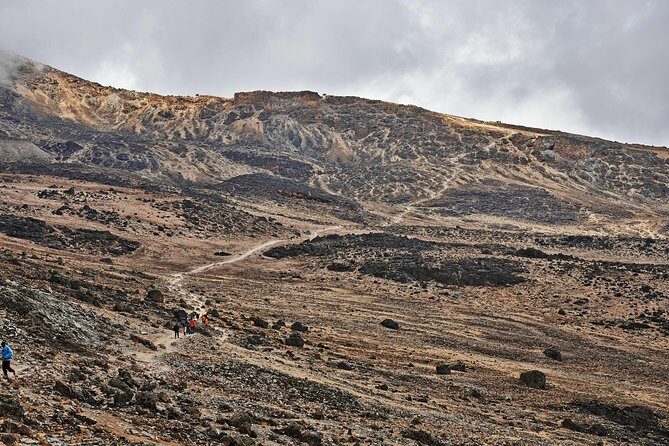
From Mawenzi Tarn, you trek toward Kibo Summit Camp (4,700 m). The description notes a significant landscape change to rocky semidesert. The trekking itself is said to be not very difficult, but this is still a key altitude moment.
The main point is: your legs may not feel like they’re doing a huge workout, but your body is still adjusting to thinner air. The instruction here is to keep an appropriate pace, sleep well, avoid strenuous activity, and drink as much as you can because that night is when you ascend Uhuru Peak (5,895 m).
This is also a moment where you’ll appreciate having oxygen and medical support part of the package. It doesn’t mean the summit is easy, but it means the team is prepared to manage risk rather than just hope for the best.
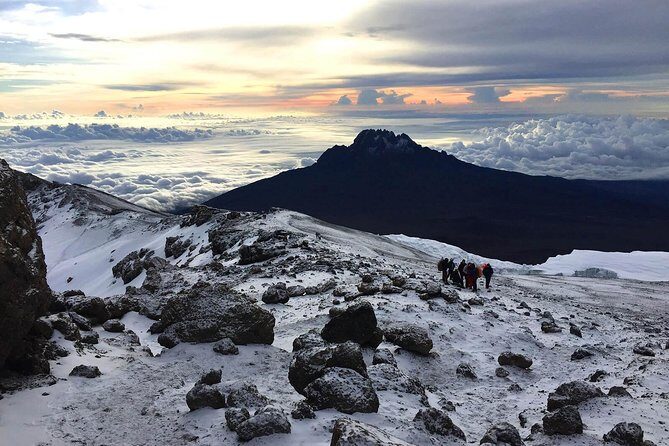
Summit night to Uhuru Peak (5,895 m): slow steps, hard hours
This is the part of Kilimanjaro that separates “tall hike” from “real climb.” You depart School Hut Camp at about 4,715 m at night, then trek to Uhuru Peak (5,895 m). The itinerary notes that the strain is more on your cardiovascular system than your muscles, even with a moderate gradient.
What you’ll feel: you walk slowly, but your body keeps asking for more. You’ll likely notice breathing rhythm and heart rate more than leg burn. That’s normal up here.
The operator assigns one guide to every two climbers during this part. That’s a big deal for safety and morale. You’re not floating in a crowd; you’re being watched and coached closely. It also matches how people describe the team in real life: strong support from guides on the toughest hours.
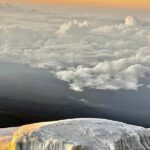
Upon reaching the summit, you can undertake a walk on the nearest glacier. Conditions vary with weather, so treat it as a possible bonus, not a guaranteed checkbox.
Descent to Horombo and down to Marangu Gate: protect your step
After summit night, you descend to Horombo Camp at 3,720 m. There’s a two-hour rest stop at Kibo Camp during the descent, which helps you reset before continuing down.
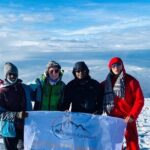
Then you make the final descent to Marangu Gate (1,860 m) after breakfast. The stop at the gate is a good moment to exchange impressions with your support crew, and you receive certificates of achievement at the offices before being driven back to your hotel.
A key warning included in the plan is blunt: 9 out of 10 climbing accidents happen on the way down. That’s why descent technique matters. Keep your footing careful, use trekking poles if you have them, and don’t rush because you feel like you earned speed.
Camps, food, and medical support: the practical comfort layer
This climb is run with a full crew system: porters, camp masters, cooks, and guides. Your tents are North Face VE-25 walk-in tents, with two hikers per tent (single accommodations cost extra). This is not “roughing it” in the dark-ages sense. It’s camping that’s designed to keep you sheltered and functional.
Meals are planned three times per day, and the itinerary includes energy-rich food plus drinks (tea, coffee, juices, soda, and more) on the mountain. Vegetarian, gluten-free, halal, and other meal options are available, which helps if you have dietary needs.
For safety, oxygen tanks and oximeters are included, plus medical kits and medical check-ups. Guides are certified Wilderness First Responder guides, so you get trained field support rather than just a friendly person with a compass.
From past group experiences with this operator, you may see the team add personal touches too, like extra friendliness in the mornings and thoughtful care with hydration. Some climbers even described celebrations like birthday cakes arranged at the first camp. Those moments don’t change the physics of Kilimanjaro, but they do help morale when you’re tired.
Price and value: is $3,507 worth it for Rongai?
At $3,507 per person, this is a premium price, but the value sits in the details they include. You’re paying for a full support operation: tents, camp gear, meals and drinks, airport transfers, permits and fees, and trained guides plus wilderness medical support. You’re also paying for the fact that your trip isn’t just “walk and hope.” Oxygen equipment and medical kits are part of the package, and that reduces uncertainty.
It’s also important to know what’s not included, because it affects your final budget:
- Personal equipment and hiking gear (sleeping bag, boots, and other items you need for the climb) are not included, though hire is available
- Insurance for altitude trekking up to the relevant heights and helicopter evacuation is highly recommended but not included
- Hotel lunches and dinners aren’t included
So the real question for value isn’t only the headline price. It’s whether you’re booking a full, handled system or you’re going to add major costs for gear and insurance anyway. If you already own solid cold-weather hiking gear, you’ll likely feel better about the total.
Who should book this Rongai 7-day climb
You’ll probably be happy with this itinerary if you:
- Want a less crowded route feel and a clear acclimatization rhythm
- Prefer guided structure over DIY decision-making
- Are aiming for Uhuru Peak with a team that includes medical readiness (oxygen and trained first response)
- Travel with family, solo, or a small group and want a private setup for your group
If you’re very new to hiking, the itinerary still demands stamina, but the pacing and built-in acclimatization hikes can help you make it through. If you’re an experienced hiker, you’ll still find the altitude is the main boss, not the trail difficulty.
Most importantly: this is a climb where your success depends on pacing, hydration, and communication with your guide. If you like to follow plans and accept advice, you’ll match the trip well.
Should you book Altezza Travel for Kilimanjaro via Rongai?
If you want Rongai’s northern route with a professional crew, walk-in tents, and safety gear like oxygen and oximeters included, this looks like a solid choice. The itinerary’s structure around acclimatization is built for real bodies, not just ambitious schedules, and the summit night support with close guide attention is the kind of detail that matters when you’re tired and cold.
I’d only hesitate if you’re not ready for the long summit push, the cold summit-zone conditions, and the need to manage your own personal gear and insurance. Also, because accidents often happen during descent, you need to be willing to go slowly on the way down even when you feel like you’re done.
If that all sounds like you, booking is a sensible move. This is the kind of Kilimanjaro trip where the systems are handled so you can focus on breathing, steps, and enjoying the big moments when the clouds finally peel back.
FAQ
What’s included for the airport transfers?
JRO pickup and drop-off are included, along with all ground transportation.
Where do you start the climb in the national park?
You enter Kilimanjaro National Park at the northern entrance via Nalemuru Gate (2,020 m).
What are the overnight accommodations like on the mountain?
Overnight stays are in walk-in tents on Kilimanjaro (North Face VE-25). The typical setup is two hikers per tent, with single tent accommodation available for an extra charge.
Do you provide medical support and oxygen?
Yes. The package includes medical check-ups, medical kits, oxygen tanks and oximeters, and guides certified as Wilderness First Responders.
What about meals and drinks during the hike?
You get three tasty and energy-rich meals a day, plus drinks on the mountain (tea, coffee, juices, soda, and more). Vegetarian, gluten-free, halal, and other meals are available.
Is personal hiking gear included?
No. Personal equipment such as your hiking outfit and boots, plus your sleeping bag, are not included (gear hire is available).
How many nights do you stay in the hotel?
You get two nights in Aishi Machame Hotel (with check-in on arrival day after 2:00 PM, and checkout at 11:00 AM on the final day).