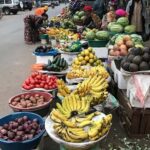
REVIEW · MOSHI
8 Days Climbing Mt.Kilimanjaro (Lemosho Route)
Book on Viator →Operated by Kilimanjaro Wonders Expedition Safari · Bookable on Viator
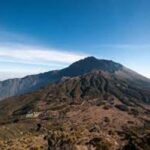
Kilimanjaro is a different kind of hard. This 8-day Lemosho route layers in big altitude acclimatization while also steering you through some of Kilimanjaro’s most scenic zones. I especially like that you start in the forest and gradually work upward, and I also like the day-by-day structure that helps your body adjust. One thing to consider: the booking info you see may list a meeting point in Machame, while the hike actually starts via the Lemosho Park Gate—so you’ll want to confirm the exact pickup and route plan early.
I love that you don’t have to play gear-store roulette. The operator can take you to a local hiking shop so you can rent what you need at fair local pricing, and the trek itself is run with tents, sleeping mattresses, and all mountain meals handled. The possible drawback is money timing and paperwork: the reviews include a few serious complaints about communication and what’s delivered, so you should lock in details in writing (especially payment schedules and what’s included for lodging and gear).
If you’re looking for a serious mountain climb with real support, this plan delivers. Expect organized camp life, porters and cooks, and a summit push that’s demanding but clear in how it’s paced. Just make sure you’re comfortable with cold mornings, thin air, and the fact that weather can force schedule changes on a trek like this.
In This Review
- Key Points Worth Knowing Before You Go
- Why the Lemosho Route Works So Well for Many Climbers
- Your Moshi-to-Mountain Flow (What the Days Feel Like)
- Day 1: Forest Trails to Mti Mkubwa Camp (Getting Your Bearings)
- Day 2: Shira Ridge to Shira 1 Camp (Entering the Moorland Zone)
- Day 3: Shira 1 to Shira 2 (A True Acclimatization Day)
- Day 4: Shira 2 to Barranco Camp (The Lava Tower Route and the Shark’s Tooth)
- Day 5: Barranco to Karanga Camp (Barranco Wall and Switching Toward the Mweka Trail)
- Day 6: Karanga to Barafu Camp (South Circuit Views and Summit Prep)
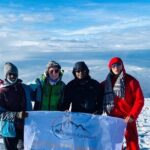
- Day 7: Barafu to Stella Point to Uhuru Peak to Mweka Camp (The Summit Push)
- Day 8: Mweka Camp to Mweka Gate to Hotel (Certificates and Mud)
- Support Crew, Meals, and Camp Life: Where This Trek Looks Strong
- Gear, Rentals, and the Stuff You Actually Need
- Price and Value: Is $2,300 a Fair Deal?
- Safety and Altitude Reality Check (Because That’s the Whole Game)
- Should You Book This 8-Day Lemosho Kilimanjaro?
- FAQ
- FAQ
- What route is this, and where does it start?
- How long is the climb each day?
- What’s included in the price?
- What isn’t included?
- Do I need to arrange gear rentals before the trek?
- Do I need to book hotel nights before and after the trek?
- Is this a private trip?
- What’s the cancellation rule?
Key Points Worth Knowing Before You Go
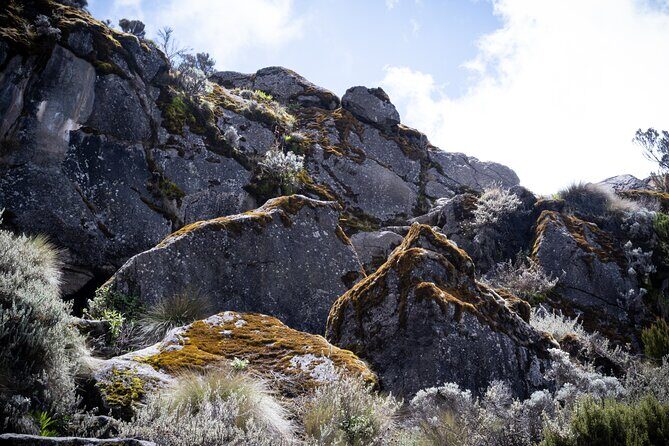
- Forest-to-plateau route design: You start in montane forest, then ease into moorland and alpine desert as you gain altitude.
- Shira Plateau acclimatization: Several days in the 3,500–4,000m zone help your body adjust before the summit bid.
- Summit timing is serious: You head out between midnight and 2am, with the hardest ascent near Stella Point and the crater rim.
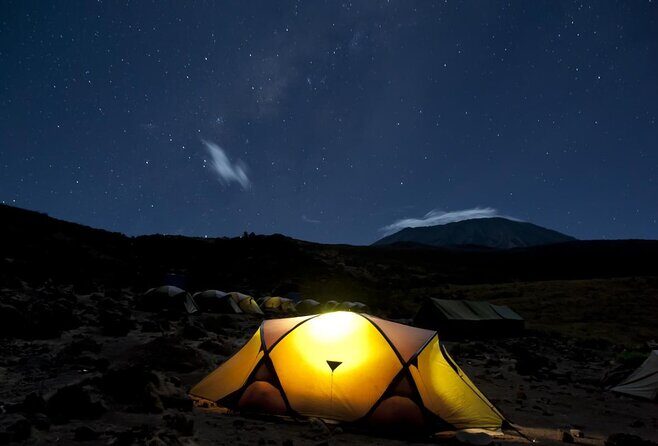
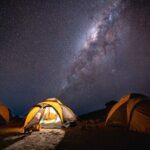
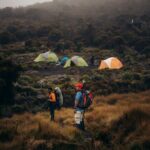
- Camp comfort is included: Tents, sleeping mattresses, a mess tent, and hot meals are part of the package.
- Small-group feel: The trekking format is described as small groups and even your private group setup matters for the vibe.
- Read reviews like a grown-up: Most feedback is positive about guides and support, but a minority report issues with communication and delivery—so verify details.
Why the Lemosho Route Works So Well for Many Climbers
The Lemosho route is popular for a reason: it gives you a long runway. You don’t jump straight into the high tundra. Instead, you work up through distinct ecological zones—montane forest first, then giant heather moorland, then moorland meadows, and later semi-desert and alpine desert. That matters because altitude doesn’t care about good intentions; it responds to pace.
I also like how this plan builds in options to move at your own speed within the route framework. It’s described as small groups and also set up as a private tour/activity, so you’re less likely to feel like you’re stuck in a cattle line. On a mountain like Kilimanjaro, that mental space helps when your body is tired.
One more practical angle: since you’re climbing for multiple days before the summit, you’re not just “enduring” the mountain. You’re learning it—how mornings feel, how wind changes, how your breathing adapts at each zone. That kind of rhythm tends to make the final push more manageable.
You can also read our reviews of more tours and experiences in Moshi.

Your Moshi-to-Mountain Flow (What the Days Feel Like)
This trek is based out of Moshi, Tanzania, and it runs with a pickup option. You’ll typically handle the “human stuff” first: briefing, getting organized, and getting to the trail access point.
Your schedule then settles into a common Kilimanjaro rhythm: breakfast at camp, a hike section that moves you forward (sometimes gently, sometimes not), and a camp setup with meals. The operator includes boiled water on the mountain, plus tents, mattress support, and the staff system that keeps camp functional—guides, porters, and cooks.
You should plan for a reality check on timing. Kilimanjaro days are long even when the hiking time looks moderate on paper, because cold mornings, packing, and camp breaks add up. The plan does a decent job matching hike effort to the altitude gains across the week.
Day 1: Forest Trails to Mti Mkubwa Camp (Getting Your Bearings)
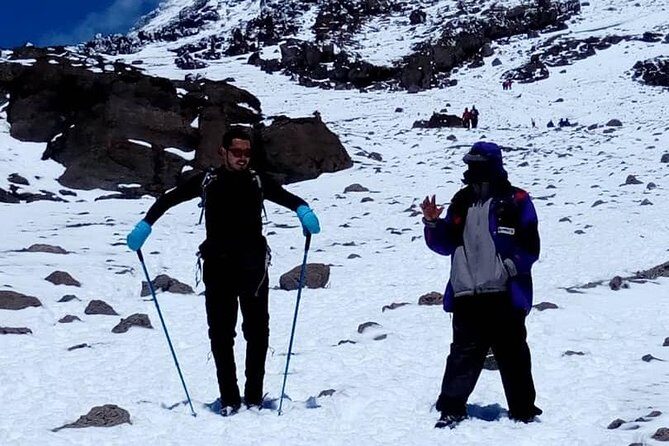
You start by driving from your hotel area to the Lemosho Park Gate, then rolling along a forest track that needs 4WD access. The hiking begins in montane forest, moving toward Mti Mkubwa camp (the big tree campsite). It’s a shorter walk—about 2 to 3 hours over roughly 6 km—so it functions as a warm-up and altitude starter.
The elevation shift is notable: from around 1,830m to about 2,650m. That’s enough to feel it, but not enough to crush you. I like Day 1 because it builds confidence early. You see the mountain’s living side first, not just rock and cold.
Practical tip: take it easy early. Forest walks can feel deceptively comfortable, and it’s tempting to hike faster than you should. You’re training your breathing for the next week.
Day 2: Shira Ridge to Shira 1 Camp (Entering the Moorland Zone)
Day 2 is where the mountain starts changing character. You continue as the trail steepens and you enter giant heather moorland. There are stream crossings, and you move over Shira Ridge before easing down to Shira 1 Camp.
The elevation jumps from about 2,650m to around 3,500m. The hike time is listed around 4 to 5 hours over about 8 km, which is a solid day, especially after Day 1.
I like this stage because it’s where you get those wide, dramatic looks across the plateau region. You’re still early enough to keep your energy fairly steady, but the altitude is rising fast enough that you’ll notice breathing changes.
Potential drawback: if you’re sensitive to altitude, you might feel “winded” even when your pace is slow. Keep your effort controlled and trust the plan.
Day 3: Shira 1 to Shira 2 (A True Acclimatization Day)
Day 3 is an acclimatization day in action. You walk across the plateau to Shira 2 Camp, staying on moorland meadows near a stream. The elevation rises from about 3,500m to 3,850m, with a similar distance (around 8 km) and about 4 to 5 hours of walking.
This is the kind of day that can make or break your summit energy later. It’s not “easy,” but it’s structured so your body has time to adapt. If you tend to push hard early, this is a day where you’ll want to resist that instinct.
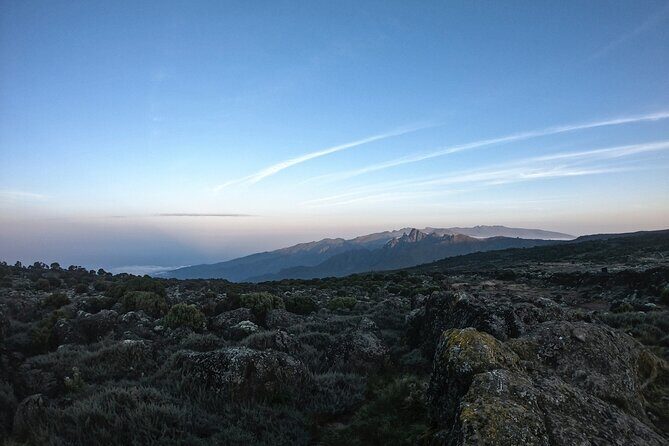
You’ll also get variety from this plateau section. The route description points out that there are different hike options available on the plateau, which is helpful if you’re feeling good one morning and want to move, or if you need to slow down.
Practical consideration: if the weather is thick, plateau days can feel cold and gray. Plan on patience and warm layers.
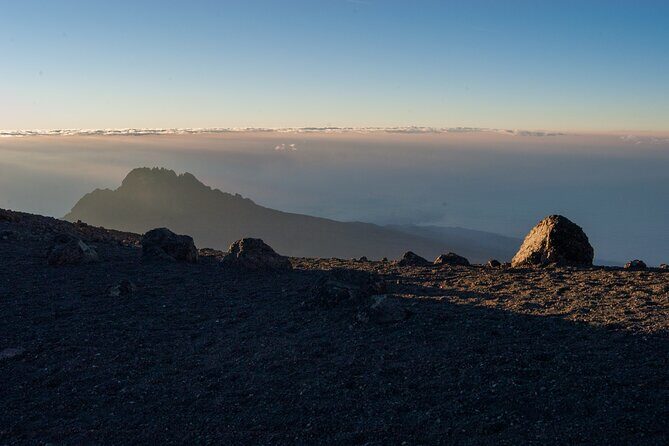
Day 4: Shira 2 to Barranco Camp (The Lava Tower Route and the Shark’s Tooth)
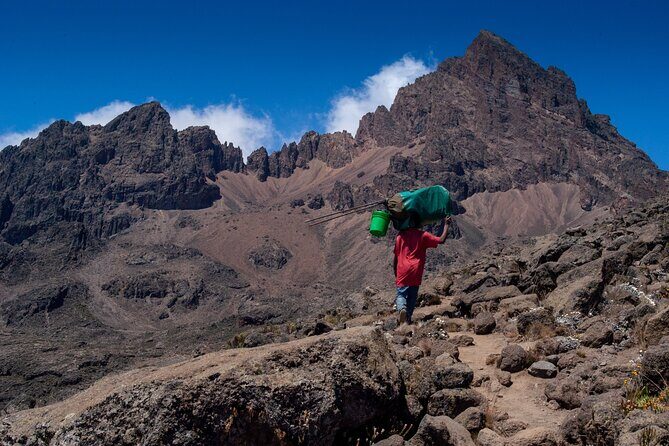
Day 4 is a bigger “mountain moment” day. From the plateau you head east up a ridge, moving toward the direction of Kibo. The route passes junctions and then shifts toward the Lava Tower, described as the Shark’s Tooth (around 4,650m). After that, the trail continues toward the Arrow Glacier junction, and you descend to Barranco Camp.
You end Day 4 at about 4,000m, roughly similar to where you started that day, but that’s the point: you get acclimatization benefits from the altitude excursion without finishing Day 4 at a higher camp. It’s classic altitude logic.
The walking time is listed around 5 to 6 hours over 8 km. That’s where endurance matters—not just speed.
Why this stop is valuable: Barranco is often a mental turning point. You’ve moved through major zones and now you’re moving deeper into the core approach to the summit region.
Possible drawback: the day includes both ascent and descent mechanics, which can feel awkward on tired legs. Trekking poles can help on the down.
Day 5: Barranco to Karanga Camp (Barranco Wall and Switching Toward the Mweka Trail)
After breakfast you leave Barranco and climb the Barranco Wall, then continue on a steep ridge toward the Karanga Valley. This day is shorter on paper—about 3 to 4 hours over 5 km—but it can feel punchy because you’re dealing with steep terrain and thin air.
You go from about 4,000m to 4,050m (around 4,050m at Karanga Camp). That small elevation change isn’t the main story. The main story is movement quality: steep sections challenge your balance and breathing.
This day matters because it connects you with the Mweka Trail junction. It’s part of the route structure that positions you for what comes next.
Practical tip: save your strength. This is not a “race to camp.” The summit is still ahead, and legs that are spent on Day 5 rarely feel better by Day 7.
Day 6: Karanga to Barafu Camp (South Circuit Views and Summit Prep)
On Day 6 you continue up to Barafu Camp. You’ve finished the “South Circuit,” and the big payoff is views of the summit from different angles.
This day is shorter—about 3 to 4 hours and roughly 4 km—but you gain a lot of elevation, from about 4,050m to around 4,700m. That’s a major shift, and it can feel like your body is working harder than the walking distance suggests.
By the time you reach Barafu, it’s time to settle in: rest, dinner, and summit preparation. This is also where the details matter: warm clothes, eating enough (not too much), and conserving energy.
I like that the plan explicitly frames this day as a prep day. That helps you treat it that way, instead of turning it into one more “let’s hike until we drop” day.
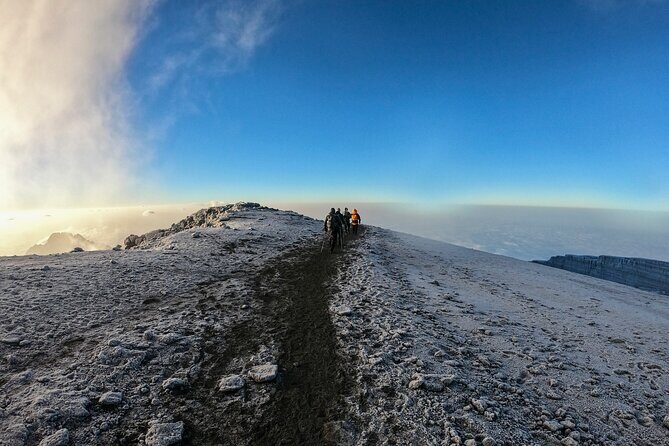
Day 7: Barafu to Stella Point to Uhuru Peak to Mweka Camp (The Summit Push)
This is the big one. You start very early, between midnight and 2am, heading between the Rebmann and Ratzel glaciers. You ascend through heavy scree toward Stella Point on the crater rim.
This is described as the most mentally and physically challenging portion of the trek. Expect cold, fatigue, and a pace that feels painfully slow. That’s normal. Your job is to keep breathing steady and keep moving in a controlled way.
At Stella Point, you stop briefly and usually catch the sunrise. The route description notes that faster hikers may be able to see the sunrise from the summit, but even if you don’t, Stella Point sunrise is often the moment you remember for years.
From Stella Point, there’s another roughly 1-hour push to Uhuru Peak (the summit). The route notes snow can be present all the way to the summit. Once you reach Uhuru Peak, you’ve reached the highest point, and then you descend to Mweka Camp.
Practical consideration: your summit day depends heavily on weather and conditions. If clouds move in or wind ramps up, you may have to adjust your expectations and rely on your guide’s judgment.
Day 8: Mweka Camp to Mweka Gate to Hotel (Certificates and Mud)
Day 8 is descent. You head down to Mweka Park Gate, then receive summit certificates. At lower elevations it can be wet and muddy, and the plan specifically suggests gaiters and trekking poles to help.
Clothing advice is practical: shorts and t-shirts may be enough, but keep rain gear and warmer layers handy because conditions can flip quickly. The hike time is listed about 3 to 4 hours over roughly 10 km.
Once you hit Mweka Gate, a vehicle is waiting to drive you back to Moshi (about 60 minutes). You’ll likely feel drained, but it’s the kind of drained that comes with relief and pride.
One small note: the trek includes entry elements like certificates, but the comfort of your final-day legs depends on how well you managed Day 7 and your hydration and food intake.
Support Crew, Meals, and Camp Life: Where This Trek Looks Strong
This package is built around a full camp team. Included are porters and cook support, along with guides and staff salaries. You also get a mess tent for dining plus mini camping chairs and tables.
Food is all on the mountain, with meals listed daily across the trek. That’s a big deal on Kilimanjaro because eating enough and staying warm can influence how you cope with altitude.
A few guide names show up repeatedly in positive feedback, especially Haji and Mariki, and also other respected crew like Fabian, Moses, Musa, and Jonathan. I also saw praise for support that felt attentive and safety-minded, including mentions of guides with medical knowledge.
Balanced view: there are also negative reports about what’s delivered, including complaints tied to hotel details and gear comfort. So I’d treat “included” as a starting point, not a guarantee of personal comfort. If you have gear needs or expectations, talk them through before you go.
If you want a smoother experience, come prepared to handle cold mornings and accept that camp bathrooms and comfort are basic by nature. The operator’s job is to keep you fed, safe, and moving. Their job is not to make Kilimanjaro feel like a resort.
Gear, Rentals, and the Stuff You Actually Need
One of the most useful parts of the setup is the gear approach. The operator offers to take you to a local hiking store and get you the best prices for rental gear, so you can avoid paying inflated rates later.
Still, this trek does not include your personal gear. That’s where your planning matters most:
- trekking poles and/or gaiters
- cold-weather layers for nights and summit hours
- rain protection
- gloves, hat, and warm socks (especially for the pre-dawn summit push)
What’s included helps, but it’s not everything. You’ll get tents and mattresses, plus cutlery and camp essentials, and boiled water on the mountain. You’re still responsible for the items that keep you comfortable in freezing temperatures and windy ridgelines.
My advice: if you’re unsure, buy less “fashion gear” and more “function gear.” Kilimanjaro rewards reliable insulation and good foot comfort more than it rewards fancy packing systems.
Price and Value: Is $2,300 a Fair Deal?
At $2,300 per person, this trek sits in the “serious expedition” category. The value case is clear: you’re getting qualified guides, porters and cooks, national park fees, rescue fees, pulse oximeters, first aid, tents, sleeping mattresses, and all meals on the mountain.
That means you’re not piecing the cost together yourself, and you’re not negotiating every meal and service on the mountain. You’re paying for a system.
Where value can change for you is in the details of what you expect from lodging and comms. The reviews include strong praise for organization and guide support, with names like Edward popping up in many booking stories. But there are also complaints tied to communication and what was delivered, including concerns about gear comfort at a pre/post hotel.
So here’s the honest math you should do:
- Compare what’s included (it’s broad here)
- Add your likely costs: tips, visa (if applicable), and personal gear
- Confirm pre/post stay expectations, because the data notes two extra nights at Kili Base Hotel are listed separately as $50
If you want value, make sure your “what you thought you booked” matches what you actually receive. That’s how you protect the $2,300 investment.
Safety and Altitude Reality Check (Because That’s the Whole Game)
This trek includes pulse oximeters, first aid, and rescue fees. That’s reassuring on paper, and it’s the kind of equipment that can help teams monitor altitude stress early.
But the mountain still decides the outcome. Kilimanjaro is serious: cold nights, heavy scree, wind, and altitude headaches or worse can still happen. This route is designed with acclimatization days and altitude excursions that make physiological sense.
The best way to use this route plan is to follow it like a tool, not a suggestion. If you feel rough, slow down. If you get a headache, don’t pretend it’s nothing. Your summit effort is only smart if your body can handle it.
Also, note the operational logic: this experience requires good weather, and if it’s canceled due to poor weather, you’ll be offered a different date or a full refund. Weather is part of the Kilimanjaro equation, not an exception.
Should You Book This 8-Day Lemosho Kilimanjaro?
Book this trek if you want:
- a longer acclimatization route with time on the Shira Plateau
- a structured plan with multiple camp nights and clear summit timing
- included mountain logistics that reduce decision fatigue
- a climb run as a small group and, at least by description, as private to your party
Hold off or double-check details if:
- you need ironclad clarity on pickup location (the meeting point info mentions Machame while the trail access is via Lemosho Park Gate)
- you’re picky about comfort levels at pre/post accommodation and want those details confirmed in writing
- you dislike high upfront payment uncertainty, since the reviews include serious complaints about payment and delivery expectations
If you do book, your smartest move is simple: message the operator early and confirm what’s included line-by-line, especially anything involving lodging on the mountain and the pre/post hotel plan. Then gear up based on actual cold-weather needs for a pre-dawn summit.
For many hikers, this route is a solid blend of scenery, acclimatization, and team support. If you treat the mountain seriously and let the route pace you, you’ll give yourself the best shot at a memorable summit day.
FAQ
FAQ
What route is this, and where does it start?
This is an 8-day Kilimanjaro trek on the Lemosho route, with trail access via Lemosho Park Gate and the trek centered around camps like Shira 1, Shira 2, Barranco, Karanga, Barafu, and Mweka.
How long is the climb each day?
Day hiking time varies by day, with some days around 2–3 hours (like the first day) and summit day described as about 6 hours. The plan also includes mornings starting very early on summit day.
What’s included in the price?
Included are qualified guides and mountain crew, national park fees and rescue fees, tents and sleeping mattresses, camp dining setup (mess tent, chairs/tables/candles), boiled water, first aid, pulse oximeters, and all meals on the mountain.
What isn’t included?
Not included are tips for guides/porters/cook/waiters, meals and drinks not specified, gear for your climb, visas, emergency oxygen, and items of personal nature.
Do I need to arrange gear rentals before the trek?
You can ask the operator to take you to a local hiking store to rent gear at good local prices, and then you’ll still need to bring/handle the personal items not covered by the package.
Do I need to book hotel nights before and after the trek?
Two nights of accommodation before and after the trek are listed separately, including a Kili Base Hotel option at $50. The rest of the trekking camps and meals are included on the mountain.
Is this a private trip?
Yes. The experience is described as a private tour/activity with only your group participating.
What’s the cancellation rule?
You can cancel for a full refund if you cancel at least 24 hours before the experience’s start time. If you cancel less than 24 hours before, the paid amount isn’t refunded. Weather issues can lead to a different date or a full refund.