REVIEW · MOSHI
7 days Lemosho route Climbing Mt.Kilimanjaro
Book on Viator →Operated by Kilisa Tours & Safaris · Bookable on Viator
Kilimanjaro is a long game, not a sprint. This 7-day Lemosho route is built around slow altitude gains, big ecosystem changes, and a summit push timed for sunrise. I like that your trip starts with real logistics in Moshi, then eases into the climb through rainforest-to-moorland hiking.
Two things I’d put at the top of the list are the way the schedule builds in altitude “breathing space” (especially around the Shira plateau and Barranco day), and the on-trail teamwork. In past Kilisa treks, guide names such as Bakari, Nickson, Goodluck Mwanga, Abraham, Joseph, Bariki, Oscar, FC, Matthew, and Tammy show up in crew feedback, which gives you confidence you’re not just buying a trek—you’re getting people who know the mountain rhythm.
One possible drawback to plan for: this is not a casual hike. You’ll be camping, walking long hours at high elevation, and the summit night starts around 2am—so you need a strong fitness baseline and patience for cold, thin-air fatigue.
In This Review
- Key points I think you should know
- Moshi pre-game: private transfers and two nights to reset
- Day 1 to Shira: from Londorossi rainforest into moorland views
- Day 2: Shira Ridge and the first big Kibo perspective
- Day 3 on the Shira plateau: acclimatization at altitude
- Day 4: Lava Tower (Shark’s Tooth), Arrow Glacier, and Barranco Hut
- Day 5: Barranco to Karanga Valley, then up to Barafu Hut
- Day 6 summit night: Stella Point sunrise to Uhuru Peak
- Day 7 descent to Mweka Gate and your summit certificates
- Guides and crew: what real support feels like on Kilimanjaro
- Price and value: what $2,850 covers, and what it doesn’t
- What to pack and how to train for this Lemosho rhythm
- Who should book this trek, and who should slow down?
- Should you book this Kilimanjaro Lemosho climb?
- FAQ
- What is the start time for the trek?
- Where does the trek begin and how do you get there?
- What type of accommodation is included during the trek?
- What meals are included?
- What’s included in the price?
- Are flights or travel insurance included?
- What should I expect on summit night?
- What helps on the final descent?
Key points I think you should know
- Lemosho via Londorossi Gate: a steady start with forest walking before altitude gets serious.
- Acclimatization that’s actually built into the route: Shira plateau time plus the Barranco down-then-up pattern.
- High-altitude highlights: Arrow Glacier viewpoints, the Lava Tower (Shark’s Tooth), and Stella Point on the crater rim.
- Summit timing: the plan is to reach Stella Point around sunrise, then continue to Uhuru Peak.
- Small group size: up to 15 travelers, with a full guide/cook/porter team.
- Value extras included: airport-to-Moshi private transfers, two nights in Moshi, park/rescue fees, filtered drinking water, and an emergency first-aid kit.
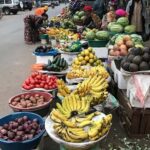
Moshi pre-game: private transfers and two nights to reset
This climb starts in Moshi, and that matters more than people think. You get private transport from Kilimanjaro International Airport to your accommodations, plus another drive back after the trek. That reduces the stress of trying to coordinate rides while your body is still dealing with travel time and nerves.
You also get two nights in Moshi included before the hike. Use that time wisely: hydrate, do a little easy walking, and iron out your packing. Kilimanjaro changes the rules fast—one day you’re planning a route, the next you’re thinking about warm layers and a headlamp.
The tour company’s safety message is direct: they frame safety and comfort as a first priority, backed by local knowledge and experience. You still carry personal responsibility on a mountain like this, but it’s good to see the trip is organized with risk planning in mind.
Practical note: pickup time begins around 8:30 am. If you’re coming from outside Moshi, plan to be ready the night before so you don’t feel rushed.
A few more Moshi tours and experiences worth a look

Day 1 to Shira: from Londorossi rainforest into moorland views
Day one is mostly about getting in place and letting your body wake up to hiking. You depart Moshi for Londorossi Gate (about a four-hour drive), then continue to the Lemosho trailhead for about another hour. After entry formalities, you have lunch and start walking through undisturbed forest.
This is where you’ll feel the style of the route: steady, not frantic. The walking time is roughly 3–4 hours on a first day segment that climbs from about 7,800 ft to 9,500 ft. You’re not racing your breathing; you’re setting a pace you can keep.
The trail then takes you toward the first camp area after a day of forest hiking. Expect a green, humid feel early on, then a gradual shift as the mountain starts changing its “climate personality.” This matters because you’ll likely pack and layer up more than once.
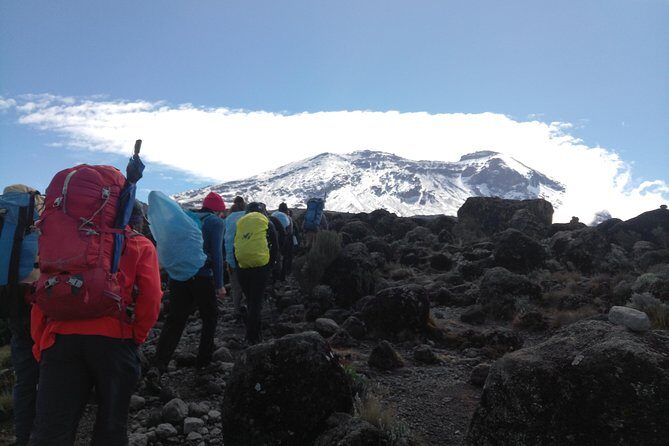
Day 2: Shira Ridge and the first big Kibo perspective
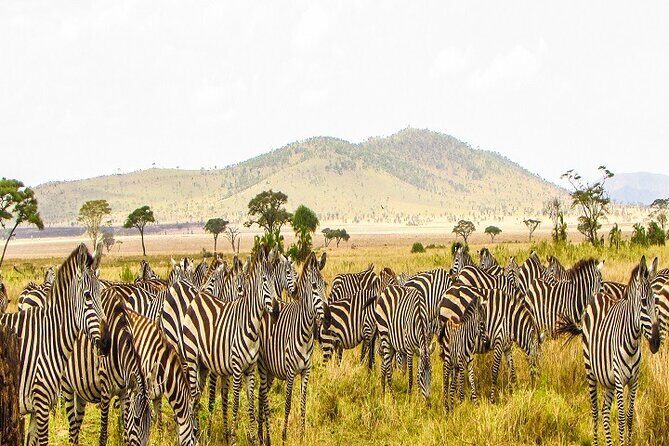
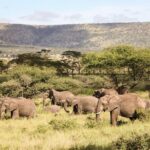
On day two you leave the forest and enter a different world: tall grasses, heather, and volcanic rock with lichen like beards. The route climbs through rolling hills, and you cross streams along the way. Then you reach Shira Ridge, with a dramatic moment: the view of Kibo from the plateau across the way.
You’ll walk longer here—about 5–6 hours—and gain altitude from about 9,500 ft to 11,500 ft. That longer day is a good test of whether you can keep a calm pace. Your goal is not to feel heroic. Your goal is to still feel steady when the air thins.
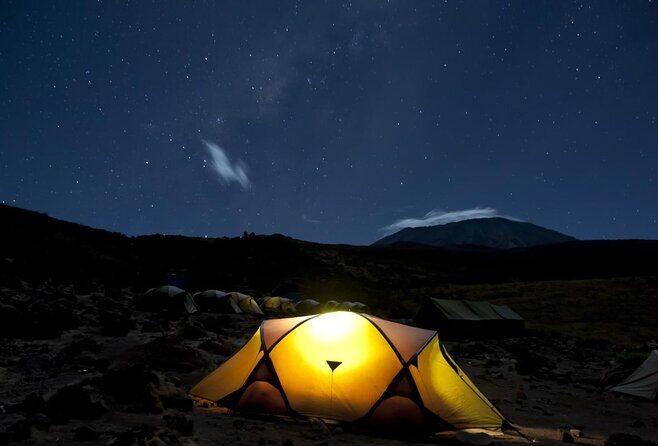
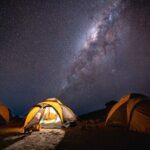
At the end of the day, you settle into Shira 1 camp and sleep in moorland conditions. That’s the first time you’ll really notice cold creeping in at night, even if you started the day warm.
Day 3 on the Shira plateau: acclimatization at altitude

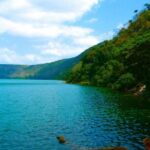
Day three is a “slow day” in the best sense of the word: it’s not short, but it’s paced for acclimatization. You spend time exploring the Shira plateau, including a gentle walk east toward Kibo’s glaciered peak.
The route continues to Shira 2 camp on moorland meadows by a stream. Then you continue onward to Moir Hut, described as a little-used site near the base of the Lent Hills. The key idea here is that you’re given room to adjust to altitude. There are walk options on Lent Hills, and the day’s purpose is partly to help your body learn the new elevation rhythm.
In terms of walking time, you’re around 5–7 hours for a longer distance segment (about 14 km). Altitude runs from roughly 11,500 ft up to 13,800 ft. That’s why your pace on day two matters. If you go too hard too early, day three can feel harder than it needs to be.
A nice payoff is that Shira is described as one of the highest plateaus on Earth. Even if you don’t measure it in your head, you’ll feel how exposed and open the world becomes up there.
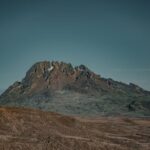
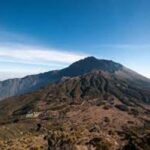
Day 4: Lava Tower (Shark’s Tooth), Arrow Glacier, and Barranco Hut
This is the day where the mountain starts showing off. From the Shira Plateau you head up along a ridge, passing a junction toward the peak of Kibo, then shifting direction toward the Lava Tower, nicknamed the Shark’s Tooth. After that, you move toward the Arrow Glacier at around 16,000 ft.
Then the schedule does something smart for acclimatization: after reaching high points, you descend down to Barranco Hut at about 13,000 ft. You still walk roughly 4–6 hours and cover about 7 km, but the gain-and-loss pattern is built into the plan.
This day ends with dinner and overnight at Barranco. You’ll likely be tired, but it’s the kind of tired that comes from altitude processing rather than from going too fast.
Also, staying at a similar elevation by the end of the day (in the itinerary’s terms) isn’t a trick. It’s a deliberate body management move. You’re helping your system acclimate without treating every day like a direct climb to the summit.
Day 5: Barranco to Karanga Valley, then up to Barafu Hut
After breakfast, you continue from Barranco and take a steep ridge passing the Barranco Wall. Then you reach Karanga Valley campsite, followed by a junction that connects with the Mweka Trail.
From there you keep climbing toward Barafu Hut, which is where you camp and prepare for the summit day. The distance is about 9 km, and walking time can stretch to 8–10 hours. Elevation is roughly 13,000 ft to 15,000 ft.
This is the day many people feel the mental shift. It’s long, and it’s close to the point where everything gets serious. The positive side: you’ll see Mawenzi and Kibo from this position, and that helps you place the summit in your mind. You’re not just walking toward fog. You’re walking toward real geometry.
Food on the trek is included for multiple meals each day, and past climbers often praised the volume and consistency. On summit weeks, good meals aren’t comfort. They’re fuel and morale.
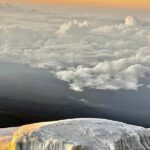
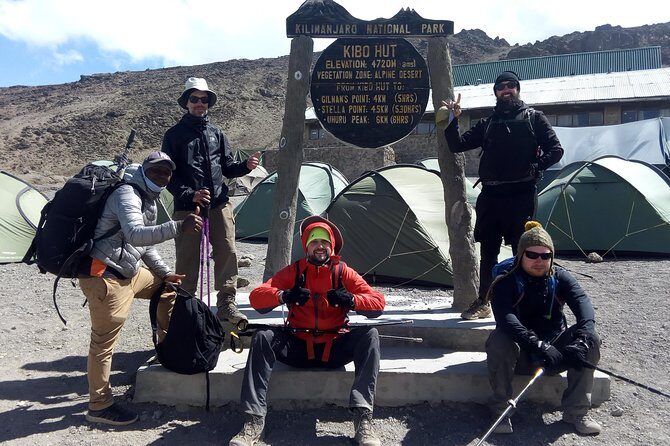
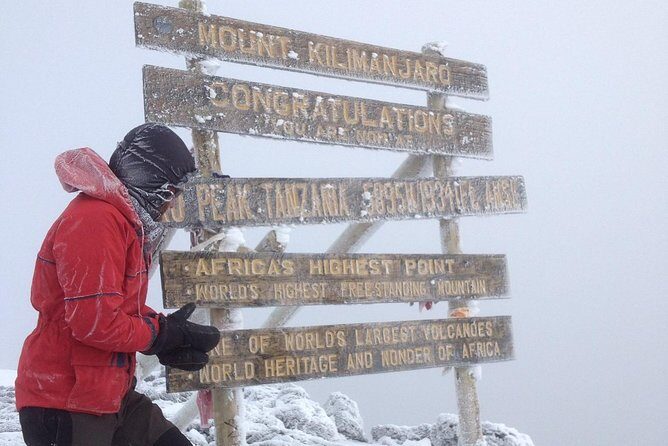
Day 6 summit night: Stella Point sunrise to Uhuru Peak
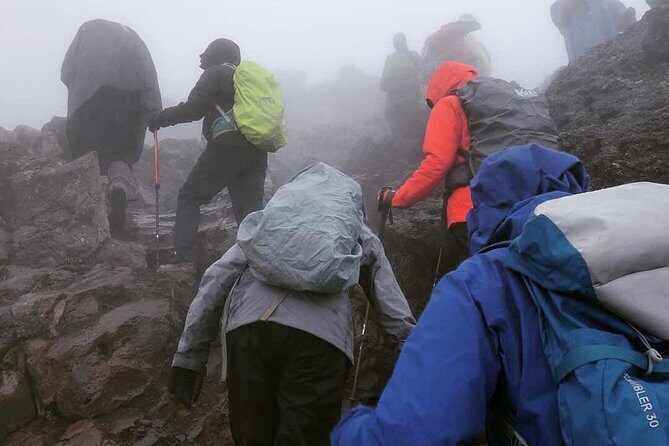
Summit day starts early—around 2am. You ascend between the Rebmann and Ratzel glaciers, heading northwesterly up heavy scree. Expect slow, steady steps. Scree is tricky because your feet don’t always behave the way they do on normal trails.
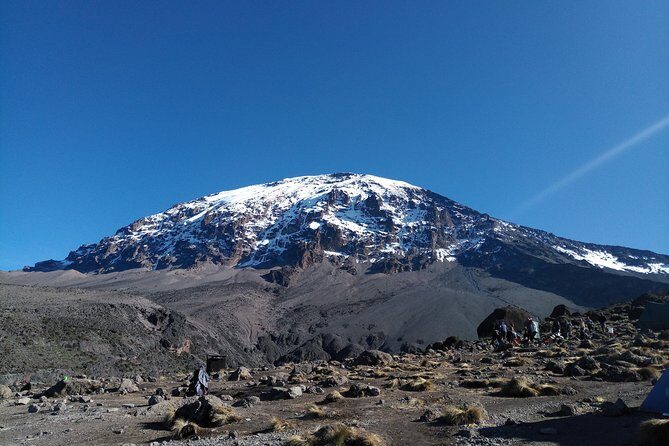
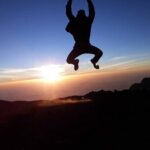
You reach Stella Point at about 18,600 ft for a short rest. This is where you’re rewarded with one of the key reasons people chase Kilimanjaro: the most magnificent sunrise, assuming weather cooperates. Then you continue roughly 1 hour up to Uhuru Peak.
Uhuru Peak is the high point of Kilimanjaro and is listed here as the highest point on Africa. If you’re a sunrise person, this timing is the whole point. Faster hikers may see the sunrise from the summit itself.
After the summit, the descent starts immediately. You head down to the Mweka Hut area, with a stop at Barafu for lunch on the way. The day’s math is emotional, not just physical: your legs are done, but you still have to move. And moving is what keeps your body regulated.
Day 7 descent to Mweka Gate and your summit certificates
Day seven is the “finish line” day. You start after breakfast and descend to the Mweka Park Gate to collect your summit certificates. At lower elevations, it can be wet and muddy, so gaiters and trekking poles can save you from the kind of slipping that ruins your mood.
Then you continue about one more hour to Mweka Village. A vehicle meets you there to drive you back to your hotel in Moshi. After that long trek, that car ride feels like cheating in the best way.
At the lower elevations, you may find conditions are less extreme: shorts and t-shirts may be enough, while you still keep rain gear and warmer layers handy. Kilimanjaro weather changes fast, so the practical approach is layered packing and a rain plan.
Guides and crew: what real support feels like on Kilimanjaro
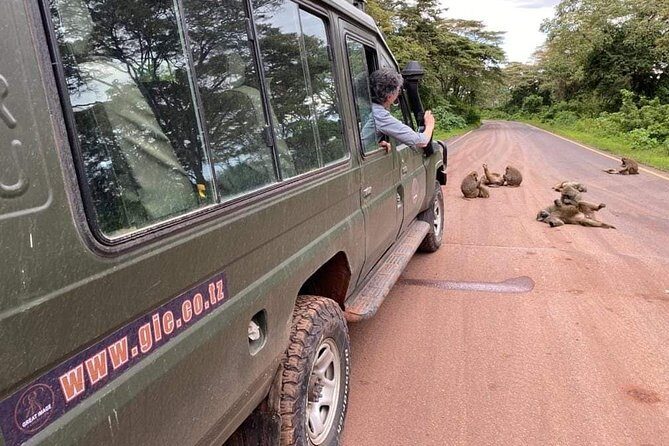
This trek runs on more than guides. It runs on teamwork: guides, cooks, and porters. The included package covers friendly and professional mountain guides plus cooks and porters, and it also includes treated and filtered drinking water plus an emergency first-aid kit.
From the feedback you can learn something practical: many climbers remember specific guides and the way they managed pacing and stress. Names that show up again and again include Goodluck Mwanga, Abraham, Oscar, Joseph, Bariki, and others like FC, Matthew, and Tammy. The common thread is encouragement and attention to needs, not just route-finding.
Some trips also include light moments to break the monotony, like games played while hiking. That might sound small until you’re on day five or day six, staring at your own exhaustion. Anything that helps you keep moving calmly is worth something.
Price and value: what $2,850 covers, and what it doesn’t
At $2,850 per person, this is a serious spend. The best way to judge value is by what’s included, because Kilimanjaro costs add up fast when you start piecing items together.
Included items worth real money here:
- Private transport to and from Kilimanjaro International Airport to Moshi
- Two nights of accommodation in Moshi
- Park entry fees
- Team Kilimanjaro Rescue fees
- Guides, cook, and porters
- Enough treated and filtered drinking water
- Emergency first-aid kit
- Meals: breakfast, lunch, and dinner across the trek (the plan lists 6 lunches and 6 dinners, plus 7 breakfasts)
Not included items:
- Travel insurance
- Flights
- Tips for guides/porters/cook
The standout value angle is that rescue fees and park fees are included, and you don’t have to guess what will be added later. If you’re comparing options, always compare “all-in” pricing, not just the headline number.
One planning thought: tips aren’t included, so budget for them. And buy travel insurance that covers high-altitude trekking and emergency evacuation. The tour provides a rescue-fee component, but insurance is still your safety net.
What to pack and how to train for this Lemosho rhythm
The itinerary includes long hiking days, high altitude, and camping. That combination demands smart packing more than fancy gear.
From the tour guidance you do get a few clear pointers:
- Gaiters and trekking poles help, especially with muddy lower-elevation descent.
- Shorts and t-shirts may be enough at lower heights.
- Keep rain gear and warmer clothing handy because cold and wet can show up even if the day starts sunny.
Training-wise, the trip listing expects strong physical fitness. I’d treat it like a stamina test: practice hiking with a pack, build leg strength, and get comfortable with steady uphill walking for hours. If you’re only strong at speed, Kilimanjaro will humble you.
Sleep gear matters too since you’re camping for multiple nights. If you run cold easily, plan for it. Your body will notice.
Who should book this trek, and who should slow down?
This route is a good fit if you want:
- A 7-day schedule that includes dedicated acclimatization time
- A climbing plan with clear milestones like Shira camps, Barranco, Barafu, and summit points
- A small group experience capped at 15 travelers
- Full-service support: guides, porters, cook, filtered water, and an emergency first-aid kit
You might want to think twice if you:
- Struggle with early starts (summit night begins around 2am)
- Aren’t comfortable with long hiking days up to 8–10 hours
- Expect lodge-style comfort (this is camping throughout the climb)
For solo travelers, the feedback includes people who felt safe and supported, which is a big deal on a mountain. If you like having a team around you and a clear plan, this style can work well.
Should you book this Kilimanjaro Lemosho climb?
If your main goal is a well-paced Kilimanjaro climb with structured acclimatization, this package looks strong. The biggest reasons to lean in are the route design (time on the Shira plateau plus the Barranco down-up pattern), the inclusion of rescue and park fees, and the human factor: guides and crew credited by name in past Kilisa climbs.
Book it if you’re ready to take hiking seriously, accept camping, and commit to a steady pace. Skip it if you want a quick, carefree hike or if you’re not willing to start summit night very early.
If you do book, make one promise to yourself: pace conservatively from day one. The whole climb rewards patience.
FAQ
What is the start time for the trek?
The meeting time listed is 8:30 am.
Where does the trek begin and how do you get there?
You depart Moshi to Londorossi Gate (about four hours by vehicle), complete entry formalities, then drive to the Lemosho trailhead (about one more hour).
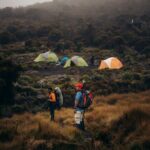
What type of accommodation is included during the trek?
You camp during the trek, with overnight stops at camp sites and huts along the route.
What meals are included?
Breakfast is included 7 times, and the plan includes lunch 6 times and dinner 6 times.
What’s included in the price?
The package includes private transport between Kilimanjaro International Airport and Moshi accommodations, two nights in Moshi, park entry fees, Team Kilimanjaro Rescue fees, guides plus cook and porters, treated/filtered drinking water, an emergency first-aid kit, and the listed meals.
Are flights or travel insurance included?
No. Travel insurance and flights are not included, and tips are also not included.
What should I expect on summit night?
The plan calls for an early start around 2am, ascending toward Stella Point on the crater rim and continuing to Uhuru Peak, with sunrise timing depending on weather.
What helps on the final descent?
The guidance suggests gaiters and trekking poles help with wet, muddy conditions at lower elevations.