REVIEW · KILIMANJARO
Mountain Kilimanjaro Climbing 8 Days Lemosho Route
Book on Viator →Operated by Exceed Expectations Tours & Safari · Bookable on Viator
Kilimanjaro feels like a moving clock. This 8-day Lemosho route is designed for gradual acclimatization, and you get real support from your guides along dramatic days up and down the mountain. Two things I really like: the expert guidance on every stretch and the fact that essential gear and sleeping support are included so you can focus on walking. The main drawback to know up front is that even with the pacing, the summit push is long, cold, and steep at altitude.
You’ll also appreciate the practical touchpoints: a small group (up to 15 people), airport pickup timing, and a full meal plan tuned to dietary needs. If you want an organized climb that still feels wild and authentic, this one hits a sweet spot.
In This Review
- Key highlights I’d circle on your planning list
- Lemosho Route: Why this climb is built for success
- The “8 days” rhythm: what you’re really signing up for
- Day 1 (2100m to Mti Mkubwa 2650m): forest start and early orientation
- Day 2 (to Shira 1): grassy moorlands, volcanic rocks, and Kibo in clouds
- Day 3 (Shira 2): acclimatization day with northern ice-field views
- Day 4 (to Lava Tower 4640m, then down to 3960m): the Lava Tower lunch
- Day 5 (Barranco Wall to Karanga Camp 3963m): long effort, glacier scenery, and recovery time
- Day 6 (to Barafu 4640m): the tough climb that’s really summit preparation
- Day 7 (summit to Uhuru Peak, then Crater Camp): pre-dawn start and an unusual overnight
- Day 8 (down to the gate and back to Moshi): forests, vehicles, and celebration
- Guides, meals, and included gear: what actually makes the trek easier
- Price and value: what $2,756.93 buys you on Kilimanjaro
- Should you book this Lemosho climb?
- FAQ
- How long is the Kilimanjaro climbing trip on the Lemosho route?
- Where does the tour start and what time does it begin?
- Is pickup offered for this experience?
- What’s included in the price besides the climb itself?
- Does the tour accommodate dietary requirements?
- What kind of group size should I expect?
- What does the climb include on the summit side of the mountain?
- What camp areas will you likely pass during the trek?
- What is the early-morning timing for the summit day?
- What should I do for tips at the end?
Key highlights I’d circle on your planning list
- Lemosho route pacing that builds altitude step-by-step instead of rushing
- Shira Plateau scenery with big Kibo viewpoints when clouds cooperate
- Lava Tower and Great Barranco days that mix epic views with honest effort
- Barafu night prep and an early summit start for more calm on the mountain
- Crater Camp add-on option for the adventurous, with an overnight in the crater bowl
Lemosho Route: Why this climb is built for success
The Lemosho route is popular for a reason: it gives you more time on the mountain before you go for the top. You’ll spend multiple days working up from forest to moorland to alpine desert, which matters because altitude rewards consistency and punishes shortcuts. In plain terms, you’re not just “hiking”; you’re training your body to handle thinner air.
I also like that this itinerary doesn’t feel like a straight line to the summit. You’ll zig and zag across different climate zones—Shira’s grassy moorland, the lava ridges, then the dramatic Barranco area—so the climb stays interesting even on days when you’re mostly climbing slowly. That variety helps mentally, and mental stamina matters on Kilimanjaro.
One more value point: you hike roughly 40km to the summit. That distance is not “easy mode,” but it’s a manageable way to think about the journey. You get enough walking time to build rhythm, without it turning into an endless march with no structure.
You can also read our reviews of more tours and experiences in Kilimanjaro.
The “8 days” rhythm: what you’re really signing up for
This trek runs like a routine, and that’s good news. Each day has a clear start, a steady hiking block, then a camp routine with dinner, sleep, and recovery. You’ll see multiple camp names along the way—Mti Mkubwa, Shira 1 and Shira 2, Lava Tower area, Barafu, and finally Crater Camp—so you’re not guessing where you are or what comes next.
What you should be ready for is the back-and-forth between effort and rest. Some days include longer travel hours (around 7 hours), and others are shorter in time but still tough because of steep sections or altitude. The summit day is its own category—waking before dawn, reaching Uhuru Peak in the early afternoon, then descending to crater terrain for the night.
If you come in thinking it’s a vacation walk, you’ll feel disappointed. If you come in thinking it’s a guided mountain training trip with big payoffs, you’ll enjoy it a lot.
Day 1 (2100m to Mti Mkubwa 2650m): forest start and early orientation
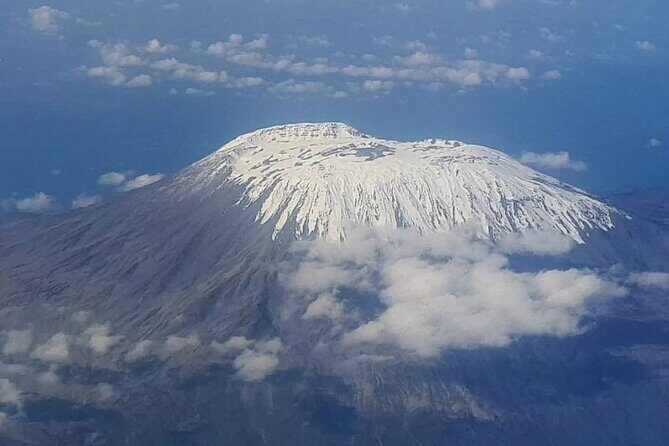
Day 1 begins around 2100m and climbs through the lush forest zone toward the lower slopes on the northern side, heading for the Shira Plateau region. The walking time is about 4 to 5 hours, and that’s intentional: your first job is to get your legs moving, not to conquer the mountain.
This is also your orientation day for cold-weather gear habits. Even early in the climb, temperatures start shifting, and you’ll likely feel it more as you get higher. Dress layers matter here, not later.
By evening you’re overnighting at Mti Mkubwa (2650m). You’ll want a quick dinner, hydrate, and treat your sleep like part of the mission. On Kilimanjaro, good sleep is not a luxury—it’s strategy.
Day 2 (to Shira 1): grassy moorlands, volcanic rocks, and Kibo in clouds
Day 2 runs about 7 hours, and the terrain changes in a way you can feel right away. You trek across a plateau of grassy moorland and heather scattered with volcanic rock formations. It’s not just pretty; the ground is uneven and can be slow underfoot, so your pace matters.
Your destination is Shira 1 Camp, and the best perk is the view possibility. From this area, you often get looks at Kibo Peak when clouds lift. Clouds aren’t guaranteed, but the fact that the route is timed for these viewpoints is a plus.
Altitude is also building a “reasonable amount” on this day, with parts that can feel steep. That mix—slow climbing on rough ground—helps you start adapting without going too hard too soon.
Day 3 (Shira 2): acclimatization day with northern ice-field views
Day 3 continues the Shira Plateau theme but with a different angle. You’ll get chances to see the northern ice fields from the western side and enjoy panoramic views that make the long hours feel worth it.
You’ll reach Shira 2 Camp, and the day’s format gives you a built-in recovery rhythm: in the afternoon you take an acclimatization walk, then return to camp for dinner and overnight. That’s a smart design. It teaches your body to move at altitude without turning your whole day into a full-on grind.
One practical way to use this day: keep your effort steady and don’t try to “catch up” if you feel good at the start. Feeling good early can tempt you to push, but altitude punishes sudden speed changes.
Day 4 (to Lava Tower 4640m, then down to 3960m): the Lava Tower lunch
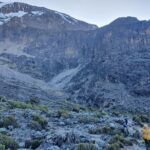
This is one of the most memorable days because it includes a major high point. You start with an ascent with wide panoramas, then work into the upland desert climate. The walking shifts from plant-filled zones to more barren, stony stretches.
Your high point is the distinct Lava Tower (4640m), where you’ll stop for lunch. This lunch stop is more than a break. It’s your viewpoint checkpoint—an unofficial moment when you can look back and see how far you’ve already climbed.
After that, the day turns into a steep descent to a camp at the base of the Great Barranco Valley (3960m). Descent can be harder than it looks because your legs are working while your body is still managing altitude. Expect dust, rocks, and careful footing.
Day 5 (Barranco Wall to Karanga Camp 3963m): long effort, glacier scenery, and recovery time
Day 5 starts by descending into the start of the Great Barranco, a huge ravine. Then you exit steeply up the Great Barranco Wall—this is not technical climbing, but it’s long and tiring because you’re working against altitude as much as gravity.
As you pass under Heim and Kersten Glaciers, the scenery sharpens into something very “Kilimanjaro proper.” It’s one of those moments where you realize you’re not just walking through zones—you’re traveling through distinct geological theater.
You then head toward the Karanga Valley and climb steeply back up to Karanga Camp (3963m). After dinner, if you’re feeling strong, there’s an optional mid-afternoon acclimatization trek up around 4200m, then a return to camp. That optional extra is useful for people who want a bit more acclimatization time without breaking their whole day.
Day 6 (to Barafu 4640m): the tough climb that’s really summit preparation
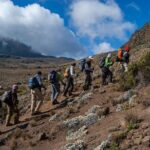
Day 6 is the “steep reality check” day. You walk to Barafu Camp (4640m), and the terrain is described as desolate scree slopes with no vegetation. That means two things: you don’t have visual distractions, and your footing can feel fragile under slow steps.
This climb is tough and steep, and altitude makes it worse. When the body gets high, every uphill step feels heavier, even when you’re moving slowly on purpose.
When you arrive, you eat and rest in the afternoon because you need energy for a long night. You’ll have an early dinner and then try to sleep. The wake-up time is between 11pm and 12am to start the summit climb.
This is where you’ll thank whoever packed your gear well. Warm layers, a hydration plan, and a calm mindset matter most on the night that looks like it’s mostly waiting and then sudden effort.
Day 7 (summit to Uhuru Peak, then Crater Camp): pre-dawn start and an unusual overnight
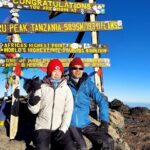
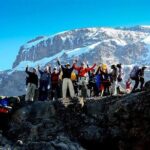
You wake before dawn and begin the summit approach. The goal is Uhuru Peak, and you’ll reach it in the early afternoon when fewer groups are around—less crowd noise, more feeling of space around you.
After a short descent, you head to Crater Camp, set in soft sands near the famed Furtwangler Glacier. Crater Camp isn’t exactly a standard route stop; it’s a challenging extension that involves sleeping overnight in the bowl of the crater. If you’re the type who likes harder, more distinctive experiences, this is the night that delivers that brag-worthy memory.
The big thing to plan for: you’ll feel summit altitude fatigue. Even after you reach the top, you’re not “done.” You’re managing the return down to crater terrain and still trying to sleep, which at altitude can be tricky.
Day 8 (down to the gate and back to Moshi): forests, vehicles, and celebration
Day 8 finishes with the descent from high altitude down through forests to the gate area, where your vehicle is waiting. Then you return to Moshi.
This day often feels like two different trips: first you’re still walking and taking in the steep relief of being lower, then suddenly you’re back in the rhythm of vehicles, town air, and real food that doesn’t come from a camp routine.
You’ll likely want to celebrate. Honestly, you’ve earned it. This is the day when the mountain stops being a project and becomes a story.
Guides, meals, and included gear: what actually makes the trek easier
This tour is built around real logistics, not just scenery. Equipment is provided, including sleeping gear, so you’re not left guessing whether you packed the right sleeping setup. That alone can reduce stress in a trip where stress drains oxygen.
Meals are included across the full 8 days, and the operator caters to dietary requirements. For me, that’s a big deal because consistent fueling helps you keep a steady pace and reduces the temptation to skip food when you feel slow.
Guides also make a huge difference. In one climb experience with a main guide named Timothy, the group had a clear, highlight-focused feel throughout the trek—meaning you’re not just walking in silence, wondering what you’re looking at. Another helpful touch: airport pickup was handled by Oscar Swai and a driver, even with late-night timing around midnight-plus.
Also take to heart the kind of packing advice you might hear before you start: one guide-style tip shared Moshi conditions as roughly 30C/90F down in town, while it gets much colder as you climb. That’s not fluff. It’s the difference between being uncomfortable and being miserable.
Price and value: what $2,756.93 buys you on Kilimanjaro
The price for this 8-day Kilimanjaro climb is $2,756.93 per person. On paper, that’s a lot of money. In real-world mountain terms, it’s covering the costs that are hard to DIY: staffed guiding, porters, cooks, camp infrastructure, park entry permissions, and the included sleeping setup and equipment.
You’re also paying for the pacing system. With Kilimanjaro, success isn’t only about effort; it’s about how the itinerary manages altitude exposure. A climb that gives you time to acclimatize can protect you from the common problem of arriving at the summit day too broken.
The operator also limits group size to a maximum of 15 travelers, which matters for attention and camp logistics. It’s not a private climb, but it’s not a cattle-car either.
There’s one more cost reality: if you come poorly prepared, you might spend extra on gear, warm layers, or fixes. Since the sleeping gear and equipment are included here, you can usually avoid some expensive “oops” purchases.
Should you book this Lemosho climb?
If you want a guided, organized Kilimanjaro experience that still feels adventurous, I think this route is a strong match. You’ll like it most if you’re aiming for a balance of good acclimatization, unforgettable scenery (Shira Plateau, Lava Tower, Barranco), and a real summit plan that starts at night and ends with Uhuru Peak.
I’d rethink it if you don’t handle cold well, or if you’re hoping for a casual pace with minimal steepness. Even with the smart itinerary, the climb includes tough segments and a long summit day.
If you’re the right kind of traveler for it—moderate fitness, good attitude, willingness to take it slow—you’ll be in the sweet spot.
FAQ
How long is the Kilimanjaro climbing trip on the Lemosho route?
It runs about 8 days.
Where does the tour start and what time does it begin?
The start is at Kilimanjaro International Airport area, with a start time of 7:00 am.
Is pickup offered for this experience?
Yes, pickup is offered.
What’s included in the price besides the climb itself?
Meals across the 8 days are included, and the itinerary includes admission ticket access. Equipment and sleeping gear are also provided.
Does the tour accommodate dietary requirements?
Yes. Included meals can be adjusted to your dietary requirements.
What kind of group size should I expect?
The maximum group size is 15 travelers.
What does the climb include on the summit side of the mountain?
You’ll aim for Uhuru Peak, and after summiting you may descend to Crater Camp. Crater Camp is described as a challenging extension that can include overnight sleeping in the crater bowl.
What camp areas will you likely pass during the trek?
Common camp stops listed are Mti Mkubwa, Shira 1 Camp, Shira 2 Camp, the Lava Tower day area, Karanga Camp, Barafu Camp, Crater Camp, and then descent to the gate.
What is the early-morning timing for the summit day?
You’ll wake between 11pm and 12am to begin the summit climb.
What should I do for tips at the end?
The guidance is to tip your guides, cooks, and porters since you’ll be leaving them when the trek ends.