REVIEW · ARUSHA
8-Day Private Kilimanjaro Trekking via Lemosho Route from Arusha
Book on Viator →Operated by Mountain Warriors Tours and Safaris · Bookable on Viator
Eight days to the roof of Africa. This private Lemosho Route trek is interesting because it layers altitude gradually, with rainforest, the Shira plateau, and cold high ridges all in the right order. I really like the way the plan builds acclimatization before you ever chase the summit. I also like the hands-on logistics: waterproof, four-season private tents plus mess-tent meals that keep you fueled instead of living on empty vibes.
The one real consideration is the physical and mental grind of summit night. You start in the dark and you’ll be moving uphill hard for hours, with cold, heavy scree near the crater rim and a steep non-technical climb that still demands steady effort and patience.
In This Review
- Key takeaways
- Why Lemosho works: a route built for your oxygen
- Day 1: Londorossi gate into rainforest at Mti Mkubwa
- Day 2: Shira ridge views and the first taste of high altitude air
- Day 3: Shira plateau exploration and the approach toward Kibo
- Day 4: Lava Tower acclimatization, Arrow Glacier, and Barranco wall training
- Day 5: Up Barranco and into Karanga Valley, the arctic zone starts
- Day 6: Kosovo Camp slow pace, Barafu views, and ridge awareness
- Day 7: Midnight summit start to Stella Point and Uhuru Peak
- Day 8: Mweka gate walk and the shower after the trek
- Camps, tents, and meals: comfort that protects your energy
- Guides and safety: the team factor (Gasto, Joe, Jeff, and Rosemary)
- Price and value: is $2,480 fair for a private 8-day climb?
- Who this trek fits best
- Should you book this private Lemosho trek with Mountain Warriors?
- FAQ
- How long is the Kilimanjaro trek on the Lemosho route?
- What route is used to climb Kilimanjaro?
- What time does the trek start?
- Is pickup included?
- What’s included in the price besides guides?
- Do I need to bring my own climbing gear and visa?
- What can I expect on summit night?
Key takeaways
- Lemosho’s gradual altitude ladder helps your body adjust before the summit push.
- Private, four-season tenting is a big quality-of-life boost when temperatures drop fast.
- A midnight start to Stella Point sets you up for sunrise and then a fast link to Uhuru Peak.
- Guides that focus on safety and pace are repeatedly praised, including lead guide Gasto and team members like Joe and Jeff.
- Meals and camp setup are taken seriously, with mess tents, table seating, and large portions of fresh food.
Why Lemosho works: a route built for your oxygen
If you’re choosing a Kilimanjaro route, you’re really choosing how your body adapts to low oxygen. The Lemosho approach shines because it doesn’t rush you into the high, thin air. Instead, you spend multiple days moving upward in steps—then you add short acclimatization hikes that help your sleep and stamina later.
You’ll start on the western side and climb through montane forest, which feels almost normal at first. Then the trail transitions to tall grasses, heather, volcanic rock with lichen, and eventually the Shira plateau. That progression isn’t just scenic; it’s practical. You’re training your legs, managing your breathing, and learning how quickly you tire when air gets thinner.
This trek is also set up for a high summit success profile (they design it that way, not by magic). The schedule includes time at key altitude points and a summit day that’s demanding but not technical—meaning you can focus on pacing, staying warm, and using your head, not climbing skills.
You can also read our reviews of more private tours in Arusha
Day 1: Londorossi gate into rainforest at Mti Mkubwa
Your first day is all about starting clean and settled. After pickup from the Arusha area, you begin the hike from the Londorossi gate, then walk into Kilimanjaro National Park through a gently rising montane forest.
The vibe here is slow and grounding. You’re not fighting the altitude yet; you’re just getting your rhythm and getting used to breathing through exertion. Campsite setup is also part of day one’s value: tents are set up for you and your belongings are kept organized, so you aren’t spending your first night turning into a tent-making robot.
You’ll camp in the rainforest zone at Mti Mkubwa (Big Tree). That matters because rainforest nights on Kilimanjaro can feel cool and damp. If you’ve ever slept on a warm-air hike and assumed you’ll stay comfortable forever, Kilimanjaro will gently correct that idea fast.
What to watch: don’t “win” day one. If you go too hard in the forest, you’ll pay for it later.
Day 2: Shira ridge views and the first taste of high altitude air
Day two takes you out of forest and into a savannah of tall grasses, heather, and volcanic rock—then up onto the Shira ridge. This is where the big open-air feeling starts, and the first wider views of Kilimanjaro often show up along the horizon.
It’s a long day by hiking standards, but the key is the gradual change in terrain and air. You’re moving upward toward the Shira plateau high-altitude desert environment, and it can feel surprisingly exposed compared to day one.
A practical trick: keep your pace controlled and steady. When the ground turns rocky and the air turns dry, your body can convince you that you’re failing when you’re actually just adjusting. Use a rhythm you can maintain for hours.
You’ll arrive at camp after a trek time that typically runs several hours, then settle into a night that feels more like high mountain weather than tropical hiking. That’s a good thing. You’re acclimatizing in real conditions.
Day 3: Shira plateau exploration and the approach toward Kibo
Day three is a full day on the Shira plateau. This is where you get more than “just walking from camp to camp.” You trek east toward Kibo’s glaciated peak, and the day offers options, like visiting the collapsed Shira cone—an older feature tied to Kilimanjaro’s volcanic history.
You’ll reach Moir Camp, located in a large gorge at the end of a dormant lava flow. Camps in these gorges can feel cooler and more sheltered, and you might notice how quickly your energy changes with altitude. One minute you’re chatting; the next you’re breathing slower and thinking about your next step.
What I like about this day: it’s not only about distance. It’s about learning the “new normal” of moving at higher elevations. By now, you’ll also start noticing how water, warmth, and pacing affect how your head feels.
Small drawback to keep in mind: with so much time at high altitude, this day can highlight anyone who tries to hike too fast or too hard.
Day 4: Lava Tower acclimatization, Arrow Glacier, and Barranco wall training
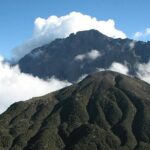
Day four is a classic Kilimanjaro acclimatization tool, and it’s built into the route. You take an acclimatization trek up toward Lava Tower (around 15,000 feet), then you continue the day toward the area of the Arrow Glacier.
After that, you descend toward the Senecio forest, where the air can feel different—less high and more sheltered. You may also pass waterfall scenery before finishing at Barranco Camp, positioned with the Barranco wall looming nearby.
This day teaches you two important lessons:
- Acclimatization hikes should feel challenging but not reckless.
- Descending is not “rest.” You’ll still be working your legs and controlling your breath.
If you’re prone to overdoing it when you start feeling okay, this is the day to listen carefully to your guide and stay disciplined. You’re training for the summit night. Everything here is rehearsal.
You can also read our reviews of more hiking tours in Arusha
Day 5: Up Barranco and into Karanga Valley, the arctic zone starts
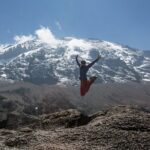
Day five pushes you through the Barranco Valley and up the Barranco wall—an adventurous stretch that tends to feel steeper than the earlier days. You’ll continue on the South Circuit path through the Karanga Valley and camp at Karanga Camp.
This is also when the trek starts to feel more winter-like. The “arctic zone” feeling isn’t just a marketing phrase. You’re getting higher, and temperatures can shift quickly. Even if you’re not shivering yet, you’ll want to treat warmth as a strategy, not an afterthought.
Practical tip: keep adjusting layers while you’re moving, not only when you stop. Long breaks can make you cold fast, and being cold makes it harder to eat and drink.
The upside of this day: you’re making steady progress toward the summit without jumping straight from “climbing days” into “summit reality.” You’re building resilience step by step.
Day 6: Kosovo Camp slow pace, Barafu views, and ridge awareness
On day six, the approach becomes more deliberate. You take a slow pace to Kosovo Camp (around 4,876 meters). You’ll pass Barafu Camp along the way, and from this section you often get excellent views of Kibo and Mawenzi.
Kosovo Camp is on an exposed ridge, and that’s not just a poetic description. Exposed ridges mean wind can cut through clothing, and darkness reduces your ability to manage footing. The route timing matters here: you’ll want to arrive with enough daylight to get your bearings and handle camp setup comfortably.
Why this matters for your summit success: a calm, well-organized night can be the difference between sleeping okay and spending hours fighting cold. On this day, you’re also preparing for summit night—mentally and physically.
This is a good day to focus on small actions:
- eat what you can, even if appetite is low
- drink steadily
- keep your layers ready so you’re not scrambling later
Day 7: Midnight summit start to Stella Point and Uhuru Peak
Summit night is where Kilimanjaro earns its reputation. You’ll start around midnight and climb toward Stella Point for sunrise, then continue to Uhuru Peak afterward.
This section is considered one of the steeper parts on Kilimanjaro’s non-technical paths. Expect a long climb—often described as several hours up to Stella Point—followed by an additional push that can feel both thrilling and brutally tiring.
The key detail is the terrain and mind game. You’re moving through heavy scree near the crater rim, which makes every step feel like it has weight. That’s why pacing matters so much. If you race early, you’ll slow down later when you need speed most.
From Stella Point, you can see the summit ahead, with Uhuru Peak roughly about an hour further depending on conditions and group pace. The views can be unforgettable. The more important win for you, though, is reaching that point without losing control of your breathing and warmth.
Then you descend back toward Mweka Camp for dinner and celebration. That meal afterward isn’t just food. It’s a recovery reset. Your body needs fuel, and your morale needs closure.
Day 8: Mweka gate walk and the shower after the trek
Day eight finishes with a morning walk down to Mweka gate. After weeks of living in altitude and cold mornings, this day can feel almost too normal—until you realize how tired your legs are.
Once you reach the gate, you’ll transfer by vehicle back toward your hotel area in Arusha for that welcome shower and a proper rest.
This final day is short on climbing, but it’s still part of the experience. I’d treat it like a cooldown: take it easy, stretch gently, hydrate, and let your body recover without turning the end of the trek into another workout.
Camps, tents, and meals: comfort that protects your energy
Kilimanjaro nights can swing from cool to genuinely cold. One reason this trek gets strong approval is the attention to sleep setup. You get quality waterproof, four-season private mountain sleeping tents. That means you’re not sharing one cramped space and hoping everyone cooperates.
You also get mess tents with table and chairs, plus meals designed to keep you eating. Large portions of fresh, healthy, nutritious food is not a luxury on Kilimanjaro. It’s fuel and morale. If you under-eat at altitude, you feel it during the climb and you recover slower.
From a value perspective, this matters because many “cheap” treks try to cut costs by shrinking camp comfort. Here, the included structure helps you stay warm and organized, which supports acclimatization.
Guides and safety: the team factor (Gasto, Joe, Jeff, and Rosemary)
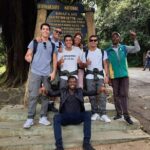
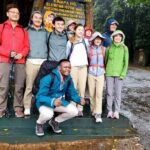
The biggest praise signal in the guide experience is simple: you tend to feel safe and cared for. The guides named Gasto and other team members like Joe and Jeff come up repeatedly in feedback. That’s usually a good sign that the company maintains a real team culture, not just a rotating cast.
The guides’ job isn’t only route-finding. On Kilimanjaro, they manage pacing for your oxygen level, watch group energy, and keep you moving in a way that lowers risk. Multiple trekkers specifically highlighted that they always felt safe and were pushed with support toward the top.
Another behind-the-scenes name that matters is Rosemary, described as handling administrative work. You might not notice that part once you’re on the mountain, but good administration reduces stress before you even start hiking.
If you want an experience where motivation comes with practical guidance—songs, encouragement, and steady decisions—this setup is built for that.
Price and value: is $2,480 fair for a private 8-day climb?
At $2,480 per person, this is a premium Kilimanjaro option, and it should be judged by what it includes.
What you’re getting in the package:
- Professional, experienced mountain guides
- All park fees and rescue fees
- All meals on the mountain
- Quality private waterproof, four-season tents
- Airport transfers
- Quality mess tents with seating
- Pickup offered, plus a mobile ticket
The money is going into the infrastructure that you can’t easily replace: guides and compliance, camp gear, and mountain meals. A lot of budget deals underprice the experience because they leave you to handle key costs or arrive with less camp support. Here, you’re paying for a system that protects your time and your comfort.
One thing to factor: tips, visa, and person gear for the climb aren’t included. So your real budget is not just the headline price. Still, compared to piecing everything together yourself—especially on a route with multiple days of camp—you’re likely buying less friction and more safety.
My take: if you want a private experience with strong camp support and you’re willing to pay for fewer headaches, this price feels in line with what you’re actually using.
Who this trek fits best
This trek suits people with moderate physical fitness who can commit to the long trekking days and the altitude learning curve. It’s also described as suitable for both beginner and advanced climbers, which makes sense because Kilimanjaro is non-technical.
Still, be honest with yourself. If you struggle with cold nights, long hours of uphill movement, or you hate early starts, summit night will be a shock. You don’t need mountaineering skills, but you do need endurance and a willingness to slow down when your body asks you to.
You’ll especially like this tour if:
- you want private-group attention
- you care about camp comfort and meals
- you want a route that emphasizes acclimatization rather than speed
- you value a guide team that focuses on safety and motivation
Should you book this private Lemosho trek with Mountain Warriors?
I’d book this if you want a structured, high-support Kilimanjaro climb with acclimatization built in, comfortable private tents, and a guide team that’s repeatedly praised for making people feel safe. The Lemosho route is a smart choice for anyone who wants a more forgiving altitude progression compared to shorter, faster schedules.
I would think twice if you’re chasing a purely casual vacation style. This is a serious hiking challenge with summit-night cold and effort. If you’re okay with that reality, the value here is in the included logistics and the support on the mountain.
If you’re serious about reaching the top and you want the process handled well—guides, meals, camps, and the long view strategy—this is a strong option to consider.
FAQ
How long is the Kilimanjaro trek on the Lemosho route?
It’s an 8-day private trek (approx.) from Arusha.
What route is used to climb Kilimanjaro?
The trek follows the Lemosho route and includes time through the Shira plateau, toward Kibo, and the classic approach to Uhuru Peak.
What time does the trek start?
The start time is 7:30 am.
Is pickup included?
Pickup is offered, and airport transfers are included.
What’s included in the price besides guides?
The package includes all park fees and rescue fees, all meals while on the mountain, quality private waterproof four-season tents, quality mess tents with table and chairs, and airport transfers.
Do I need to bring my own climbing gear and visa?
Yes. Tips, Tanzania visa, and personal gear for climbing are not included.
What can I expect on summit night?
You’ll have a midnight start, hike toward Stella Point to see sunrise, then continue to Uhuru Peak before descending back to Mweka Camp for dinner and celebration.