REVIEW · MOSHI
8 Day Kilimanjaro Lemosho Climb
Book on Viator →Operated by Shah Tours Travel Ltd. · Bookable on Viator
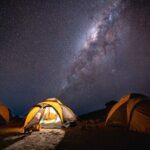
Quiet trails make Kilimanjaro feel personal. This 8-day Lemosho climb is a non-technical camping route that starts far to the west, then feeds you into classic high-altitude scenery on the way to Uhuru Peak. You’ll walk from rain forest through moorland and alpine desert, get that hands-and-feet mountain feeling at Barranco, and finish with a mellow descent into the southern forest.
What I like most is the route profile and pacing. You get several “step-up” days for acclimatization, including time around Lava Tower (4630m) before you commit to the harder upper zones. Second, the trip is built as true expedition logistics: tents, crew setup, full meals, and serious health monitoring, plus plenty of campsite comfort details for a mountain this remote.
One consideration: the summit push is long and cold. You start the night ascent around 00:00, hike steep loose scree, and spend a good chunk of time at extreme altitude—so if you’re not confident in your fitness or have known lung or altitude issues, this won’t be the right call.
In This Review
- Key Highlights to Know Before You Go
- Why the Lemosho Route Fits Real Hiking Fitness
- Getting to the Start: Moshi, 4×4 Track, and Your First Forest Step
- Shira Plateau Days 2 and 3: Heather Country and Jagged Cone Views
- Lava Tower and Barranco Valley: Acclimatization Plus a Real Climbing Moment
- Karanga to Summit Camp: Quiet Alpine Steps and the Mawenzi Peek
- Summit Night to Uhuru Peak: Stella Point, Loose Scree, and a Long Descent
- Day 8 Down to Mweka Gate: Forest Descent and the End Feeling
- Camp Life, Food, and the Crew System You’re Paying For
- Medical Checks and Oxygen: Not Glamorous, But It’s the Point
- Price and What $3,125 Really Covers
- Who This Climb Fits Best (and Who Should Rethink It)
- Final Call: Should You Book This 8-Day Lemosho Climb?
- FAQ
- How long is the Kilimanjaro climb on the Lemosho route?
- Where do you meet and what time does the trip start?
- Is this route technical, or can I do it without special climbing equipment?
- What’s included in the price?
- Are transfers from Moshi included?
- What are the key high-altitude points on the route?
- Who should not book this trek?
- Final Thoughts Before You Say Yes
Key Highlights to Know Before You Go

- Remote Lemosho start means a quieter climb through forest reserve before the crowds (if any) come later.
- Barranco Wall scramble gives real mountain-climbing energy without special gear.
- Acclimatization built in with Lava Tower and a later summit-camp rest day.
- Summit night timing is early, with Stella Point (5685m) as a key marker en route to Uhuru (5895m).
- Strong support system: twice-daily health checks, an oximeter, and emergency oxygen provisions.
- Expedition comforts like foam mattresses, dining setups, and campsite wash/loo facilities.
Why the Lemosho Route Fits Real Hiking Fitness
The big reason the Lemosho route gets picked again and again is simple: it gives you time. It’s non-technical overall, but it still feels like mountain travel—slow days, big elevation days, and one very memorable “use your hands” section near Barranco.
The start in the remote west area is also a big deal. You begin in forest reserve territory, often quieter and more shaded, and that matters for both the vibe and the early challenge level. If you’re the type who likes to earn views, rather than just race upward, this route matches that personality.
You can also read our reviews of more tours and experiences in Moshi.

Getting to the Start: Moshi, 4×4 Track, and Your First Forest Step
Your day starts in Moshi, with a transfer leaving around 9:00am. You go by road to Lemosho gate, complete registration, then continue by 4×4 track to the trailhead. After that, you begin hiking through the rain forest zone with your guide.
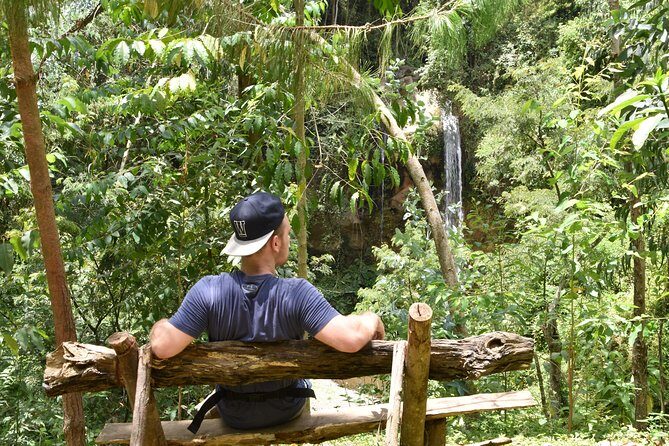
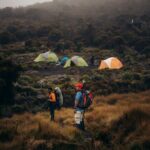
Day 1 is where the mountain sets its terms. The forest is thick and diverse, and rain is common in this zone, so expect slick footing. The trail is also described as winding and short, which is exactly what you want on day one: get moving, feel your pack weight, and settle into rhythm without burning your matches.
If you tend to feel nervous at the start of big treks, this route helps. You’re not thrown straight into the alpine desert. You ease in through plants, shade, and a steady trail approach.
Shira Plateau Days 2 and 3: Heather Country and Jagged Cone Views
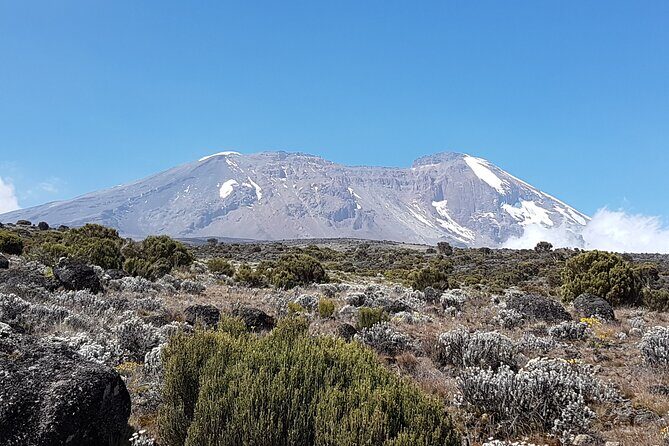
After the forest, the climb pivots. By morning on Day 2, you leave the forest zone via a steeper path, and the dense vegetation fades into Heather and moorland. From there, you hike across the Shira ridge, where views of Shira Peak (the third volcanic cone) show up as jagged, eroded drama.
This is one of those days that feels “scenic” in a way that’s more than postcard. You’re walking in a broad open environment, so if you handle exposure well, you’ll probably enjoy how you can read the mountain ahead of you. If you hate wind or cold early in the day, plan to layer right away once you hit moorland.
Day 3 continues across the Shira Plateau in heather and moorland. There’s also an optional extra hike to Shira Cathedral (3880m). If you’ve still got energy and clear weather, that detour is the kind of effort that turns into a story later—plus it’s a good way to test how you feel at higher walking altitude before the real high points.
You finish the day reaching Shira Two camp, still in the Shira area, with that sense of progression: you’re moving toward Kibo, the highest destination.
Lava Tower and Barranco Valley: Acclimatization Plus a Real Climbing Moment
Day 4 is a turning point. The hike aims toward the Kibo cone, and you climb steadily up and over the edges of the alpine desert to your first high altitude at Lava Tower (4630m / 15190ft). The purpose is acclimatization, and it also serves as a body-and-breath check: how steady are your breathing and pace when the air thins?
After Lava Tower, you begin a steep descent anti-clockwise around Kibo into Barranco Valley. This is where the route gives you variety. You’re still high, but the terrain shifts, and the scenery includes mountain cacti—specifically the flowering Kilimanjaro Senecios (not something you’ll see back home).
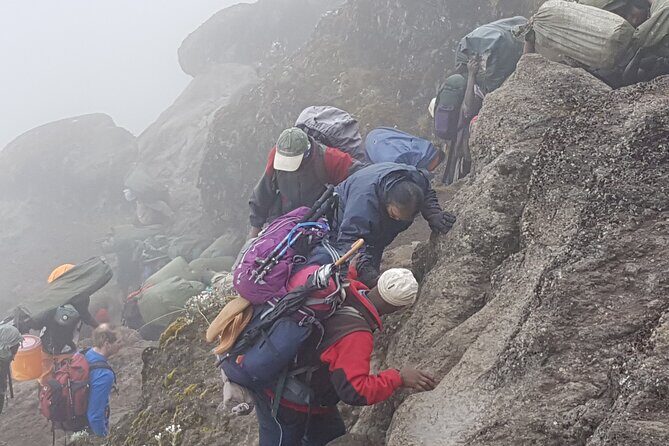
Day 5 is the highlight if you love that “I’m actually climbing something” feeling. You ascend the Barranco wall, which is described as an impressive non-technical scramble using hands and legs, and rewarded with views back toward camp and the Heim glacier on the peak. You don’t need advanced equipment, but you do need comfort with uneven steps and using your upper body for balance.
Then the day continues through alpine desert, winding around the mountain toward Karanga valley, where you descend and then climb back up to camp. Karanga is noted as the last water point, so it’s a practical day to stay intentional about hydration and pacing.
Karanga to Summit Camp: Quiet Alpine Steps and the Mawenzi Peek
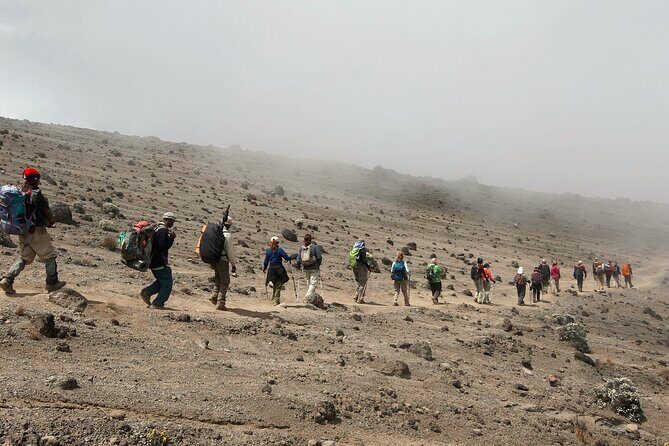
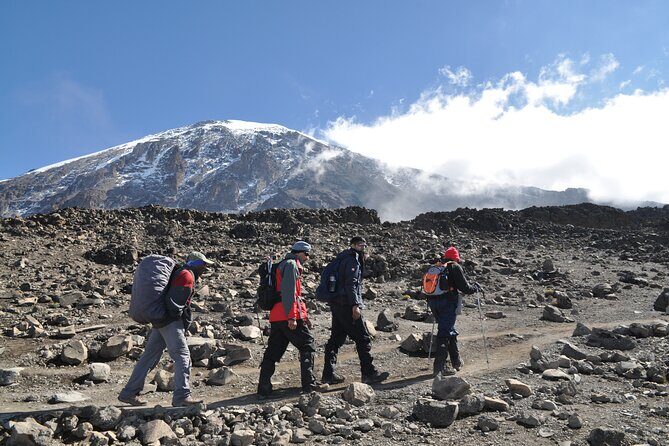
Day 6 is described as almost casual, and I’d treat it as such in the best way. You move through empty alpine desert with a slow pace, even if the path isn’t extremely steep. The goal is to keep effort manageable while you move closer to the summit zone.
This is also where the mountain starts “revealing itself” more. As you approach Kibo, you may finally glimpse Mawenzi (Kilimanjaro’s second peak) to the east. Even if you catch it for only a moment between ridgelines, that view is often a mental boost: you’re not just heading up, you’re also seeing the whole structure of the volcano.
You finish with time at summit camp to rest and prepare for the summit attempt. That rest time matters because the next day is not a hike you can rush.
Summit Night to Uhuru Peak: Stella Point, Loose Scree, and a Long Descent
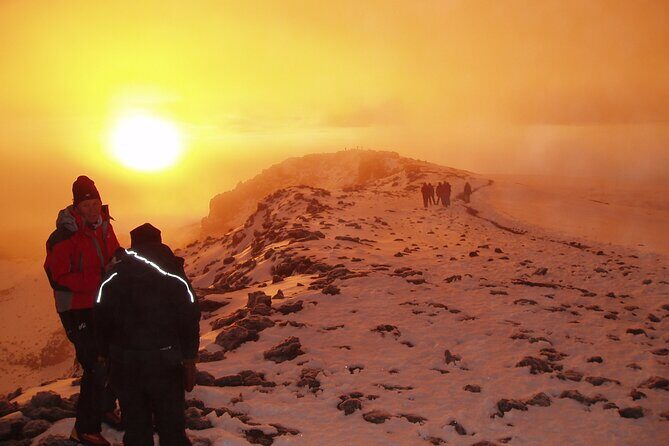
On Day 7 you begin your final ascent to Uhuru Peak early, around 00:00. This climb takes you through the arctic zone, and it’s described as a steep hike over loose volcanic scree in cold darkness. Expect a slow zig-zag pattern as you work your way upward.
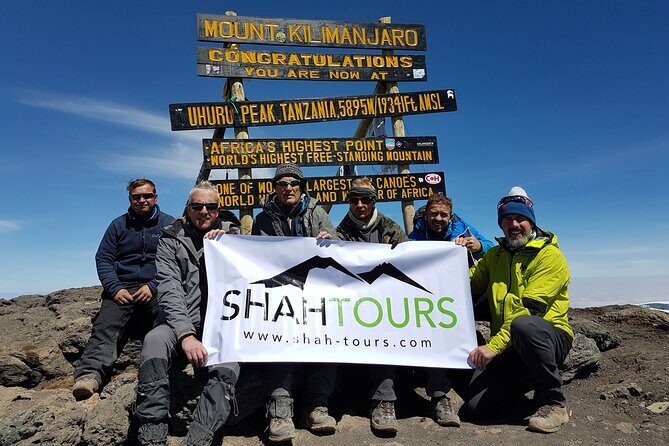
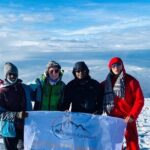
The first major marker is Stella Point (5685m / 18650ft). From there, you still have a short but difficult stretch to reach Uhuru Peak (5895m / 19341ft), the highest point in Africa. Because altitude hits hard at these levels, you usually don’t spend long at the summit due to how quickly your body gets overwhelmed.
Then comes the part many people underestimate: you descend back down to the base camp for breakfast/brunch, then continue the descent through the alpine desert. The day is listed as extremely long (around 18 hours), and that’s the honest rhythm of a summit day on Kilimanjaro.
Practical tip: on summit night, pace is everything. Loose scree makes it easy to overstride and burn energy. Your goal is controlled steps and steady breathing, not speed.
Day 8 Down to Mweka Gate: Forest Descent and the End Feeling
Your final day is a descent through the southern rain forest until Mweka gate. This is a mood shift. After arctic-zone darkness and scree climbing, forest sounds and plant textures feel almost unreal—like you’re coming down from a different world.
At the gate, a vehicle is waiting to take you back to Moshi town. The crew typically leaves you at Mweka gate, which gives you a natural moment to say goodbye. If you’ve built relationships over the week, that last handover is often the emotional punctuation mark.
Camp Life, Food, and the Crew System You’re Paying For

On paper, Kilimanjaro trekking companies can look similar. In real life, the difference is in the “how do you survive the day” details.
Here, you get full expedition support. There’s a specialist tent crew to service and set up campsites, plus four-season tents (with sharing rules described by even/odd number of travelers). You’ll also get basic 1-inch foam sleeping mattresses, and a dining setup with chairs and tables.
For hygiene, there’s a hand washing station and a small personal wash basin at campsites. Toilets are noted as shared public toilet facilities at campsites, which is normal for the mountain, but it’s still good to know what the reality is before you picture it differently.
Food is included every day on the mountain: breakfast (7), lunch (7), and dinner (7), along with eating utensils and tableware. The best thing about that is not just the meals—it’s the predictability. When you’re hiking at altitude, you want food at set times and you don’t want to think about cooking or cleaning.
Drinking water is handled in a specific way. You get boiled drinking water on trek from the first camp onwards, and water on Day 1 is noted as not included. There’s also a clear note that soft plastics are not permitted on the mountain, and metal/hard plastic water bottles are also flagged—so plan to follow the provided water system rather than guessing with your own bottle habits.
Now for the human factor: the strongest praise shows up again and again for guides and crew. Names that came up include Mathayo, Calvin, Hamza, Isaac, John, Joshua, and assistants like David. The repeated themes are calm reassurance, patience, and strong safety culture—plus cooking and food quality that people remembered. I’d take that seriously. On summit night, the guide’s tone matters as much as the trail.
Medical Checks and Oxygen: Not Glamorous, But It’s the Point
This trip includes serious health and safety support. You get twice daily health checks with guides and a high-grade medical oximeter. There’s also 1 emergency oxygen cylinder per 5 passengers and a first aid kit.
I like that the plan is proactive rather than reactive. Altitude issues often start as small changes, and the earlier you spot them, the better your odds. This isn’t about fear. It’s about making smart decisions while you still have options.
Also included: a Pre-climb briefing / equipment check in Moshi. That’s where a good guide team can catch common mistakes before they turn into problems at 4800m and beyond.
Price and What $3,125 Really Covers
At $3,125 per person, this is not a bargain. But it’s also not just a bare-bones hike fee. What you’re paying for is the entire expedition machine: park entry and conservation/rescue fees, camping and camping operations, trained guide teams, tent crew, cook and waiter, meals, and equipment like mattresses and dining infrastructure.
You also get included transfers—from Moshi to park gates and back—plus crew transportation to remote gates. A luggage porter system is included as well: one porter carrying up to 15kg per person of personal luggage. That’s a big quality-of-life factor when you’re tired, and it helps you keep your own load realistic.
The main things not included are the usual add-ons: tips, beverages, international flights, visas, insurance, and pre/post climb accommodation. If you’re budgeting, treat those as essential parts of the trip, not leftovers. The biggest risk of “cheap” Kilimanjaro math is forgetting that you still need travel insurance and spending money even when the mountain costs are covered.
Who This Climb Fits Best (and Who Should Rethink It)
This tour is for people with strong physical fitness and comfort hiking at altitude for days. It’s also not recommended if you have lung problems or other known conditions related to altitude.
Route-wise, it suits hikers who want a non-technical climb but still want meaningful challenge. The Barranco wall scramble means you should be ready to use hands for balance and take uneven terrain seriously. If you only want smooth walking with no exposure to scrambling, this route may feel a bit too adventurous.
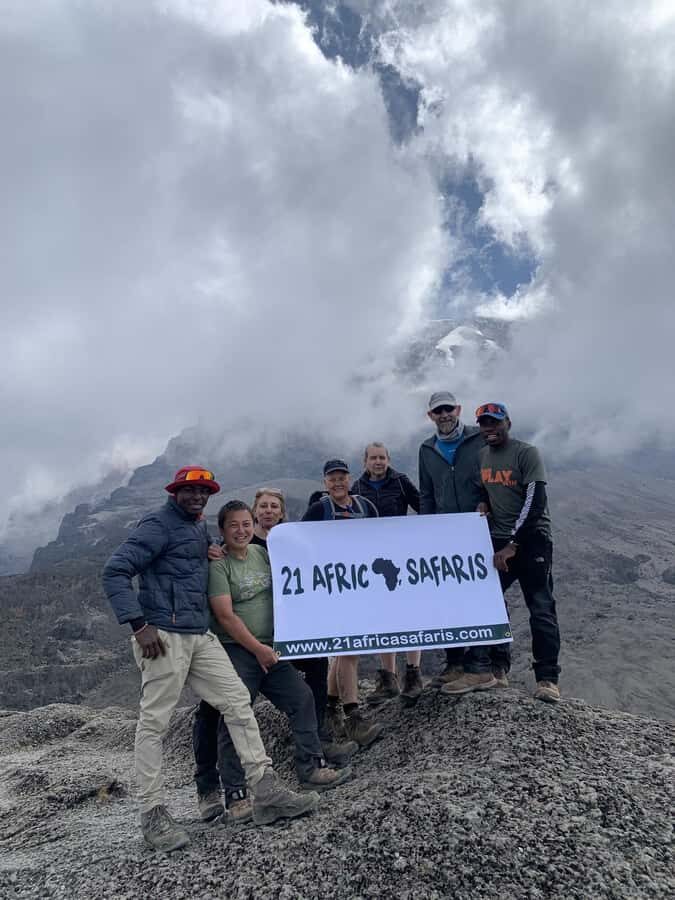
Final Call: Should You Book This 8-Day Lemosho Climb?
Book it if you want a route that feels like a real climb, but still stays non-technical overall. The pacing advantages—forest start, Shira ridge days, Lava Tower acclimatization, then a deliberate summit build-up—are exactly what many climbers need to stack the odds in their favor.
I’d think twice if you’re worried about cold, darkness, or long exertion. Summit night is not short, and the terrain is loose scree at extreme altitude. Also, make sure you’re ready for the practical side: no typical bottled-water habits on the mountain, and you’ll need your own personal gear like sleeping bag and walking poles if you use them (not listed as included).
If your priority is a well-run expedition with a guide team that people consistently describe as calm, caring, and safety-focused, this one has strong momentum behind it.
FAQ
How long is the Kilimanjaro climb on the Lemosho route?
The trek runs about 8 days.
Where do you meet and what time does the trip start?
You meet at Shah Tours in Moshi, and the start time is 9:00am.
Is this route technical, or can I do it without special climbing equipment?
It’s described as non-technical camping overall, with an important scrambling section at the Barranco wall that uses hands and legs, but it does not require special equipment.
What’s included in the price?
Your price includes park entry and conservation/rescue fees, trained English-speaking mountain guides, tent crew and camping setup, a porter system (15kg per person), meals on the mountain, and medical support such as health checks and emergency oxygen provisions.
Are transfers from Moshi included?
Yes. There are transfers from Moshi to park gates and back from park gates to Moshi.
What are the key high-altitude points on the route?
You’ll reach Lava Tower (4630m) for acclimatization, pass Stella Point (5685m) on summit night, and climb to Uhuru Peak (5895m). You can also do an optional hike to Shira Cathedral (3880m).
Who should not book this trek?
It’s not recommended for travelers with lung problems or other known altitude-related medical conditions. You should have a strong physical fitness level.
Final Thoughts Before You Say Yes
If you’re ready for a serious but well-managed trekking plan, the 8-day Lemosho route is a strong choice. The combination of remote start, built-in acclimatization, and the Barranco scramble gives you both scenery and that real mountain feeling, while the included medical checks and oxygen planning add a layer of confidence.