REVIEW · ARUSHA
7 days Lemosho route
Book on Viator →Operated by Wild Root Safaris and Adventures · Bookable on Viator
Kilimanjaro on the Lemosho side feels thoughtful and wild at once. I like the low-traffic start and the gradual acclimatization rhythm built into the daily climbs. I also love how the route gives you big visual payoffs without turning every day into a death march. The main consideration is that nights get brutally cold at exposed camps, and the summit push starts around 23:30, so you’ll need grit and good planning.
This is a private climb for up to 2 people, with pickup and a full crew of guides, porters, and chef support. I like that your team handles logistics day-by-day, including registration with TANAPA and campsite setup, so you can focus on pacing, breathing, and taking in the views. Just know the itinerary is demanding at altitude, and you should come in with a solid fitness baseline and flexible expectations about how your body will feel.
If you want a classic Kilimanjaro route that leans into scenery and success-rate friendly acclimatization, Lemosho is one of the smartest ways to do it from Arusha.
In This Review
- Key points to know before you book
- Why the Lemosho plan tends to work (and feel calmer)
- Arusha arrival and the day your gear gets serious
- Londorossi Gate: rainforest legs and a proper TANAPA handoff
- Shira 2 Camp: from lush rainforest to cold moorland at 3,840m
- Lava Tower and Barranco: a scenery-heavy altitude wake-up call
- Great Barranco Wall: the acclimatization day that still bites
- Barafu Camp and the last water reality
- Summit day from 23:30: Stella Point at sunrise to Uhuru Peak
- Mweka Gate finish: certificates, dancing, and the final walking hours
- Price and what you really get for $6,300 (up to 2 people)
- Who should choose this Lemosho climb
- Practical tips that make a real difference
- Should you book the 7-day Lemosho route with Wild Root Safaris?
- FAQ
- How long is the Kilimanjaro Lemosho experience?
- Where does the trip start and end?
- Is pickup included?
- What’s included in the price?
- What is not included?
- Can I rent gear if I’m missing something?
- What fitness level do I need?
- Is this a private tour?
- What happens if weather is bad?
- Cancellation: can I get a full refund?
Key points to know before you book
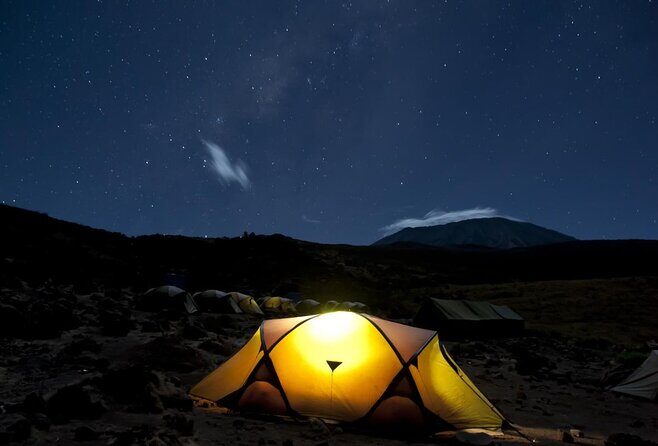
- West-side Lemosho intro: long drive to Londorossi Gate, then rainforest into moorland
- Shira 2 Camp views: close-up scenery plus a cold night at 3,840m
- Lava Tower day: semi-desert trekking, optional tower climb if conditions allow
- Great Barranco Wall: an acclimatization day with a satisfying scramble and glacier views
- Barafu ridge reality check: wind, rocks, and the last accessible water stop
- Summit timing: wake around 23:30, then Stella Point at sunrise and Uhuru Peak
Why the Lemosho plan tends to work (and feel calmer)
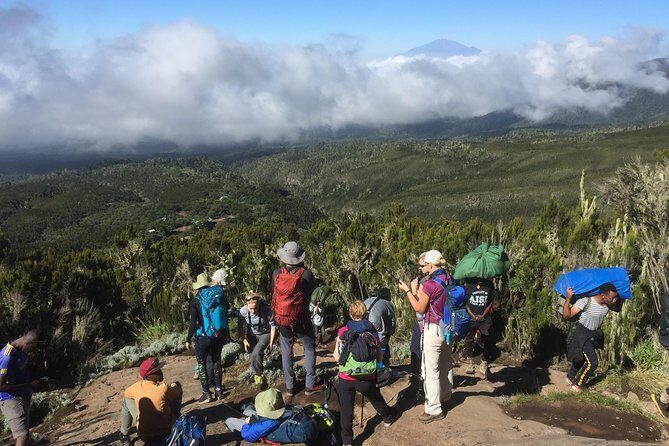
The Lemosho route is built around time at height. You start on the west side, work through rainforest and moorland, and only later transition into the steeper alpine stages. That matters because Kilimanjaro isn’t just about distance; it’s about how your body handles altitude stress.
I like that this route spends multiple days walking at a sensible pace, with an actual acclimatization day built into the calendar. You’re not simply “going up every single day.” Instead, you climb, rest, climb again, and use terrain shifts to your advantage. That’s a big part of why Lemosho is often recommended for better summit odds.
Also, it’s a quieter route. The lower traffic feel tends to mean less crowd pressure in the emotional moments, especially around camp life and summit morning. You still need to be mentally tough, but it’s not crowded-funnel tough.
A few more Arusha tours and experiences worth a look
Arusha arrival and the day your gear gets serious
Your trip starts in Arusha with pickup from Kilimanjaro International Airport and a transfer to your lodge. After you meet your guide, there’s an equipment check. This is one of those unglamorous steps that can make or break comfort later.
If something is missing, your team can rent it on this day. That’s a practical advantage because you’re not scrambling at the last minute on the mountain. You get a real chance to ask questions while you’re still in normal air and normal routines.
Your overnight here is at Arusha Planet lodge, giving you a simple base before the drive to Londorossi. I’d treat this day like a warm-up for your whole mindset: organize your layers, charge devices, and keep your expectations realistic. You’re about to spend hours at altitude, and good prep is easier on the ground.
Londorossi Gate: rainforest legs and a proper TANAPA handoff
Day 2 begins with a drive from Arusha to Londorossi Park Gate, climbing from about 1,400m to 2,100m. The drive is about two hours, but the last 45 minutes are on a bumpy forest track that needs 4WD. Translation: expect a jolty ride, not a smooth city transfer.
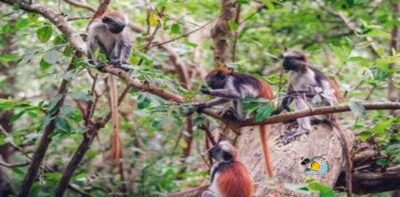
Near the gate, you’ll eat a packed lunch and you can buy mineral water. Then guides and porters register with Tanzania National Parks Authority (TANAPA), and you start your hike into the rainforest. This is a great day to observe wildlife and slow down mentally. Colobus monkeys are specifically something to look out for on the route.
The hike time is listed as about three hours. That’s the right first “real trekking” block: enough to wake your legs up, not enough to wreck you before acclimatization has even started.
Shira 2 Camp: from lush rainforest to cold moorland at 3,840m
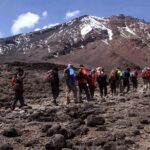
Day 3 is your transition day. After an early breakfast, you head out from rainforest and into moorland/heather zones, with stream crossings and plateau walking that ultimately leads to Shira 2 Camp at about 3,840m.
You’re in a different world here. You’ll trade thick greenery for open, colder air. At Shira 2, the views are a standout: you get an impressive look toward the Western Breach and glaciers to the east. It’s one of those moments where you understand why people keep coming back.
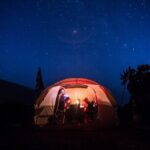
Camp setup happens before you arrive, and porters prepare drinking and washing water. Then you settle in for the cold. The route notes that temperatures can drop below freezing at this exposed camp, so plan on real cold rather than “lightly chilly.”
Evening rhythm matters. Snacks and dinner are part of the day plan, but your priority should be sleep and warmth. Summit success is built in hours you’ll barely remember later.
Lava Tower and Barranco: a scenery-heavy altitude wake-up call
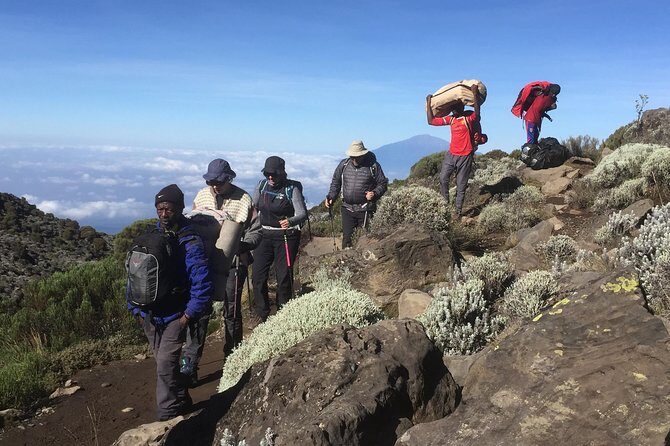
Day 4 shifts you into semi-desert and rocky terrain. After breakfast you walk for around five hours to reach Lava Tower at about 4,630m. Lunch is served there, and you have the option of climbing Lava Tower if weather permits.
This is also where altitude often starts to show up as a physical reality: headaches, shortness of breath, and that odd feeling of moving slower than your brain wants to. The itinerary openly flags that point, which I appreciate. It’s better to expect it than to panic when it arrives.
After lunch, you descend to Barranco Campsite around 3,950m. Descending is not failure here. It’s a smart tool. Your body gets a bit of relief while you keep momentum. This day is a good reminder that on Kilimanjaro, you’re not only climbing; you’re managing stress.
Great Barranco Wall: the acclimatization day that still bites
Day 5 is shorter on paper—about 4 to 5 hours, roughly 5 kilometers—and it’s meant for acclimatization. But don’t let that fool you. The highlight is the Great Barranco Wall, described as a Class 2 scramble.
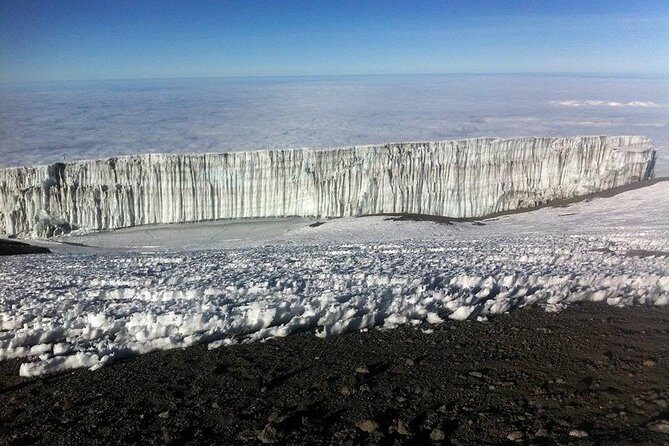
You’ll climb, get a big view (including Heim Glacier), and you may feel like you’re higher than you thought because you’ll likely be above clouds. That’s a great feeling if you’re mentally tuned in. It’s also a reminder to move carefully. Scrambles reward sure-footed hikers and punish rushing.
After the wall, the trail winds up and down in the Karanga Valley. You spend the night at Karanga Camp at about 3,950m. Dinner and washing happen at the camp, and this day tends to be a confidence builder: you prove you can handle technical terrain at altitude while still pacing for the next stages.
Barafu Camp and the last water reality
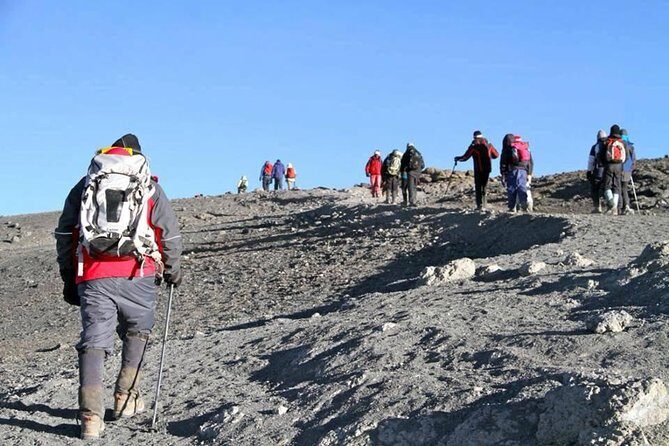
Day 6 is one of the most important “logistics check” days in the itinerary. You start with an early breakfast and hike around 2 to 3 hours, about 4 kilometers, ascending toward Barafu Hut and then Barafu Camp at about 4,550m.
The route intersects the Mweka Route (the trail used later for descent). This is one of those moments where the map starts to make sense: you’re positioning yourself for the final act.
You’ll reach Barafu Hut after about an hour, and this is the key water point. The plan states it’s the last water stop for porters because there is no accessible water at Barafu Camp. That detail matters. It means your team is planning around scarcity, and your comfort later in the evening depends on what you do earlier.
Barafu Camp is on a rocky, exposed ridge. Wind is expected, and tents can feel more chaotic than earlier, quieter camps. The itinerary specifically advises you to familiarize yourself with the campsite before dark. Take that seriously. In cold, windy darkness, finding your way to your tent and doing small tasks takes way more effort than it does on a sunny morning.
Early dinner comes before rest. This isn’t the day to stay upbeat just because you’re excited. This is the day to treat sleep like gear.
Summit day from 23:30: Stella Point at sunrise to Uhuru Peak
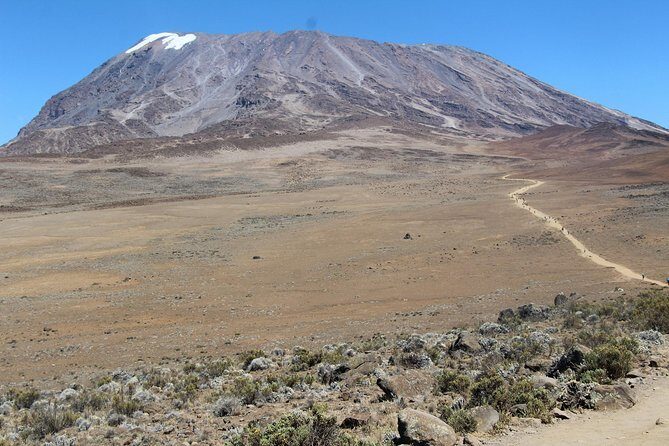
Day 7 is the big one. You’re woken around 23:30 with tea and biscuits, then you begin the summit attempt. The route heads northwest over stone scree and toward higher, snow-covered sections.
The itinerary frames this as the most mentally and physically challenging part of the climb, and the details support that. You’ll face a long uphill grind, not just a short “hero moment.” Many hikers find that the early climb over stone is where the mind starts bargaining.
In about 6 hours you reach Stella Point at 5,685m, located on the crater rim. This is where sunrise happens—an unforgettable payoff—and it’s also where the day splits into “almost there” energy and “keep moving” endurance.
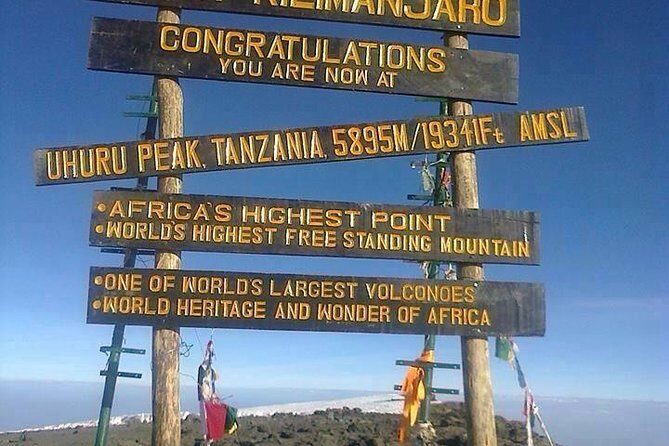
After enjoying the sunrise at Stella, you continue ascending for about 2 more hours on snow-covered trail to Uhuru Peak at 5,895m.
Then you descend. The plan lists about 7 to 8 hours to get down to Mweka. Expect the descent to feel long and tiring even if your summit moment was euphoric. On Kilimanjaro, your legs do the hard work twice.
Mweka Gate finish: certificates, dancing, and the final walking hours
Day 8 starts with breakfast, then your staff throws a celebration with dancing and singing. This is also the moment you present tips to your guide, assistant guides, chef(s), and porters. It’s worth paying attention to this part. Those tip moments are part of the culture of a staffed climb.
After the celebration, you descend for about three hours to Mweka Gate. The final paperwork includes signing your name to receive certificates of completion. There’s also a reward system based on elevation reached: a green certificate if you reached Stella Point, and a gold certificate for reaching Uhuru Peak.
After certificates, you continue descending into Mweka village for about 1 hour over roughly 3 kilometers. You’ll feel it in your calves. But it’s also the point where the whole trek finally feels “complete,” not just “still going.”
Price and what you really get for $6,300 (up to 2 people)
This costs $6,300 per group for up to 2 people. For some budgets, that sounds steep. But here’s why it can be value-heavy: your price includes the core Kilimanjaro machinery—park fees, camping gear, guides and porters, and transportation—plus meals (breakfast seven times, lunch seven times, and dinner six times).
Private groups also reduce friction. It’s not a shared scramble for pace control or restroom timing. You get the crew’s attention tailored to your group size, which can matter on summit day when communication and pacing are everything.
What’s not included is also clearly listed:
- visa
- flights
- trekking gears
That last point is the one to plan for. If you’re short on gear, the itinerary says missing items can be rented on day 1 during your equipment check, which can save you from bad decisions later. Still, I’d try to bring your own core comfort items when you can, because rental gear quality can vary.
If you compare this to a budget climb model where you cover many costs separately, the “all-in” meals and crew support are where the price justifies itself.
Who should choose this Lemosho climb
This trip calls for moderate physical fitness, and that’s fair. You don’t need to be a mountain athlete, but you do need to handle sustained walking at altitude and accept slow, deliberate pacing—especially on summit morning.
You’ll likely enjoy this route most if you:
- want scenery and not just a summit checkbox
- appreciate a structured acclimatization plan
- prefer a private group setup for smoother camp life
It’s also a good fit if you value crew coordination. In feedback, people praised smooth running between guides and porters, plus the way the team’s presence stays coordinated rather than chaotic. Specific crew names came up in feedback, including Mathew (planning/arrangements) and Lucia (lead guide). Those names may not be your exact crew, but they reflect the kind of experienced staff that shows up for this route style.
Practical tips that make a real difference
Start thinking like a mountaineer early. A few details from the route matter more than you might expect:
- Plan for cold: Shira 2 Camp is described as cold enough to drop below freezing, and Barafu is exposed and windy. Pack warmth accordingly.
- Treat water like a schedule: At Barafu, porters’ last water access is noted because there’s no accessible water at Barafu Camp. You’ll want to be ready for that reality during the ascent phase.
- Handle Barafu before dark: The itinerary suggests getting familiar with your campsite in daylight. When the wind rises, that earlier minute saves energy.
- Accept the long summit day: The schedule is heavy—wake around 23:30, Stella at sunrise, then a long descent. Bring patience more than motivation.
- Use your senses on transition days: Lava Tower and Barranco terrain can change how you breathe. Focus on steady steps, not speed.
For electronics and documents, keep them organized in your daypack. Camp transfers and early starts make it easy to lose small items. Keep a simple system.
Should you book the 7-day Lemosho route with Wild Root Safaris?
I’d book it if you want a Kilimanjaro route that balances scenery with an acclimatization-friendly pace, and you like the idea of a private climb for up to 2 people. The included support—guides, porters, camping gear, meals, and transportation—removes a lot of stress from your planning, especially if you’re not sure which gear you’ll actually need.
Skip this one—or at least ask lots of questions—if cold nights and the late summit wake-up would stress you out more than help you. Also be ready for the reality that altitude can feel rough even when everything is going correctly.
If your goal is a thoughtful Lemosho experience with a well-run crew and a clear path to the summit attempt, this is a strong option to seriously consider.
FAQ
How long is the Kilimanjaro Lemosho experience?
The itinerary runs for about 8 days approximately, with a 7-day Lemosho route structure and a return descent back to the meeting point.
Where does the trip start and end?
It starts at Arusha, Tanzania (meeting point listed as Arusha Tanzania JM7M+65W) at 8:00 am, and it ends back at the meeting point.
Is pickup included?
Pickup is offered, and Day 1 includes transfer from Kilimanjaro International Airport to your Arusha lodge.
What’s included in the price?
Included items are fees (admission, camping gear, guides, porters, transportation), meals (breakfast 7 times, lunch 7 times, dinner 6 times).
What is not included?
Visa and flights are not included, and trekking gear is not included in the package.
Can I rent gear if I’m missing something?
Yes. On the first day, there’s an equipment check with your guide, and missing gear can be rented on that day.
What fitness level do I need?
The experience notes that travelers should have a moderate physical fitness level.
Is this a private tour?
Yes. It’s described as a private tour/activity, and only your group will participate.
What happens if weather is bad?
This experience requires good weather. If it’s canceled due to poor weather, you’ll be offered a different date or a full refund.
Cancellation: can I get a full refund?
Yes. You can cancel up to 24 hours in advance of the experience for a full refund, and cut-off times are based on local time.