REVIEW · MOSHI
7-Day Kilimanjaro Climbing Via Machame Route
Book on Viator →Operated by Spirit of Kilimanjaro · Bookable on Viator
Kilimanjaro’s Machame route packs in variety. This 7-day climb on the southern slope is often called the Whiskey Route, and it takes you from tropical rainforest up through moorlands and alpine deserts toward Uhuru Peak, with camps placed to help you acclimatize smoothly. On day 3, the Machame line meets hikers from other routes at Barranco, so the trek keeps building momentum without feeling like a repeat of the same scenery.
What I really like is the way the plan supports your body and your head. The camps are positioned for a gradual adjustment, and the itinerary includes a proper summit-day rhythm: a late start, slow progress, and a sunrise payoff. I also like the human side of this operator’s setup—reviews repeatedly highlight a team approach with guides such as William, Rama, David, Zach, Donovan, Joseph, and cooks like Hussein, plus steady attention to safety, comfort, and good food.
The main consideration is simple: this is a long, high-altitude effort. You’ll be waking for a midnight summit push, so if you hate cold, darkness, and broken sleep, you’ll feel it during the climb.
In This Review
- Key things to know before you climb the Whiskey Route
- Machame Route, aka the Whiskey Route
- What $2,565 covers (and how to judge value)
- Altitude and acclimatization: why this 7-day rhythm matters
- Team support you’ll feel (names that matter)
- Day 1: Machame Gate to Machame Camp through rainforest
- Day 2: Shira 2 Camp and the move into moorland
- Day 3: Shira 2 to Barranco Camp, with Lava Tower lunch
- Day 4: Barranco to Karanga Camp and the Barranco Wall crossing
- Day 5: Karanga to Barafu, the pre-summit grind
- Day 6: The midnight summit to Uhuru Peak, then Stella Point down
- Day 7: Mweka Gate, the register, certificate, and back to Moshi
- Meals, comfort, and what “included” actually means at altitude
- Weather, cold, and the stuff you should plan for
- Best fit: who this Machame plan suits
- Should you book this 7-day Machame route with Spirit of Kilimanjaro?
- FAQ
- How long is the Machame route climb?
- Where does the climb start and end?
- What’s the summit plan and when do you start the final climb?
- What’s included in the price?
- What is not included?
- Is the Barranco Wall crossing technical?
- What physical level do you need?
Key things to know before you climb the Whiskey Route
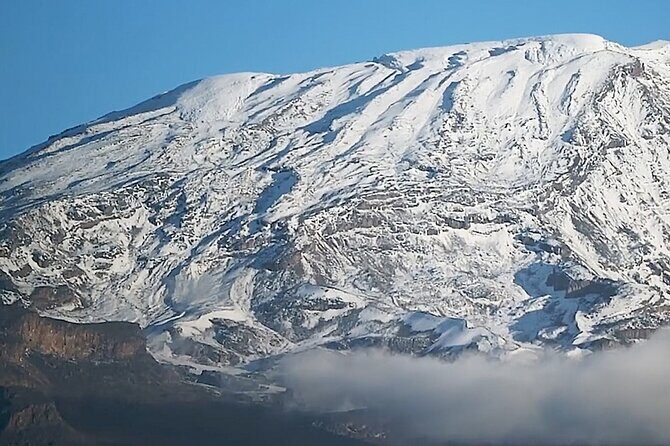
- A route with real zone-changes: rainforest to moorland to summit desert, so your day-to-day trekking doesn’t feel monotone
- Great Breach Wall views from Barranco Camp: you get major payoff time in a place that many people remember most
- Barranco Wall is doable with guidance: it’s described as non-technical, but still a “work day” crossing
- Summit night starts cold and early: you’ll sleep around 7 pm, then move out around 11 pm for the climb
- Meals are covered: breakfast 7 days, lunch 7 days, dinner 6 days, which matters when you’re burning calories
- A crew that stays present: multiple named guides and porters in reviews emphasize support from start to finish
Machame Route, aka the Whiskey Route
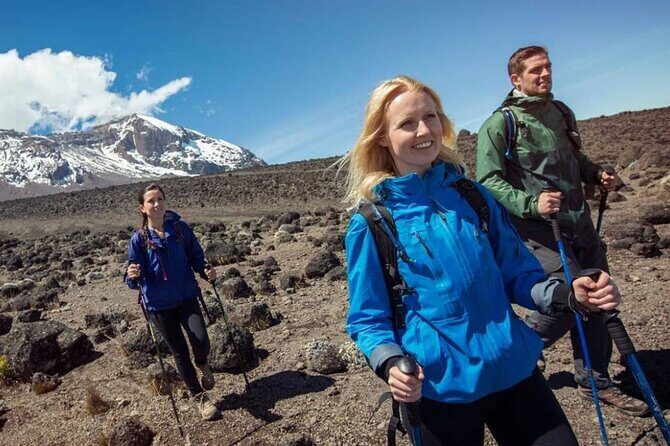
Machame is one of Kilimanjaro’s classic routes for a reason: it’s varied. You start in the tropical rainforest zone, then move into thinner air and different vegetation as you climb. The Machame Route is also nicknamed the Whiskey Route, and the name fits the vibe—this path can feel like a slow burn all day, then suddenly intense when you’re near the top.
What makes it more than just a “different trail” is the way the camps are positioned. They’re built to support a gradual acclimatization transition rather than pushing you too fast. And on day 3, the Machame route converges with hikers on Lemosho and Umbwe at Barranco Camp, so you’re not trekking into emptiness for days on end.
You’ll feel the route as a sequence of mini-adventures: forest walking early on, then more exposed terrain, then a sharper “this is getting serious” phase around Barranco and the higher camps.
A few more Moshi tours and experiences worth a look
What $2,565 covers (and how to judge value)
At $2,565 per person, this isn’t a bargain-bin climb. But Kilimanjaro is expensive for real-world reasons: permits, a multi-person climbing support team, layers of logistics, and the fact that you’re moving through remote zones where everything costs more.
From what’s included:
- Meals: breakfast every day (7), lunch every day (7), and dinner for 6 days
- Admission tickets: included on day 1 and again on day 7 (linked to gate/park formalities)
- Pickup offered (from Moshi/hotel-side)
- You’ll get the official administrative steps near the end, including the park register entry and certificate from the head guide
What’s not included:
- Visa and international flights
So here’s how I’d weigh the value: if you want a climb where your energy goes into walking (not guessing, hustling, and stress-buying essentials), paying for a solid team and included meals is part of the cost. The price feels more reasonable when you consider that summit night is physically demanding enough without adding extra uncertainty.
Altitude and acclimatization: why this 7-day rhythm matters
Even if you’re fit, Kilimanjaro punishes anything that moves too fast. The Machame plan uses a higher-start approach (you begin by leaving the gate into rainforest, then climb into higher zones day by day). The big goal is not “go hard.” The goal is to let your body adjust as altitude rises.
The itinerary also includes enough “change of scenery” that your mind stays engaged, while your body keeps getting time to react. And for many people, choosing the full 7 days (not just six) is a key decision because acclimatization has more room to happen.
Also, remember this: the climb is not technical in the usual mountaineering sense. It’s a trekking challenge. Your success depends on pacing, hydration, and how well you handle cold and fatigue.
Team support you’ll feel (names that matter)
A lot of Kilimanjaro operators say they have a great team. This one earns the praise through consistency: reviews highlight safety, communication before and during the hike, and guides who keep helping you stay comfortable.
Names that show up again and again in feedback include:
- William as a guide in multiple experiences
- Rama, David, Zach, Donovan, and Joseph as guides mentioned directly
- Izadini and Paul in private-tour context
- Hussein, specifically as a cook mentioned for good meals
Even if you never meet all of these people, the pattern is clear: you’re not just buying access to a trail. You’re getting a working crew that’s expected to stay responsive day after day, including during the summit approach.
Day 1: Machame Gate to Machame Camp through rainforest
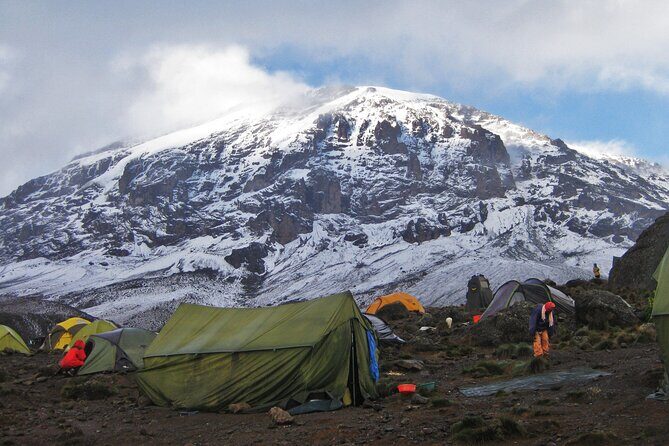
Your climb starts at Machame Gate at about 5,718 ft / 1,748 m, then you trek to Machame Camp at about 9,350 ft / 2,850 m. The walking time is roughly 5–7 hours, and it’s in the Tropical Rainforest Zone.
This day matters because it sets your pace. Rainforest also means you’ll likely deal with humidity and uneven footing, so it’s less about speed and more about controlled breathing and steady steps. Starting in greenery also makes the first altitude push feel less severe than beginning in bare rock.
If you’re nervous about altitude, Day 1 is a good confidence-builder. You’re climbing hard enough to get moving, but not yet at the point where everything becomes a fight against the air.
Overnight at Machame Camp is included, and you’ll be back to meals and camp routines that help you recover for the next day.
Day 2: Shira 2 Camp and the move into moorland
Day 2 goes from Machame Camp (~9,350 ft / 2,850 m) to Shira 2 Camp (~12,621 ft / 3,847 m). Plan on about 8 hours of trekking, and you’ll notice a change right away.
The route leaves the rainforest and enters the Moorland/Heather Zone. Trees thin out. Small plants become more common. To you, that means the walking feels more exposed even if the trail isn’t technically difficult. It’s also the kind of day where weather can change fast, so you’ll want layers you can add without slowing down too much.
This is also a day where you learn how your body handles effort at higher altitude. If you push too hard, you’ll feel it here, not later. So I’d treat Day 2 as your “settle into altitude” test.
Day 3: Shira 2 to Barranco Camp, with Lava Tower lunch
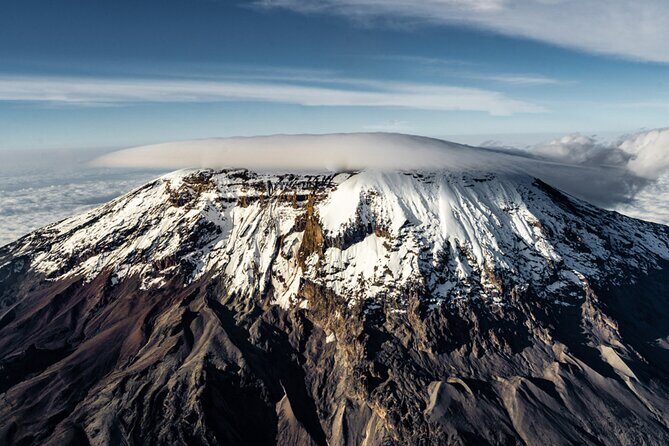
Day 3 starts at Shira 2 (~12,621 ft / 3,847 m) and heads to Barranco Camp (~13,066 ft / 3,983 m). The day is about 8 hours, and it includes a lunch stop near Lava Tower.
What I like about this day is the mix of focus and payoff. You’re trekking through increasingly desolate terrain, and lunch near Lava Tower gives you a moment to reset before the descent to Barranco Camp.
Barranco Camp is also the moment the Machame route converges with Lemosho and Umbwe. In practical terms, that can mean more people around and a more shared energy at camp, which helps if you prefer company.
And then there’s the view. The Great Breach Wall is called out as fantastic from this camp—often better than elsewhere on the mountain. So even if you find the day’s walking tough, you have a strong visual reward waiting when you arrive.
Day 4: Barranco to Karanga Camp and the Barranco Wall crossing
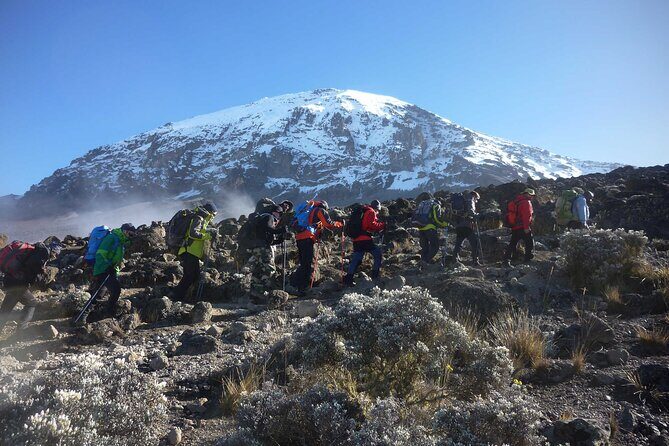
Day 4 climbs from Barranco (~13,066 ft / 3,983 m) to Karanga (~13,106 ft / 3,994 m) in about 4–5 hours. It may look small on paper, but the key feature is crossing Barranco Wall.
The good news: it’s described as not technical, and your guides assist you. So you’re not signing up for scrambling like you might on a rugged alpine peak. Still, it’s a “climb with intent” day. You’ll feel it in your legs and core, especially after a couple of days at altitude.
After that, you rest for the remainder of the day at Karanga Camp. This rest matters because tomorrow pushes you to a higher camp where sleep and recovery become more important than ambition.
Day 5: Karanga to Barafu, the pre-summit grind
Day 5 climbs from Karanga (~13,106 ft / 3,994 m) to Barafu (~15,239 ft / 4,644 m), typically 4–5 hours. Then you rest for the rest of the day.
This is the staging day. The terrain and the air are thinner, and Barafu is where your summit plan becomes real. Expect cold nights, limited comfort, and the need to keep moving your body in small ways without draining your energy.
The schedule also sets you up for a late-summit pattern:
- You’ll sleep around 7 pm
- Then wake around 11 pm for the summit climb
That timing is a big deal. If you’re used to regular sleep, you’ll feel the disruption. On Kilimanjaro, the best strategy is to treat sleep as preparation equipment, not just downtime.
Day 6: The midnight summit to Uhuru Peak, then Stella Point down
Day 6 is the day you came for.
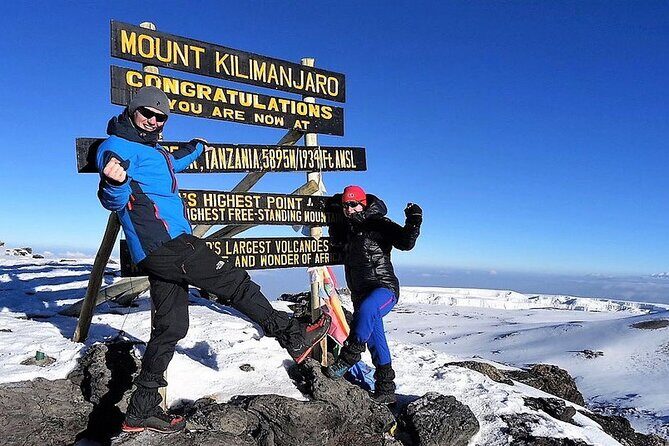
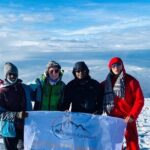
You start your summit trek from Barafu (~15,239 ft / 4,644 m) to Uhuru Peak (~19,341 ft / 5,895 m). The climb takes about 7 hours. You move out after the pre-summit sleep, trekking around midnight, and you reach the summit around sunrise.
This is where pacing really matters. Even if your legs feel okay, the air won’t give you much forgiveness. A steady rhythm and trust in your team’s guidance matters more than matching the fastest walker.
After celebrating at Uhuru Peak, you descend via Stella Point down to Mweka Camp (~10,204 ft / 3,110 m). The descent is long, about 6–8 hours, and it’s in the Moorland/Heather Zone.
That descent is often mentally easier than the summit climb, but physically harder in a different way. Your knees and quads take the hit. So keep your steps controlled and don’t let excitement turn into sloppy footwork.
Day 7: Mweka Gate, the register, certificate, and back to Moshi
Day 7 begins with breakfast at camp, then continues down to Mweka Gate (~5,423 ft / 1,653 m). It takes around 3–4 hours.
At the gate, you’ll:
- sign the Official Kilimanjaro National Park Register
- receive your official Kilimanjaro Certificate presented by the head guide
- get a cold drink as part of the end-of-climb formalities
After that, you head back to your hotel in Moshi. The drive is about 3 hours, and you should arrive in the mid-afternoon around 3 pm, depending on when you leave.
This ending part matters more than people think. Your body will be tired, but the gate formalities give you closure, and the ride back to real beds gives you a clean off-ramp from the mountain.
Meals, comfort, and what “included” actually means at altitude
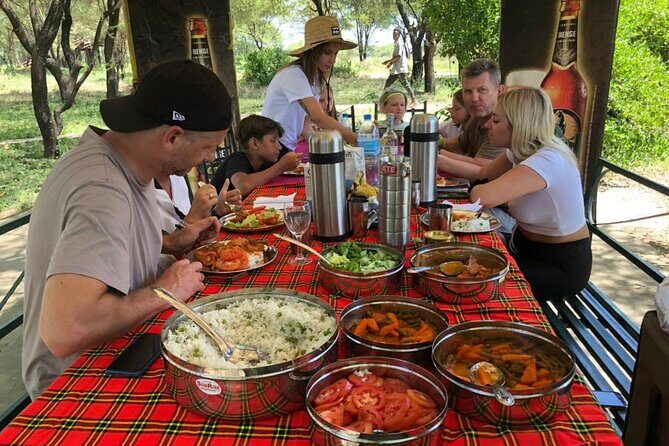
I like that food is built into the plan in a practical way: breakfast every day, lunch every day, and dinner for 6 days. When you’re at altitude, you can’t afford to miss nutrition. It’s not just about taste—it’s about keeping your energy steady for pacing.
Reviews also bring up the cooking side, with Hussein specifically mentioned for good meals. That’s not a guarantee for every day or every group, but it’s a useful sign that camp food isn’t treated like an afterthought.
Comfort is camp-based. You should expect cold nights and simple routines. If you go in expecting a luxury hotel vibe, you’ll be disappointed. If you go in wanting a functional base where you recover and keep moving, you’ll probably be happy.
Weather, cold, and the stuff you should plan for
The trek crosses climate zones fast, even though your days are paced for acclimatization. You’ll likely experience:
- humid, warmer conditions in the rainforest phase
- cooler, windier conditions as you move into higher moorland and desert-like terrain
- cold summit-night conditions, because your body is working in thin air at night
So your layering plan is critical. Bring items you can layer and remove quickly, and expect the summit push to feel colder than you expect.
Also, hydrate and snack consistently. At altitude, appetite can shift. The schedule’s meal structure helps, but you’ll still want to pay attention to how you feel and keep your energy up through the day.
Best fit: who this Machame plan suits
This 7-day Machame climb is a good fit if:
- you have moderate physical fitness and you can handle long walking days
- you want route variety across ecological zones
- you want the summit sunrise experience with a structured plan
- you prefer a crew-based approach with active guides and support
It’s also a solid choice if you like clear milestones: gate to camp day one, rainforest to moorland shift day two, Barranco and Great Breach views day three, then pre-summit staging and the summit push.
If you’re prone to panic in the cold or you struggle with disrupted sleep, take that seriously before booking. The logistics require a willingness to work through the night.
Should you book this 7-day Machame route with Spirit of Kilimanjaro?
If your priority is a classic Kilimanjaro route with real variety, plus a support team that shows up day after day, this is a strong option. I especially like how the plan is built around acclimatization pacing, with the Great Breach Wall view giving you an early morale boost before the harder higher camps.
I’d book if:
- you’re choosing the 7-day version for better acclimatization time
- you want included meals and park-end certificate formalities
- you’re comfortable with the midnight summit schedule
I’d think twice if:
- you know you hate cold, darkness, and broken sleep
- you’re hoping for short days or low-effort hiking (this is not that)
If you’re on the fence, focus on one question: can you walk steadily for hours at altitude and still stay calm during the summit night? If the answer is yes, Machame is one of the most rewarding ways to meet Kilimanjaro on its terms.
FAQ
How long is the Machame route climb?
The tour runs for about 7 days, with the plan including a summit attempt on day 6.
Where does the climb start and end?
It starts at Machame Gate and finishes at Mweka Gate, where you complete the national park register entry and receive an official certificate.
What’s the summit plan and when do you start the final climb?
You wake around 11 pm after sleeping about 7 pm, then begin trekking around midnight. You reach Uhuru Peak around sunrise.
What’s included in the price?
Meals are included (breakfast 7 times, lunch 7 times, dinner 6 times). Admission ticket time is included on day 1 and day 7. Pickup is also offered.
What is not included?
Visa and international flights are not included in the price.
Is the Barranco Wall crossing technical?
The route describes Barranco Wall as not technical, with guides assisting you during the crossing.
What physical level do you need?
You should have a moderate physical fitness level to take part in this experience.