REVIEW · MOSHI
Mt.kilimanjaro-machame Route
Book on Viator →Operated by Trip to Africa (theKili-Guides) · Bookable on Viator
Mt. Kilimanjaro has a way of changing your breathing fast. This 6-day Machame Route is built for the long game: rainforest start, smart acclimatization, then a night push to Uhuru Peak.
What I like most is how much emphasis the operator puts on people, not just the mountain. You’re met early in Moshi, then you trek with a guide and a mountain support crew—exactly the kind of team that makes the difference between a stressful hike and a once-in-a-lifetime trip.
One consideration: you’ll be dealing with altitude (and likely rain in the rainforest), so you need a moderate fitness base and the willingness to go at the pace your guide sets.
In This Review
- Quick Hits: What Makes This Machame Route Special
- Entering Kilimanjaro Through Moshi: The Team Setup Matters
- Machame Day 1 (Machame Gate to Machame Camp): Rainforest Start Energy
- Shira Day 2 (Shira Camp and a Controlled Acclimatization Hike)
- Lava Tower and Barranco Day 3 (The Key High Point)
- Barranco Wall to Karanga Camp Day 4 (Climb It Early, Pace It Smart)
- Barafu Night and Uhuru Peak Day 5 (A Simple Climb That Feels Huge)
- Mweka Day 6 (Relief, Rainforest Air, and a Real Finish)
- Price and Logistics: What $1,743.59 Really Buys
- Packing for This Route: Rain Isn’t a Maybe
- Who This Machame Trip Fits Best (and Who Should Think Twice)
- Should You Book This Machame Route With Trip to Africa (theKili-Guides)?
- FAQ
- How long is the Machame Route trip?
- Where does the trek start and what time do you begin?
- Is pickup included from Moshi?
- Is this tour private?
- Do you receive mobile tickets?
- What are the main camps you’ll stay at?
- What happens on the summit day?
- Do you get time to acclimatize during the hike?
- What fitness level do I need?
- What if weather conditions are bad?
Quick Hits: What Makes This Machame Route Special
- Your guide is central to the plan, including a personal guide monitoring you during the summit ascent.
- Early starts are part of the strategy, especially on Barranco Wall to help avoid other groups.
- Acclimatization is built in, including time around Lava Tower and planned climbs/descents.
- The route mixes rainforest and high-altitude camps, so pack for weather swings.
- It ends with more than a photo: group congratulations, a guestbook moment, and commemorative certificates.
Entering Kilimanjaro Through Moshi: The Team Setup Matters
Starting in Moshi is practical. The guides and mountain support crew come to your hotel in the morning for a quick briefing, then you head to Kilimanjaro National Park’s entrance at Machame Gate (1,800 m).
This “get organized first” approach matters because Kilimanjaro isn’t just legs and lungs. You’ll handle the basics at the gate—climbing permits and registration with search and rescue service—then the trek begins. That early structure helps you settle in before the mountain starts doing what it does best: raising your heart rate and lowering your oxygen.
If you’re the type who likes clear communication, you’ll probably appreciate this team-first style. In past experiences shared by other travelers, guides such as Fred and Nancy and Qamrish and Ayoub are specifically mentioned for being supportive and well organized. I’m not promising the same exact names for your trip—but it’s a good signal that the guiding team is a real priority here.
You can also read our reviews of more tours and experiences in Moshi.
Machame Day 1 (Machame Gate to Machame Camp): Rainforest Start Energy
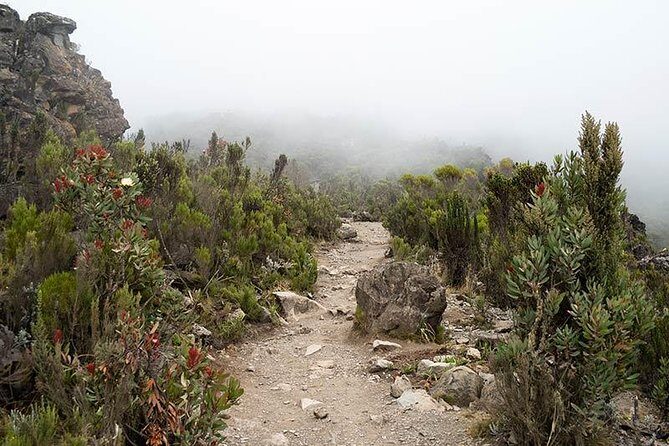
Day 1 is long, and it’s also a mood-setter. You trek from Machame Gate (1,800 m) up to Machame Camp (3,010 m), passing through the rainforest. In plain terms: this is the part where you can get wet even if the sky looks calm when you start.
Expect tropical showers to be possible. Your best move is to pack with that in mind. Plan for spare clothes and raincoats, not just a single set of everything. Wet layers drain heat and comfort fast at altitude, and you’ll feel it later even if Day 1 seems “only” like the warm-up.
You also get your first big reminder of what the Machame Route is about: you’re gaining elevation from the beginning, but you’re not racing. If your guide is doing the job well, you’ll feel steady rather than panicked.
Shira Day 2 (Shira Camp and a Controlled Acclimatization Hike)
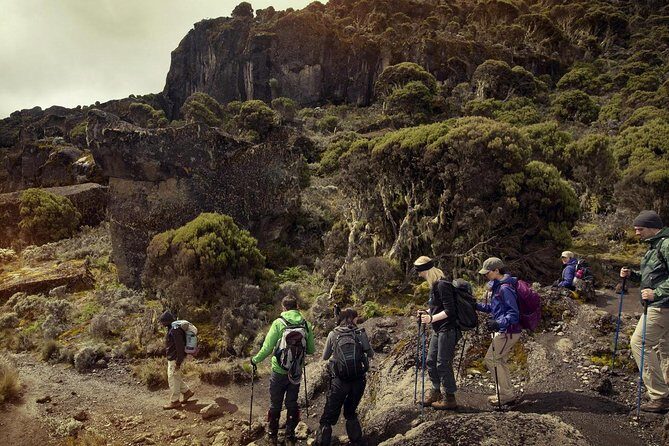
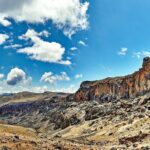
After breakfast, you continue upward to Shira Camp (3,845 m). This is where the trek changes. You move out of the rainforest and you get those first wide views of the Shira Plateau spread out in front of you.
Physically, the walking may not feel like the hardest day on paper, but altitude changes can still sneak up on you. This is the day to take your body’s signals seriously—headache, nausea, unusual fatigue. The route’s value is that it asks you to slow down and listen.
At camp, you’ll have lunch and rest, then you’ll do an acclimatization hike toward Lava Tower Camp, including about a 300-meter gain. After that, you go back down to Shira Camp for a hot dinner.
This pattern—go up, then come down to sleep—is one of Kilimanjaro’s best teaching tools. It helps your body adjust without turning the next day into a survival test.
Lava Tower and Barranco Day 3 (The Key High Point)
Day 3 is built around the route’s most important stepping stone: Lava Tower (4,630 m). You leave Shira Camp (3,845 m), then you hit a section with lots of ups and downs. It can feel rough, and you may feel discomfort from the altitude.
The real point of this day is that you spend at least 1–2 hours in the Lava Tower area to support acclimatization—this is where lunch happens. That waiting time isn’t wasted. It’s the route’s “biology first” moment.
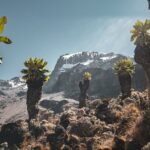
Then you descend to Barranco Camp (3,960 m). And yes, you get a look at the famous Barranco Wall—huge and steep. You’re not climbing it yet, but seeing it in daylight is a useful mental shift. It turns the next day from mystery into a real plan.
Barranco Wall to Karanga Camp Day 4 (Climb It Early, Pace It Smart)
Day 4 starts with an early wake-up and the Barranco Wall summit-style climb. You’ll hike up the gorge wall—about an hour—and after that you get time for photos with Kibo volcano in the background.
Here’s a detail I like: you’re advised to leave camp as early as possible to avoid crowds of other groups. That’s not just about avoiding people. It’s about staying calmer. Less jostling helps you focus on footing and breathing.
After the wall, you tackle a more difficult hike to Karanga Camp. Expect numerous ascents and descents, but the key promise is that the guides choose an optimal pace for the group. If you’ve ever watched someone try to “power through” altitude without a plan, you’ll know why that matters.
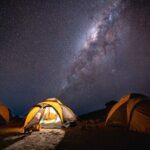
At Karanga, you get a warm lunch, then you continue up to Barafu Camp (4,640 m) for a hot dinner. The rest of the day is about conserving energy. You’re not trying to entertain yourself on Barafu. You’re trying to sleep.
Barafu Night and Uhuru Peak Day 5 (A Simple Climb That Feels Huge)
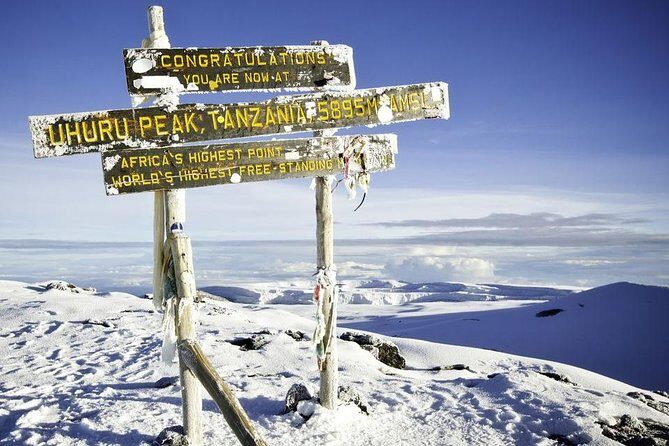
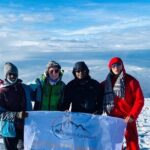
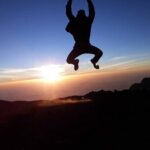
Day 5 is summit night. You depart Barafu Camp (4,640 m) at night for the push to Uhuru Peak (5,895 m).
Technically, the climb is described as relatively simple. The hard part is the altitude, not the scrambling. This is the day where your body becomes the boss.
Each pair of climbers gets a personal guide for the entire ascent. That’s a big deal. It means you’re not just part of a line walking uphill—you’re being monitored for physical and mental conditions throughout the summit push.
After reaching Uhuru Peak, you have the option to descend toward the nearest glacier if you want. Then you go back to Barafu Camp, rest for about two hours, and start the descent down to Millennium Camp (3,820 m).
Even if you feel proud (you will), the smartest summit mindset is to treat the descent as part of the challenge. The mountain takes energy in both directions.
Mweka Day 6 (Relief, Rainforest Air, and a Real Finish)
Day 6 begins in the rainforest. The description of the camp being in the forest hits the point: it’s a different atmosphere after days above the trees.
You wake up feeling the relief of lower altitude. After a warm breakfast, you head for the park exit at Mweka Gate (1,650 m). Once you descend, the group gathers to celebrate your achievement, share opinions in a guestbook, and receive commemorative certificates. Then you transfer back to your hotel.
That certificate moment is surprisingly meaningful. It’s a clear marker that you didn’t just “walk in mountains.” You earned it with a full trek cycle—permits handled, acclimatization respected, summit done, then safely down again.
Price and Logistics: What $1,743.59 Really Buys
At $1,743.59 per person for about 6 days, the main question is value: what are you paying for besides “a bed and a badge”?
Here’s what stands out as value signals in the plan:
- Private experience for your group (not a mixed crowd hopping between travelers).
- Pickup offered from your hotel and transfers at the end.
- Guiding that scales at the right moment, especially the personal guide support during the summit ascent.
- Support crew and daily meals in the rhythm of the trek (hot dinner, warm lunch are specifically part of the plan).
- Park entry and admission tickets listed as free within the itinerary schedule.
- A full route arc from Machame Gate to Mweka Gate, including key acclimatization points.
Is it cheap? No. But Kilimanjaro isn’t a budget checkbox. You’re buying safety-focused pacing, logistics that don’t fall apart when altitude hits, and a team that treats the summit night as serious work.
Packing for This Route: Rain Isn’t a Maybe
This trip explicitly warns you about rainforest weather on Day 1 (and the general need for rain gear). So I’d pack like this:
- Raincoat (plus spare clothes). You’ll be happier if you can change into dry layers.
- Warm layers for higher camps and the summit night temperatures. The plan includes night departure and a high peak, so expect cold.
- Comfortable trekking footwear with real grip. You’ll be doing ascents/descents across multiple days.
- A small strategy for altitude comfort: keep your routine simple and consistent. Don’t add new habits mid-trek.
The best part of matching your packing to the actual route? You won’t spend mental energy worrying whether your clothes are working.
Who This Machame Trip Fits Best (and Who Should Think Twice)
This is best for you if you:
- Want a moderate fitness level trek—challenging, yes, but guided and paced.
- Prefer a private group feel rather than blending into whatever crowd shows up.
- Like the idea of acclimatization being part of the schedule, not something you wing.
Consider thinking twice if:
- You want a leisurely hike. This is a serious altitude itinerary with long trekking days (listed as about 12 hours each day).
- You’re prone to altitude issues and don’t respond well to pace changes. That doesn’t automatically rule you out, but it makes choosing a guide-led plan even more critical.
Should You Book This Machame Route With Trip to Africa (theKili-Guides)?
I’d recommend booking if you want Kilimanjaro to feel planned and human. The biggest strengths here are guides who control pace, the built-in acclimatization rhythm (including time around Lava Tower), and the real summit structure (personal guide support for your ascent to Uhuru Peak). Add the early-start focus on Barranco Wall and the thoughtful descent wrap-up with certificates, and it reads like a serious operation.
I’d skip it if you’re hoping for a casual, low-structure trek, or if you’re not ready for rainforest dampness on Day 1 plus altitude discomfort at key points. This route rewards patience. If you bring that, it rewards you back.
FAQ
How long is the Machame Route trip?
It’s scheduled for 6 days (approx.).
Where does the trek start and what time do you begin?
The trip starts at Kilimanjaro National Park’s Machame Gate, with a start time of 7:00 am.
Is pickup included from Moshi?
Pickup is offered.
Is this tour private?
Yes. It’s listed as private, so only your group participates.
Do you receive mobile tickets?
Yes, mobile ticket is included.
What are the main camps you’ll stay at?
The trek goes from Machame Camp to Shira Camp, then to Lava Tower area, Barranco Camp, Karanga Camp, Barafu Camp, Millennium Camp, and finishes with Mweka Gate.
What happens on the summit day?
You depart Barafu Camp at night for Uhuru Peak (5,895 m). Each pair gets a personal guide for the ascent, and after the summit you descend and continue down toward Millennium Camp.
Do you get time to acclimatize during the hike?
Yes. There are acclimatization moments, including a hike toward Lava Tower Camp from Shira Camp and planned time around Lava Tower.
What fitness level do I need?
The trip indicates travelers should have moderate physical fitness level.
What if weather conditions are bad?
This experience requires good weather. If it’s canceled due to poor weather, you’ll be offered a different date or a full refund.